
In a shocking revelation, it turns out there are an awful lot of tanks in World of Tanks. Truly surprising stuff. If only there was some kind of list, or guide, or article to tell you and help you out...

Official Retailer
Every game comes direct from publishers

Shop with confidence
We’ll refund or replace your key if you have a problem
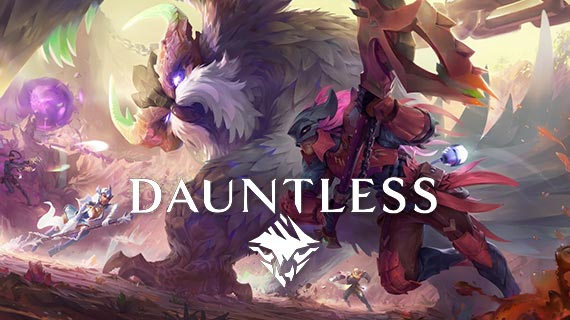
Dauntless Armor – Armor Sets, Perks, and What Is Dauntless Best Armor
Dauntless armor is about far more than just looking sharp, although that does help. In fact, your armor is the only thing that’s going to stop the Behemoths you hunt one-shot killing you. To actually get new armor, you need to go out on hunts and use the parts dropped from these huge beasts, but how do you know which is the Dauntless best armor? Well, we’ve put together a small Dauntless armor guide to help you figure it all out.
Dauntless Armor Guide
There are four different places for the armor you can wear; head, torso, arms, and legs. Each piece of armor has its own resistance, elemental resistance and weakness, and perks. On top of that, there are cell slots in some pieces as well, which allow you to augment a piece of armor to better suit your needs.
There aren’t really any benefits to wearing a full set of armor, so you’re often better off mixing and matching in order to get the right perks, but that’s something you’ll figure out as you play. The most important thing to keep in mind is that each armor set can be gained by farming the corresponding Behemoth. Other than that, it’s all just a matter of figuring out which perks and resistances you want. It’s because of this that there isn’t really a Dauntless best armor, it’s more about what is right for the hunt you are about to go on.
Dauntless Armor Sets
Each piece of armor, other than the Recruit’s Armor, starts off with 25 resistance and can be levelled up to 137.5 resistance. On top of this, they will grant you an elemental resistance of 25 and an elemental weakness of 25 too, these go hand in hand with the element they are, so if you have Blaze armor then you’ll be strong to Blaze but weak against frost. Here is the list of armor sets:
- Recruit’s Armor (Neutral)
- Gnasher Armor (Neutral)
- Shrike Armor (Neutral)
- Quillshot Armor (Neutral)
- Charrogg Armor (Blaze)
- Embermane Armor (Blaze)
- Hellion Armor (Blaze)
- Skraev Armor (Frost)
- Pangar Armor (Frost)
- Boreus Armor (Frost)
- Rezakiri Armor (Radiant)
- Valomyr Armor (Radiant)
- Drask Armor (Shock)
- Nayzaga Armor (Shock)
- Stormclaw Armor (Shock)
- Skarn Armor (Terra)
- Kharabak Armor (Terra)
- Koshai Armor (Terra)
- Shrowd Armor (Umbral)
- Riftstalker Armor (Umbral)
Each of these sets will give you a full resistance and weakness of 100, but mixing and matching them can help offset that. As such, it’s often better to simply decide which perks you want. This allows you to not worry about changing your armor too often. You only need to go for a specific elemental resistance if you’re really struggling against a specific Behemoth.
Each piece of armor can be upgraded from a base level to +15, which will allow it to reach its maximum values. Due to how expensive this can be, it’s usually best to focus on an all-purpose collection of different pieces first, before venturing into specific sets as you make your way to the endgame. Otherwise, you’re going to be grinding forever.
With all that armor knowledge with you, you might want a weapon or two. Here’s where you can get all the weapon information you’ll ever need.
Battle for survival at the edge of the world. As a Slayer, it’s up to you to hunt down the boss-sized Behemoths that are devouring the land. Team up with millions of players as you master challenging co-op battles, craft deadly weapons and powerful armor, and forge your legend as a Slayer of Ramsgate.
Release Date: May 21, 2019
Publisher:
Epic Games
Developer:
Phoenix Labs