Final Fantasy 7 Remake Character Guide

With a remake of one of the best games of all time upon is, it’s probably a good time to take a look at the characters you’ll be meeting along the way. Of course, we won’t be including spoilers, and if you’re only here to look at Final Fantasy 7 remake Tifa then you’ll be pleasantly surprised by all of the other characters on this list. It’s important to note that this isn’t all of the Final Fantasy 7 remake characters, just the important ones for the first release of the Remake.

Cloud Strife

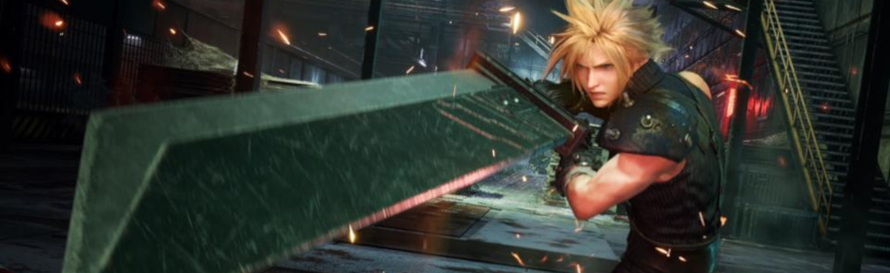
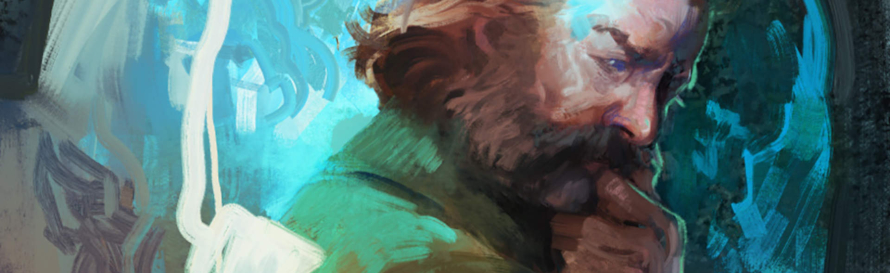
Cloud is the main protagonist of Final Fantasy 7 Remake, and he is a blonde-haired ex-SOLDIER who has incredible strength and also broods a lot. He’s initially very aloof and cold, but you’ll find out why that is as you play through the story and find out about his past. He’s a man of few words, fewer emotions, and suffers for this with flashbacks and a fractured memory. He grew up looking up to Sephiroth, and that was the main reason for him joining SOLDIER, little did he know what would happen when they finally met, nor the tragedies that would unfold throughout their time together. 

Barret Wallace

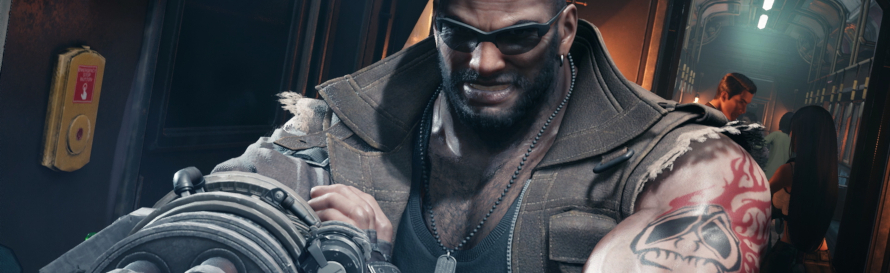
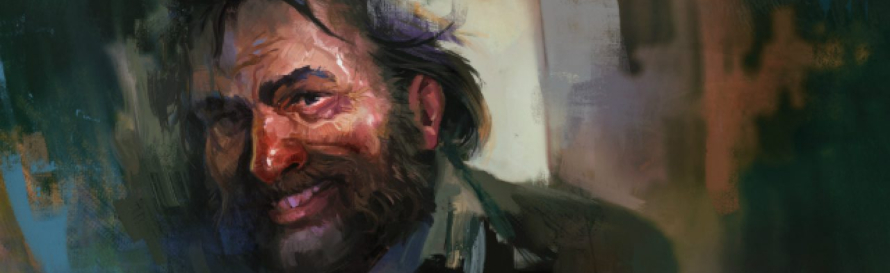
Barret is a tough-talking guy with a gun for an arm, you know, the usual. He’s also an incredibly loving father and dotes on his daughter Marlene and despite wanting to spend all of his time with her, chooses instead to try and save the planet from the evil Shinra corporation. He does this by forming Avalanche and leading them into plenty of operations designed to fight the corrupt forces of capitalism that are destroying the planet just to make money. 

Tifa Lockheart

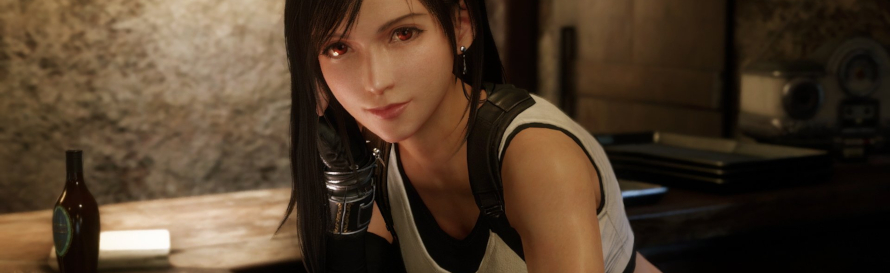
Tifa is a martial artist who has known Cloud for years and years. She’s sweet and incredibly tough, and there’s nobody else you’d rather have by your side when trying to save the world. She always has other people’s best interests at heart and helps to look after Barret’s daughter Marlene. 

Aerith Gainsborough

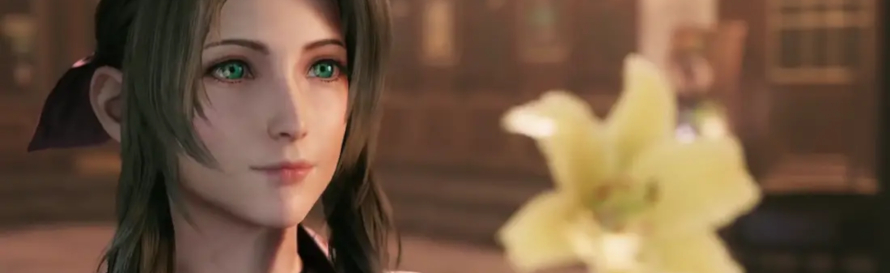
Aerith (originally translated as Aeris) is a kind-hearted girl from the slums of Midgar. You first meet her selling flowers on your escape from your very first mission with Avalanche. She is a little naive sometimes but has her fair share of dark secrets as well. It’s at this point that you should realise that the Final Fantasy 7 Remake characters are all a bit messed up. 

Red XIII

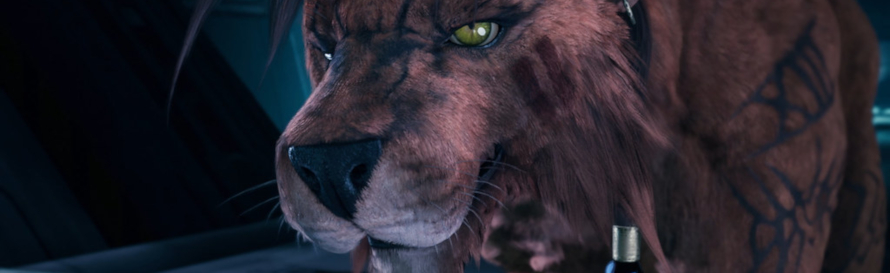
Red XIII is a lion-like creature from a different species. He’s incredibly intelligent and can hold his own in a fight as well, better yet, he looks awesome and also fluffy. He is from Cosmo Canyon where he lives with his grandfather, but you’ll meet him in very different circumstances. 

Jessie

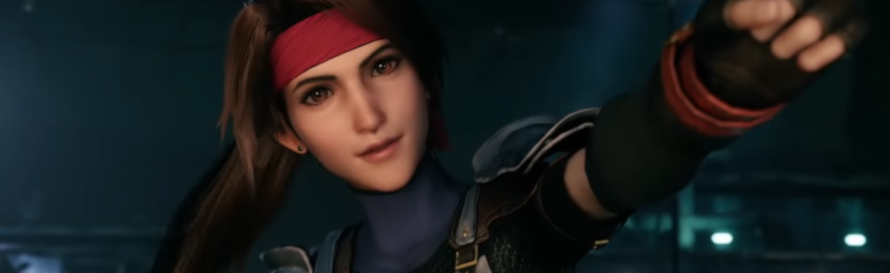
Jessie is one of the core members of AVALANCHE, and ends up developing a small crush on Cloud fairly early on. She’s also incredibly gifted with technology, and is the expert who builds the bombs that AVALANCHE uses, as well as being responsible for things like cracking security doors or getting past scanners.

Biggs

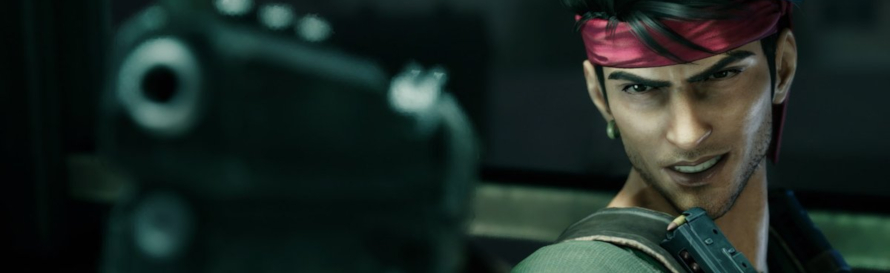
Biggs is a svelte guy with a hothead and far too much energy. He also tends to complain a lot and is kind of lazy given the chance, nevertheless, he gets very excited about the opportunity to have a drink and is very committed to AVALANCHE.

Wedge

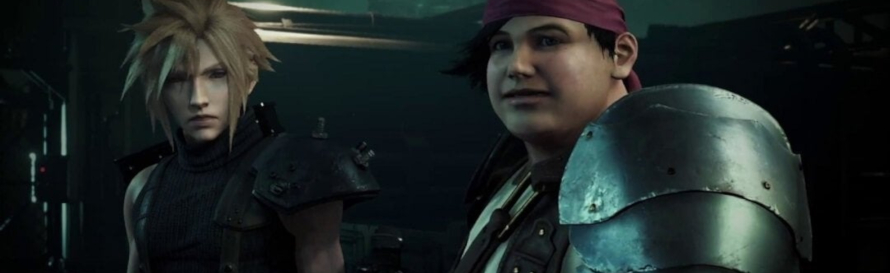
Wedge is the polar opposite of Biggs. He describes himself as “roly poly” and is empathetic and very chilled out. He also constantly worries about others and more or less assigns himself as the older brother of AVALANCHE, probably because he is an older brother when he’s not fighting against capitalism.

President Shinra

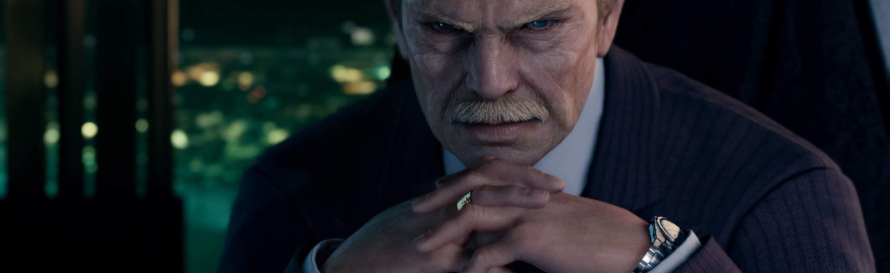
Imagine what would happen if we gave our billionaires too much power and they became corrupt. Oh right, not that much of a stretch. President Shinra is the reason that Shinra is draining life from the planet for energy. He is a fairly short man with thinning hair and a moustache. He’s basically very low-level evil, but he’s also not afraid to go full supervillain when needed.

Sephiroth

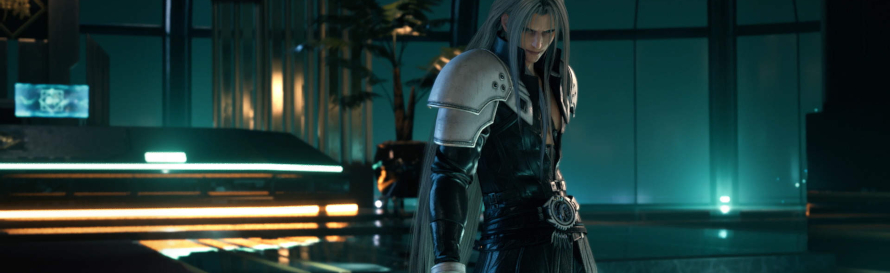
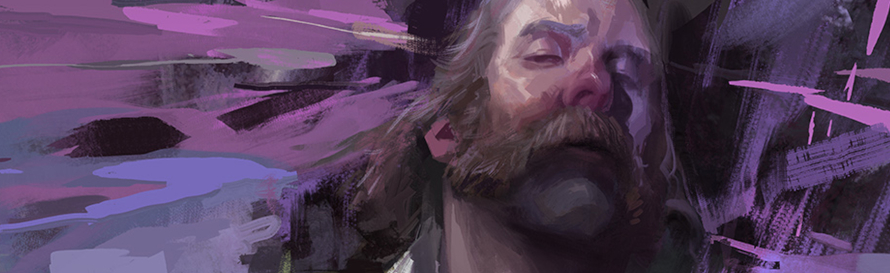
Sephiroth was once the hero of SOLDIER, someone adored for his overwhelming and preternatural strength and heroism. He’s the only person who can wield his absurdly long katana, Masamune. He is also incredibly angry with the entire world for reasons that you’ll come to understand as you play through the game, he’s definitely not someone you’d want to upset, but you’re going to have to if you want to save the planet.

The Best Games Like DOOM Eternal

If like us your palms get uncomfortably sweaty at the thought of the intense first-person shooter action of DOOM Eternal, you might be looking for other great FPS experiences to keep your adrenaline pumping. Well, we just so happen to have ten top shooters that will do just that.

Borderlands 3

Gearbox Software’s bombastic loot shooting sequel is everything that fans of the Borderlands franchise could want. Bursting at the seams with enough guns to make the NRA blush and enough humor to power Saturday Night Live indefinitely, Borderlands 3 is glossy, brazen and thoroughly fun loot shooter that violently catapults the series bedrock appeal into 2020 and beyond. 

DOOM (2016)

Arguably, there’s no better way to prepare for DOOM Eternal than to throw yourself face, fist and feet first into its illustrious predecessor. Setting down the template that DOOM Eternal looks set to dutifully follow, 2016’s DOOM remake is nothing less than a smash-mouth, full-throated reinvigoration of the godfather of the first-person shooter genre. DOOM invites players to speed around levels like a murderous engine, executing and blasting apart demons in a shower of gore all the while the relentless death metal thrum of Mick Gordon’s energizing score wills you on to increasingly spectacular feats of first-person shooter carnage. 

Dying Light

A natural evolution of the open world, first-person zombie template established by the Dead Island games, Dying Light reimagines the island-bound, first-person carnage of Techland’s earlier titles with a furious parkour flavour. With an emphasis on high octane slaughter, deep progression and gruesomely satisfying zombie destruction, Dying Light is the desperately furious, hyper-kinetic take the zombie shooter genre has craved for years.

Metro Redux Bundle

A remastered and definitive pairing of two of the best shooters to come out in the last decade, Metro 2033 and Metro: Last Light, the Metro Redux bundle represents a great starting point for fans who have yet to experience the franchise. A deftly executed blend of first-person shooter and survival horror elements set against the stirring backdrop of Dmitry Glukhovsky’s post-apocalyptic Russia, there are few genre efforts that thrill and terrify in equal measure quite as effectively as Metro 2033 and Metro: Last Light.

Prey

From the same conclave of boundless imaginations that gave us the Dishonored franchise, Prey is an eye-opening romp that mixes in inspirations from BioShock and System Shock to create one of the most intriguing and intelligent shooters in recent years. As the subject of an experiment aboard a space station meant to improve mankind things have, somewhat unsurprisingly, gone devastatingly south. Between trying to uncover your own past, present and future, and dealing with an enemy that mimics the shape of just about anything it touches, Prey is a high concept, sci-fi shooter odyssey that engages the grey matter and trigger finger in equal measure.

RAGE 2

A joint bombastic venture between id Software and Just Cause developer Avalanche Software, RAGE 2 reinvigorates the post-apocalyptic setting with fiendish cyborg enemies and a massive array of differently themed locations. Perfectly marrying the furiously immediate shooter beats that id Software is famous for, with the open-world exploration and destruction that Avalanche’s Just Cause and Mad Max titles showcase, RAGE 2 is a stupendous, cyborg-slaying, open-world shooter that entertains from beginning to end.

SUPERHOT

A more uniquely cerebral shooter than perhaps any other genre entry in this feature, SUPERHOT has a highly unique premise – time only moves when you do, allowing you to pull off some Matrix-style moves as you duck under bullets and return fire in an effortlessly cool manner. As such, this original concept results in scenarios that are as much a puzzle as they are a test of your shooting acumen. Imagine it – in one level you could start with no weapons, but as your armed foes approach, you could toss a nearby ashtray into their face, causing a gun to fly into the air – which you then catch, and use to see off the remaining baddies. Total bliss. Oh, and SUPERHOT VR is a total revelation, too – Neo would be proud.

Titanfall 2

Look, there’s no getting around it, Titanfall 2 is simply essential. While the best in class, hyper-frenetic mech and ground soldier combat remains unendingly alluring, it’s really in the stellar single-player campaign that Titanfall 2 soars. Effectively a buddy action movie told through the perspective of a rifleman and his sentient AI Titan mech, Titanfall 2’s story campaign isn’t just a stunningly framed tale of man and machine co-existence, but also one of the most innovative shooter campaigns in years. You’ll want to go into this one completely fresh. 

Wolfenstein II: The New Colossus

If id Software deserves mountains of credit for rebooting Doom so very successfully, then so too does developer Machinegames surely deserve the same for its work on id Software’s original shooter property, Wolfenstein. The peak of Machinegames output on the IP, Wolfenstein II: The New Colossus has everything you could want from a shooter – a super-fast pace, tons of gore, more weapons than you can shake Nazi robot mech at and enemies with faces that just need to be shot. Oh, and it doesn’t hurt that even two years on, Wolfenstein II: The New Colossus still looks absolutely stunning, too.

WRATH: Aeon of Ruin

The spirit of id Software’s Quake can be felt in every pixelated nook, cranny, and gib of WRATH: Aeon of Ruin. A love letter to that aforementioned legendary and often forgotten shooter series, WRATH: Aeon of Ruin not only uses the same game engine that powered the original Quake (albeit heavily modified), but also welcomes inspirations from other classic shooters such as Duke Nukem 3D, BLOOD and Hexen to fashion a lightning-fast, wondrous splatfest of a gothic shooter that does ample justice to its much-loved inspiration.

Sekiro: Shadows Die Twice Guide – All Bosses In Order

Sekiro: Shadows Die Twice is the latest, and some might say toughest, entry in the Soulsborne series of games and that’s never more apparent than with its list of bosses. With each boss requiring exact timing and supreme mastery of the game’s systems, FromSoft have built an experience that can test any player’s skills. Even if you’re familiar with Dark Souls or Bloodborne you’ll find that Sekiro is a radically different beast to play, with a far greater emphasis on poise and parries than ever before in the series.

The mark of a great Soulsborne player is to get stuck on a boss, dust yourself off, and try try try again. But that doesn’t mean you have to go alone. Think of us as your partner as you fight your way through the game, so head on below for our full boss list guide, with every boss in order and some hints on how to defeat them.


Gyoubu Oniwa

The first boss in Sekiro is a perfect place to hone your Deflection skills and deal heavy Posture damage. Despite Gyoubu Oniwa being highly mobile and aggressive, you can still deflect their attacks with a little bit of skill, timing, and patience.

Failing that, grappling hook attacks can take small chunks of health off this boss, if you prefer keeping your distance from this horse-mounted horror.


Lady Butterfly

Lady Butterfly is a Sekiro boss that is designed to teach you the true path of Sekiro: supreme aggression. Stay close, deflect after every three attacks, and don’t leave her time to regroup. You’ll soon have this boss defeated if you remember to push her hard and never let up.


Genichiro Ashina

We have one main recommendation for fighting the Genichiro Ashina boss, and that’s to unlock the Mikiri Counter skill. This boss specialises in low-thrust attacks, with liberal applications of arrows sent your way. Learn to deflect them both and you’ll soon be victorious.


Folding Screen Monkeys

Each monkey in this boss fight has a different gimmick, with each one requiring you to figure out how to take them out. The See No Evil monkey has great eyesight but poor hearing, Speak No Evil has poor eyesight but brilliant hearing, Hear no Evil again has great hearing, and Do No Evil can be tracked by its glowing footprints. Simply take your time, take them out, and you’ll be a winner in no time.


Guardian Ape

The Guardian Ape will leave you little time to recover so make sure you’re always on the move and countering and attacking where possible. No place is safe, however, as even if you move to its rear this Ape will unleash a devastating gas attack. Yes, that kind of gas.

This boss has two phases, with the second having an area-of-effect attack that you can spot coming when the ape inhales. In addition, you can deflect its giant sword attacks, leaving you a moment to deal damage.


Headless Ape

Unlocked by defeating the Guardian Ape, this boss is a continuation of the former fight, except now you’re facing two apes with the second arriving when you’ve dealt enough damage. The first phase of the fight mirrors the second Guardian Ape phase, with the second continuing much the same just with more ape to deal with.


Corrupted Monk 

This boss is a test of your pattern memorisation skills. The Corrupted Monk will always attack in a certain way, and if you time it right and remember correctly you’ll be able to slip past their defences with liberal usage of the Mikiri Counter and deal some hefty damage. 


Isshin Ashina 

The Isshin Ahina boss starts with a series of attacks you can bait out, ending with a final strike you can deflect. The second phase of this Sekiro boss fight can set the entire arena on fire, making manoeuvring much harder. With a new stomp attack thrown into the mix and unparryable attacks, we recommend interrupting charged-up attacks with the Firecracker skill and then moving into damage.


Great Shinobi Owl

The main thing to look out for during this boss fight is the thrown shurikens which must be dodged. In addition, this boss can drop an item that stops you from healing and in its second phase, it unleashes smoke bombs which you will need to move out of quickly. Otherwise, this boss is a lesson in deflection, so deflect what you can dodge what can’t be deflected, and this boss should be simple.


True Corrupted Monk

The True Corrupted Monk is a revisit of the Corrupted Monk fight, though this time the boss may have up to three health bars depending on your choices in the game. Whilst this is an extended fight, it is worth noting that due to the larger arena, you have much more area to play with, making the moment-to-moment combat easier than the first time you met this boss in Sekiro.


Divine Dragon

Despite this boss appearing to be utterly terrifying, it’s actually a little simpler than it might appear. The first phase sees you fighting off a gang of elderly dragons until a tree appears which you can grapple to and then deal damage to the Divine Dragon. The second phase sees you deflect or dodge attacks as they fly your way until more trees re-appear, allowing you to strike at the boss again.


Owl (Father) 

This boss can do everything you can do, meaning you’re in for a tough fight. However, not all is lost. The Mortal Draw skill deals huge Vitality damage and is a great way to batter down this boss, and the Whirlwind Slash is a helpful way to deal short bursts of damage. Overall though, this boss fight will be hard. Deflect, dodge, and use whatever tools you have at your disposal to survive long enough to deal damage back.


Demon of Hatred

One of the toughest fights in the game and also one of the largest, the Demon of Hatred is a long fight that tests everything you’ve learned so far. Many of its attacks are unblockable so run away, dodge, and then return to deflecting again whilst waiting for your chance to strike Stock up on items to help with healing and burns, and prepare for a tough battle.


Isshin, The Sword Saint

Deflect, deflect, deflect. Then deflect some more. You’ll have to memorise Isshin’s attacks throughout their phases, and you’ll have to be up close when doing so as you’ll need to dodge attacks at their last moment in order to strike. Go too far, and Isshin will unleash hell on you with their very own gun. This is a ridiculously tough fight, but once you’ve done it you’ll be able to call yourself a Sekiro Master.

Until you start New Game+, that is


So there you have it, every Sekiro main boss in the order you will encounter them. Hopefully, now you’re forewarned and forearmed, you’ll find your path through the game that little bit easier.

Grand Theft Auto 5 Collectable Locations Guide

Sometimes you need a break from mowing down pedestrians or shooting up downtown Los Santos in Grand Theft Auto V. That’s the perfect opportunity to take some time out and work toward 100% completion.

To get there, you’ll need to find GTA V’s many collectables, so here’s our guide to rooting them out.

Letter Scrap Locations

There are 50 letter scrap locations in GTA V, which you can begin collecting after you finish the mission Repossession. You’ll find these glowing letters on the ground, and the sound of loose papers rustling on the wind will clue you into their location.

After collecting every letter scrap, players will uncover the truth of Leonora Johnson’s murder, which will open up the A Starlet in Vinewood mission. You’ll need to swap to Franklin to start the mission.

Stunt Jump Locations

There are 50 stunt jump locations in GTA V, which you can discover right from the start of the game. There’s a good chance you’ll have already completed a few in the course of other (sometimes literal) pursuits.

Each stunt jump will let you know the success parameters if you fail, and each time you complete a stunt jump, the game will tell you how many remain. There are a couple of milestone paint job rewards for stunt jumps, but the only real reward is the achievement and the satisfaction of getting them done.

Spaceship Part Locations

You’re ready to collect GTA V’s spaceship parts after you meet with UFO-obsessed hippie Omega as part of the mission Far Out.

Spaceship parts can be almost anywhere, so you’ll need access to a variety of transportation methods to reach them. Each one hums quietly and resembles someone’s way-too-hipster PC case.

Finding all 50 parts will open up the mission The Final Frontier for Franklin, which will hand you the keys to the Space Docker vehicle—though it’s not nearly as space-worthy as it sounds.

Playing Card Locations

GTA V’s playing cards are only available in GTA Online, so hop over to the online mode before you start. Unsurprisingly, there are 54 of these to collect.

These playing cards can be a little hard to spot, so watch out for the glow they give off. You’ll find them on various surfaces across San Andreas, both indoors and outdoors.

After you collect all 54, you’ll receive RP, along with chips at various milestones, which you can use in the Diamond Casino & Resort. You’ll also unlock the High Roller outfit and some new gambling-related trinkets for the Master Penthouse. You’ll also unlock a free Cardenas Poncho in Red Dead Online.

Signal Jammer Locations

Signal Jammers were also added as part of the Diamond Casino Heist patch that introduced the Playing Card collectables. 50 Signal Jammer locations appeared across San Andreas, usually located on the sides of buildings.

To “collect” a Signal Jammer, you’ll need to destroy it. Each time you destroy a jammer, you’ll receive 1,000 RP and $2,000. Destroying all 50 will net you an extra $50,000 and unlock Avi Schwartzman for your support crew.

How Wipeout Shaped the Future of Gaming

If you aren’t from the past, then the easiest way to explain the Wipeout franchise to you is to say it’s a kart racer for grown-ups. The vehicle combat genre isn’t as popular as it once was, but the Wipeout franchise helped put that genre on the map of gaming history.

So let’s crank up some peak hits by The Prodigy and race through the story of Wipeout’s future history.

Firestarter (Twisted Firestarter)

Truly iconic franchises often belong to an era. In that respect, Wipeout is every bit a personification of 90s x-treme style, and as representative of the decade as the WWF Attitude era or South Park. Yet Wipeout comes at it from a very different direction.

At its core, Wipeout was never a complicated concept. It featured a league of zero-g teams racing in ships that looked like the illegitimate offspring of a stealth jet and a can of coke. To spice things up, power-ups could kit a ship out with weapons and defences, while savvy players could exploit their track knowledge to make full use of the built-in speed boosts.

Where Wipeout stood apart from the general arcadey nature of vehicular combat games was in its unique handling. Floaty physics (a good thing, in an anti-grav game) and air brakes offered players the ability to pull the game’s ships through impossibly tight turns. Combined with the importance of track knowledge, it created an experience with a high skill ceiling and, even at lower levels of skill, a feeling that you were flying something out of this world.

Ironically, for a series that drew so much from Japanese design aesthetics, Wipeout was an intensely British game. Its developers spitballed the initial design down the pub, for one thing. But it also tapped into the British rave scene of the 90s, perhaps best typified by the iconic use of The Prodigy’s Firestarter in its sequel.

Wipeout married that soundtrack to a vision of the future dominated by bleak industry and consumption, the future as seen through the lens of the 90s, sharing an inspirational space with the likes of Final Fantasy VII’s iconic city of Midgar. Design studio The Designers Republic was instrumental in shaping the aesthetic of the series through the crafting of its main characters, the anti-grav ships. Bright colours contrasted with sharp angles and sleek profiles to create vehicles that visually cut their way through grim urban backdrops.

Wipeout 2097 (XL in the US) took everything that worked about the first game and made it bigger and better. It was a sequel-cum-reimagining that proved an essential Playstation title, and was later ported to other systems including the Sega Saturn.

The Third Lap

The series received two follow-ups as it reached its third incarnation. The “official” sequel, Wipeout 3, found itself in difficult territory. While it was a competent follow-up, it failed to attract the same kind of audience as 2097 and didn’t quite carve out a unique identity for itself. It was seen largely as more of the same, and the series began to shed the casual audience, with its fanbase slowly shifting toward the hardcore players.

Wipeout 64, meanwhile, was the N64 iteration of the franchise. On Nintendo’s console, it competed directly with the comparable F-Zero series. Even today, mixed opinions dominate the discussion around Wipeout 64. Some consider it a worthy successor, others an okay reimagining for a new console.

While neither game was bad, this generation of Wipeout games began to move Wipeout out of the popular spotlight.

Fusion Cuisine

By the end of the Playstation era, Wipeout was still a household name in the gaming world. Its next challenge was to make the leap to the Playstation 2 and aim for sophomore success.

Wipeout Fusion released in 2002. Psygnosis helmed the project again, but this time rebranded to SCE Studio Liverpool after consolidating with Sony.

While Wipeout Fusion proved a competent entry in the series and included most of the core Wipeout experience, it never achieved the same kind of essential gaming status that the previous entries enjoyed. Critics targeted its graphics, though they did note its exceptional soundtrack was on par with the Playstation era.

This period was a watershed for more than just the 3D era of consoles. It also represented a shift in popular culture away from the edgy and x-treme 90s to the iPod-defined 2000s. As real life became more gritty in the wake of events like 9/11, pop culture looked to a sleeker, shinier future.

This meant the x-tremely 90s Wipeout attitude would need to evolve to stay relevant. A game so known for its soundtrack couldn’t risk becoming the dad music of the gaming world.

Pure Determination

Wipeout Pure was the series’ 21st-century rebirth. The canon moved forward by a century, the developers making a conscious choice to leave 90s-esque grit behind and adopt the sleek, white future that defined the changing aesthetics of the early 2000s.

Wipeout Pure launched in 2005 on the new Playstation Portable and achieved critical acclaim. Where critics had knocked Fusion for failing to use the full potential of the Playstation 2, it was clear Pure was wringing everything it could out of the PSP. Pure received a follow-up in the form of Pulse, released in 2008.

Back in Time

Wipeout HD was the next leap for the series, taking things onto the Playstation 3 and into full 1080p. The game released in 2008, after delays stemming from the use of visual elements that could risk triggering epilepsy. It launched on the Playstation Store as a conscious effort by the developers to prove the Store wasn’t just for small-fry games.

2012 saw the release of Wipeout 2048. As the name suggests, it was a prequel to the series, though this defined more in the way of aesthetics than gameplay, giving us the Wipeout version of street-racing franchises like Need for Speed. The lore explored a world where anti-gravity racing was still underground, with makeshift tracks formed from busy near-future expressways.

2048 built on the technology of its immediate predecessors, which allowed the team to keep much of their existing engine intact. In doing so, they demonstrated how easy it was to make the leap from Playstation 3 to Playstation Vita—and 2048 was part of the Vita’s line-up of launch titles.

The game launched to positive reviews, with critics noting that it provided a beautiful demonstration of the Vita’s power. 2048’s new aesthetic prompted some commentary, both positive and negative, but on the whole, it proved an essential early title for the handheld.

Sadly, 2048 proved to be the last hurrah for series originators Psygnosis/SCE Studio Liverpool. The studio closed later that same year, effectively slamming the air brakes on the franchise.

Wiped Out

With the end of SCE Studio Liverpool, Wipeout’s most recent release is the remastered Omega Collection, and with the franchise going silent since 2017, it may be that Wipeout’s future is a thing of the past.

A few other games have dipped into the vehicular combat pool over the years, including the likes of street-racer Blur and Need for Speed: Most Wanted. Wipeout’s brand of futuristic gaming was even echoed in games like Star Wars: Podracer. Wipeout’s basic DNA still lives on in the kart racer of your choice, but its unique fusion of vehicular combat and sim-like depth feels like a hole has been left in the gaming world with the franchise’s end.

The series has proved influential enough to spawn imitators, however, developed by people who grew up playing Wipeout. 2016’s Redout was a throwback to and fusion of games like Wipeout and rival series F-Zero. 2017’s Pacer (formerly Formula Fusion) is the most direct Wipeout descendant, featuring all of the key elements of the series minus the brand. BallisticNG, meanwhile, is to Wipeout what sprite-based indie games are to the SNES, providing a hypothetical Playstation-era Wipeout 4 that never was.

For now, though, these imitators are all that’s left of the Wipeout name.

Still, 2048 is less than thirty years away now, so who knows? We might all be living the anti-grav dream by the middle of this century.

Resident Evil 3 Remake: Meet the Main Characters

Resident Evil 3 Remake is already out, and if you’re diving back into the reimagined horrors of Raccoon City, you might need a quick refresher on the key characters you’ll be spending time with. It’s been a long time since 1999, so here’s a guide to the main Resident Evil 3 Remake characters you’ll encounter as you fight to survive in a city overrun by terror.


Jill Valentine

Jill Valentine, a long-time series icon, returns as the main character in Resident Evil 3 Remake. First introduced in the original Resident Evil, Jill is now a seasoned survivor of the STARS team, and the remake gives her a modern overhaul, both in terms of character design and narrative depth. In Resident Evil 3 Remake, Jill is trying to escape the doomed Raccoon City, which has been ravaged by the T-Virus outbreak. But it’s not just the zombies she needs to worry about—there’s something else hunting her, and it’s relentless.


Carlos Oliveira

Carlos Oliveira is a member of the Umbrella Corporation’s elite security team, the U.B.C.S. (Umbrella Biohazard Countermeasure Service). In the remake, Carlos plays a crucial role in helping Jill escape the nightmarish chaos of Raccoon City. Initially, Jill is sceptical of Carlos, given his ties to Umbrella, but over time, she learns he’s a pawn in a much larger corporate game. His journey parallels Jill’s, as he also fights to survive and uncover the truth behind the outbreak. His character adds depth and support to Jill’s story, and his actions become a key part of the narrative.


Resident Evil 3 Remake – Nemesis

The towering Nemesis is back, and he’s more terrifying than ever in the remake. Originally introduced in Resident Evil 3: Nemesis (1999), Nemesis is a bioweapon created by Umbrella to hunt and eliminate members of STARS. Unlike Mr. X from Resident Evil 2, Nemesis is much more aggressive and appears throughout the game, relentlessly hunting Jill down. He evolves over the course of the game, gaining new weapons and becoming even more dangerous with every encounter. Expect him to show up at unexpected times, forcing you to stay on edge as you navigate through the chaos of Raccoon City.


With the core trio—Jill, Carlos, and Nemesis—you’re in for a wild ride through Resident Evil 3 Remake. Their fates intertwine in the dire circumstances of Raccoon City, and survival depends on how well you can navigate the perils of a world overrun by the T-Virus. Prepare yourself for a heart-pounding adventure filled with terrifying encounters, shocking twists, and of course, a relentless pursuit from the monstrous Nemesis.

Ultimate Guide To The Fastest Cars In The Gran Turismo Series

Gran Turismo may be the racing game for the sophisticated racer, but sometimes you’re in the mood for speed and power. At times like that, you want to hop into the beefiest car you can find.

Here’s our look at some of the fastest and best-performing cars in Gran Turismo.

Gran Turismo

Mitsubishi FTO LM

Many GT players have fond memories of the FTO LM as a reliable powerhouse, offering an excellent balance of speed and handling. With a 549 brake horsepower engine, it could be outclassed on raw speed by a suped-up supercar on a straight run, but offered a total package in every other scenario.

The Mitsubishi can be obtained as a prize in the US-Japan Sports Car Championship. The FTO LM only features in the first two Gran Turismo games and is replaced with the LM Race Car in GT3. 

Dodge Viper GTS-R

The iconic ‘96 Dodge Viper has an instantly recognisable look and popped up in several contemporary games—even in an ersatz form, as with Grand Theft Auto’s Beast GTS. Sleek, stylish, and with 680 brake horsepower under the hood, the Dodge Viper GTS-R wasn’t the fastest car out there with stock tuning but could hold its own against more powerful cars in overall performance.

Players could pick the Viper up at the Dodge Dealership for 80,040 credits.

Gran Turismo 2

Suzuki Escudo Pikes Peak Version

This car left an impression in its only outing in the Gran Turismo series. Offering a top speed of 255 mph, a 1.5 second 0-60 and rounding it out with four-wheel drive, it provided an excellent balance of raw power and precision handling.

Players could get their hands on the Escudo Pikes Peak at the special section of the Suzuki dealer for a cool 2,000,000 credits.

Nissan R390 GT1

The Escudo Pikes Peak enjoyed an undisputed place at the top of the heap in GT2, but the R390 was prepared to give it a run for its money. The R390’s disappointing first outing at the Le Mans is totally forgotten here, with its full potential on display, and a top speed of 225 mph.

Players had a 25% chance to win this car through the Gran Turismo World League.

Gran Turismo 3: A-Spec

Suzuki Escudo Dirt Trial Car

The brother of the Escudo Pikes Peak makes an unsurprising impression as the fastest car in Gran Turismo 3. With 981 brake horsepower and a design suited for tackling mountains, the Escudo offers excellent tune-up opportunities that will turn it into a true beast. If you don’t feel like winning it in various events, you can purchase it for 1,000,000 credits at the Suzuki dealership.

Polyphony001

A cool hidden car and one unique to the PAL version of the game, the Polyphony001 is broadly modelled after the 1996 Williams FW18 that helped Damon Hill net a win at the Formula One World Championship. With 790 brake horsepower, it can make 0-60 in 2 seconds flat. It can’t be purchased, but turns up as a prize in several events.

Gran Turismo 4

Tommy Kaira ZZII

The ZZ-II may be a familiar sight to GT fans by now, but it first appeared as one of the fastest cars in Gran Turismo 4. Boasting 542 brake horsepower and a top speed of 215 mph, this car can only be obtained by winning the Rome Circuit race of the Gran Turismo All Stars event.

Formula Gran Turismo

The Gran Turismo team’s take on an F1 car features an 891 brake horsepower engine capable of smashing the Nürburgring Nordschleife in under six minutes and you can pick it up by winning the Nürburgring 24h Endurance event. However, you can’t make it your own through tuning. Reaching 100% completion in GT4 will also net you this car in sexy black.

Gran Turismo 5

Red Bull X2010

Unbound by laws of man and god, the Red Bull X2010 (originally branded X1) is a fascinating thought experiment. It’s a wholly imaginary car, and Gran Turismo creator Kazunori Yamauchi puts the concept best: “If you built the fastest racing car on land, one that throws aside all rules and regulations, what would that car look like, how would it perform, and how would it feel to drive?”

The answer: something with 1,557 horsepower with a top speed of over 280 mph—and which looks more at home in Wipeout than Gran Turismo.

Three variants of the car are available in Gran Turismo 5, one each for placing bronze, silver, and gold in the Sebastian Vettel X Challenge

Bugatti Veyron

The Veyron spent some time as the fastest road-legal car in the world, and you may recall Jeremy Clarkson tooling around in it as he raced a light aircraft to London. Its sheer power translated to Gran Turismo, but with one major caveat: you needed to be good with the brakes. The Veyron’s 986 brake horsepower engine is a nightmare to wrangle around a corner at racing speeds.

Brave players could get their hands on the Veyron via the Gran Turismo World Championship in the Professional Series in A-Spec. For a mere 2,000,000 credits, you could also occasionally grab it from the Used Car Dealership.

Gran Turismo 6

RedBull X2011

Unsurprisingly, RedBull’s ludicrous fantasy car also shows up as one of the fastest cars in Gran Turismo 6, albeit with improvements to make it even more ludicrous and fantastical. With a 1,556 horsepower engine, this beast is available for 6,000,000 Credits. The car isn’t a complete internal overhaul on its previous iteration, featuring only a few small tweaks to squeeze every last drop of performance out of the design.

SRT Tomahawk X Vision

A jet fighter in car form, the Tomahawk offers over 2,500 brake horsepower and a staggering 350+ mph top speed, making it the fastest car in Gran Turismo Sport and the most powerful car to appear in the series. At this point, we’re not sure if it’s a car or a podracer. You can get your hands on this beast at the Vision Gran Turismo shop for 1,000,000 credits.

Gran Turismo Sport 

Bugatti Vision

As if the Veyron wasn’t enough of a beast, the Vision makes its debut as one of the fastest cars in Gran Turismo Sport and one of the most powerful cars to ever appear in the Gran Turismo series. You can take Gran Turismo as your only chance of getting your hands on it. The Bugatti Vision boasts a 1,626 brake horsepower engine and cutting-edge racing tech.

If you aren’t a real-life Saudi prince, you can purchase in the Bugatti section of Brand Central for 1,000,000 Credits.

Watch out, though. At these speeds, things get hairy.

SRT Tomahawk X Vision

It stands to reason that only the most powerful car in the series could edge out the Bugatti Vision for the top spot. The SRT Tomahawk X returns in GTS as if to show the Bugatti Vision that it’s still the top dog and, boy, does it do just that.

This time, it’s available from the Dodge shop for 1,000,000 credits. Which is good to know, because you’ll need to do more than buff out the bodywork by the time you’re done with it.

Quests in Monster Hunter World: Iceborne – Your Complete Guide

Monster Hunter World: Iceborne isn’t just DLC – it’s practically a full sequel built into an expansion. It adds new monsters, regions, mechanics, and an entire rank of gear progression. If you’re diving into Iceborne for the first time or returning to wrap things up, here’s a breakdown of all the quest types you’ll encounter and how they factor into your journey.


Unlocking Iceborne Content

Before you can access any of Iceborne’s content, you’ll need to complete the main story of Monster Hunter: World, including the final mission, Land of Convergence. This unlocks Master Rank (MR) and triggers the opening of the Iceborne storyline, introducing you to the snowy region of Hoarfrost Reach and the new hub Seliana.

Once you’re there, the game opens up with new monsters, upgraded gear, and a fresh set of challenges.


Assigned Quests – The Main Storyline

Assigned quests are your main story quests in Iceborne, just like in the base game. Completing these unlocks:

  • New monsters and regions
  • Tools and gear upgrades
  • Access to The Guiding Lands, Iceborne’s endgame zone

These quests will push your Master Rank higher and serve as the most efficient route to the expansion’s finale. The last assigned quest, “Farewell to the Frozen”, marks the end of the core Iceborne story and the beginning of true endgame grinding.

If you’re mainly interested in pushing to MR 100+ or accessing tougher hunts, speeding through assigned quests is totally viable – you can circle back to the rest later.


Optional Quests – Gear, Tools, and More

Optional quests are where you’ll unlock a wide variety of important upgrades:

  • Specialized tools (like the Temporal or Rocksteady Mantle)
  • Canteen ingredients for better buffs
  • Layered armour options
  • New facilities and upgrades through side characters in Seliana

Many optional quests are tied to NPCs, so talk to everyone in town frequently – especially your fellow Fifth Fleet hunters. Capturing monsters can also unlock special arena quests in the Gathering Hub.

Completing all optional quests rewards you with additional Master Rank experience and a final, challenging quest featuring some of the expansion’s strongest monsters.


Delivery Quests – Unlock Camps, Gear, and Upgrades

Delivery quests are simple but essential. You’ll need to gather materials and bring them back to base to complete these.

They unlock:

  • Campsites in Hoarfrost Reach and other areas
  • Farming tools and facility upgrades
  • Canteen recipes
  • Layered armour and decorations

These quests don’t require monster hunts but are critical for expanding your options and comfort in the field.


Event Quests, Investigations, and Special Assignments

Event Quests – High-Value, High-Fun

Event quests offer unique rewards and encounters. While they were originally on a rotation, most event quests are now permanently available in the post-launch version of the game.

Expect:

  • Cosmetic layered armor
  • Exclusive materials
  • Crossover gear (like Geralt, Aloy, and Mega Man sets)
  • High-value hunts for crowns, tickets, and decorations

Check the quest board regularly – some of the best fights and farming opportunities are tucked away in events.


Special Assignments – Monsters from Updates

Special assignments introduce monsters added via free updates, such as:

  • Rajang
  • Stygian Zinogre
  • Safi’jiiva
  • Alatreon
  • Fatalis

These are some of the hardest fights in the game and cap off the true endgame. Unlocking and defeating them requires progressing through the Guiding Lands and hitting specific Master Rank thresholds.

They’re absolutely worth doing, not just for the challenge but also for some of the strongest weapons and armour sets available.


Investigations – Targeted Hunting

Investigations let you hunt specific monsters under custom conditions (like shorter time limits, fewer faints, or better rewards). They’re essential for:

  • Farming materials
  • Crown hunting
  • Grinding decorations

In Iceborne, many monsters don’t appear in optional quests, making Investigations one of the best ways to consistently hunt them. Track monster footprints, gather clues, and manage your available list to keep your hunting options fresh.


The Guiding Lands – The True Endgame

Once you finish all assigned quests, you’ll unlock The Guiding Lands. This ever-changing, multi-biome zone is where you:

  • Fight monsters exclusive to the region
  • Level up regions to spawn new monsters
  • Farm rare materials used for augmenting and custom upgrading weapons
  • Unlock monsters like Scarred Yian Garuga and Gold Rathian

It’s a huge time sink – but one that rewards long-term hunters with some of the most powerful gear and layered armour in the game.


Whether you’re chasing crowns, farming decorations, or just soaking in the atmosphere, Monster Hunter World: Iceborne has an incredible amount to offer. From assigned quests to special assignments and the grind of the Guiding Lands, every quest type plays its part in making Iceborne such a meaty, memorable expansion.

So ready your blade, pick your Palico, and get questing!

Control Ending Explained – What Happened To Jesse, Dylan, The Future of the Oldest House and Much More

SPOILER WARNING – This article goes into depth on the ending of Control, so if you haven’t finished the game yet, be aware of the spoilers that follow from this point.

Given the super dense lore of Control and the fact that, while prescriptive to a degree, Control’s ending nonetheless leaves plenty of room for healthy speculation, it’s fair to say that you could well be left with more questions than answers after the credits have completed their upward climb (twice).

Simply put, Control is much more narratively sophisticated than anything Remedy Entertainment has done to date, and that includes previous games like Alan Wake and Quantum Break. So with that in mind, and a fair amount of stuff to get through, let’s get stuck in shall we?

Control Ending Explained – Dylan, The Oldest House, and The Future

Right, so as you probably know (assuming you’ve finished Control), the game has not one, but two credit sequences. The first time the credits kick in is just after Dylan’s part in the Hiss takeover is revealed, as Jesse seemingly fails to prevent the Oldest House from succumbing to the Hiss before apparently doing the same herself.

After the first credit sequence has completed, we then end up in some kind of different reality where Jesse finds herself locked within the walls of the Oldest House as a pen-pushing jobsworth.

It’s not long until Jesse manages to liberate herself from this predicament – thanks in no small part to her friend Polaris, and then she shuts down the projector, severing the connection that exists between the Oldest House and the Hiss dimension.

After this, Jesse finds that she has ascended to the FBC’s director’s chair, underlining the vast capability that she was hinted at possessing whilst she was a child in her sleepy hometown of Ordinary. 

Despite such success, the Oldest House still remains in a state of lockdown thanks to the pockets of Hiss presence that are threaded throughout the building. Equally, Jesse and some of the other FBC folks are also locked within the walls of the Oldest House too, neatly leaving a nice chunk of unresolved tasks to tackle that will likely be addressed by the forthcoming Control DLC expansions.

Control Ending Explained – Jesse, Dylan, Hedron and Polaris 

One of the biggest and most enduring mysteries that Control weaves is the relationship between protagonist Jessie Faden and the mysterious inter-dimensional presence in her mind known as Polaris. In the pursuit of her wayward brother Dylan and the paranormal slide projector, Jesse finds herself wandering in the Dimensional Research sector within the Oldest House.

Surrounded by what appears to be a boundless desert of crimson-stained sand, Jessie eventually finds her way into a massive projection room where she beholds an echo manifestation of five towering pillars with amber sands on all sides. The significance of the amber sand and the pillars is that they stand as evidence that an object of power was used to contact Polaris, but a bigger reveal lay in wait – that the scientists which kept Polaris imprisoned (in a physical sense) refer to this being as ‘Hedron’, causing other pieces of the narrative puzzle to tumble into place. That’s right – Polaris and Hedron are one and the same.

You remember the Hedron Resonance Amplifiers (HRAs) dotted throughout the game, and how these machines successfully prevented some FBC employees from being possessed by the Hiss? Well, the very same being (Polaris) that lurks within Jesse’s psyche and which makes her immune to the possession attempts of the Hiss, is also the same presence which is amplified by the HRAs to protect others who might be nearby.

As such it is thought that Polaris is part of some sort of interdimensional force that stands in direct opposition to the Hiss – effectively appearing as Control’s take on the light versus darkness dichotomy seen in countless other stories to date. Jesse’s wayward brother Dylan, meanwhile, remains in a coma, capable of waking at any time. The kicker though? We’re not sure just how much of ‘Dylan’ is actually left after his possession by the Hiss.

Control Ending Song – What was the music that plays during Control’s Ending credit sequence?

Though having little bearing on the story itself, a lot of folks have been curious as to what the song was that accompanied Control’s final credit sequence. Well, the Control ending song is something of an irresistible earworm called “Fear of a Blank Planet” by English progressive rock band Porcupine Tree. Definitely one to plonk on your Spotify playlist methinks.

The Ultimate Witcher 3 Quest List: Main Quests in Order by Level

The Witcher 3: Wild Hunt is a colossal game filled with adventures, dangers, side quests, main quests, hunts, and much more. You’ll spend many hours getting to grips with its massive world, brilliant characters, and quests. With so many quests often given all at once, the game can be a little daunting. But fear not, we’re here to help with our full Witcher 3 quest list in order. You’ll never be lost again with our Witcher 3 walkthrough.

Before you dive in, keep in mind that this list may contain spoilers for The Witcher 3: Wild Hunt. So, if you want to avoid even knowing where you’ll be heading on your adventure, look away now. We’ve tried to keep this Witcher 3 quest list as spoiler-free as possible while presenting the quests in order, by level, and to preserve the best, most optimal path.

Note: This guide covers the main The Witcher 3: Wild Hunt quest list in order, by level. The number next to each quest represents the recommended level. You’ll also find information on when to best start the DLC quests for Blood and Wine and Hearts of Stone.


Prologue

The Wild Hunt begins with a moment of peace before the turmoil that’s to come. You’ll be adventuring across the White Orchard area, which serves as a tutorial for the larger game. Enjoy these moments of relative safety; it won’t last…

  • Kaer Morhen – No recommended level
  • Lilac and Gooseberries – No recommended level
  • The Beast of White Orchard – Level 3
  • The Incident at White Orchard – Level 2
  • Imperial Audience – Level 2

Act 1

The main Act 1 quests can be completed as you wish. Below, we’ve listed the Witcher 3 quests in optimal order, with additional level information.

In Ciri’s Footsteps – Velen

Velen is a natural starting point for your adventure in The Witcher 3. The quests here are lower in level, making it a great way to ease into the story.

  • The Nilfgaardian Connection – Level 5
  • Bloody Baron – Level 6
  • Ciri’s Story: The King of Wolves – Level 5
  • Family Matters – Level 6
  • A Princess in Distress – Level 5
  • Ciri’s Story: The Race – Level 5
  • Ciri’s Story: Out of the Shadows – Level 5
  • Hunting a Witch – Level 5
  • Wandering in the Dark – Level 6
  • Ladies of the Wood – Level 6
  • The Whispering Hillock – Level 5
  • Ciri’s Story: Fleeing the Bog – Level 5

In Ciri’s Footsteps – Novigrad

Your next stop is the city of Novigrad, an area more complex by level, where you’ll immerse yourself in the politics of the great city.

  • Pyres of Novigrad – Level 10
  • Novigrad Dreaming – Level 7
  • Broken Flowers – Level 11
  • Get Junior – Level 12
  • Ciri’s Story: Visiting Junior – Level 9
  • Count Reuven’s Treasure – Level 12
  • A Favor for Radovid – Level 9
  • The Play’s the Thing – Level 11
  • A Poet Under Pressure – Level 13
  • Ciri’s Story: Breakneck Speed – Level 11

In Ciri’s Footsteps – Skellige

Finally, in Act I, you’ll head to the islands of Skellige, filled with mountains, dangerous monsters, and even more dangerous politics.

  • Destination: Skellige – Level 16
  • The King is Dead – Long Live the King – Level 16
  • Echoes of the Past – Level 17
  • Missing Persons – Level 15
  • Nameless – Level 14
  • The Calm Before the Storm – Level 14
  • A Mysterious Passenger – No recommended level

Act II

Act II kicks off with a hunt for the ugliest baby (or man) ever seen, and Geralt and Yennefer head off to the Witcher’s only home, Kaer Morhen, while the Wild Hunt closes in on you.

  • Ugly Baby – Level 19
  • Disturbance – No recommended level
  • To Bait a Forktail… – Level 19
  • The Final Trial – Level 19
  • No Place Like Home – Level 19
  • Va Fail, Elaine – Level 19
  • Brothers in Arms: Velen – Level 22
  • Brothers in Arms: Novigrad – Level 22
  • Brothers in Arms: Skellige – Level 22
  • Brothers in Arms: Nilfgaard – Level 22

Note: When the Brothers in Arms quests appear in your quest log, we recommend starting Hearts of Stone, as it will fit seamlessly with the main Witcher 3 quest list.

  • The Isle of Mists – Level 22
  • The Battle of Kaer Morhen – Level 24
  • Blood on the Battlefield – Level 20

Act III

Act III sees the quest levels rise again, so you may want to clear up secondary quests and hunts before heading into this act. This act brings all the disparate threads of the game together before a final confrontation that asks big questions of both Geralt and the player.

  • Bald Mountain – Level 26
  • Final Preparations – No recommended level
  • Blindingly Obvious – Level 28
  • The Great Escape – Level 28
  • Payback – Level 28
  • Through Time and Space – Level 26
  • Battle Preparations – Level 28
  • The Sunstone – Level 28
  • Veni Vidi Vigo – Level 28
  • Child of the Elder Blood – Level 31
  • Skjall’s Grave – Level 28
  • On Thin Ice – Level 30
  • Tedd Deireadh, The Final Age – Level 30
  • Something Ends, Something Begins – Level 30

At this point, the main Wild Hunt quests are over, and we recommend starting Blood and Wine, which serves as an excellent epilogue for the main quest.

After Blood and Wine, pour yourself a stiff drink, reflect on your journey, and start The Witcher 3 all over again.


The Witcher 3 Quests by Level

As you can see, the game offers a smooth leveling process through the main quest, but with many side quests sprinkled throughout, you might find that despite level recommendations, you may be ahead of a quest’s level. Don’t worry – this often happens.

We recommend enjoying The Witcher 3 in your own time. Do what you want, when you want, in terms of side missions. Use the above guide for the main quest’s order. If you want to play Gwent, punch out a few drunks, or race horses, go ahead – the main quest can wait. The Witcher 3’s vast world is yours to explore.

Now, you’re ready to dive into The Witcher 3: Wild Hunt with full confidence about where you’re going. Good luck, Witcher. Slay well!

Death Stranding Episodes: How Many Chapters Are There In Death Stranding?

Death Stranding is many things – absurd, challenging, emotional, but above all that, it’s really quite long. We won’t blame you if you look up from the BT-soaked swamp once in a while and wonder “just how far am I into this game?”

Trudging through the mountains for just one delivery is enough to tire out any avid BRIDGES explorer despite its many rewards, so it’s no surprise that the entire game can be daunting for the average player. 

Well, that’s what we’re here for. We’re going to talk at length about Death Stranding’s many episodes, specifically about how many chapters there are in the game and how long it takes to beat. This is useful if you want to, you know, live your life around Kojima’s latest gargantuan game. 

Death Stranding: How many episodes are there in Death Stranding?

Death Stranding, despite being somewhat unknowable in every sense of the word, is actually chopped up into discrete chapters, each named after a character or place in the game world. It’s thought that each chapter dives into a specific part of that character’s story, shedding some light on their background with the extinction event and how that fits into the life of our protagonist, Sam Porter Bridges. 

Some chapters actually dwell on the same character more than once due to a necessity to expand further on their importance in the story. Character development! You love to see it. Here’s a list of the 15 chapters in Death Stranding – be warned, the names of the episodes could be constituted as spoilers, so observe at your own peril! 

Episode 1: Bridget

Episode 2: Amelie

Episode 3: Fragile

Episode 4: Unger

Episode 5: Mama

Episode 6: Deadman

Episode 7: Clifford

Episode 8: Heartman

Episode 9: Higgs

Episode 10: Die-Hardman

Episode 11: Clifford Unger

Episode 12: Bridges

Episode 13: Sam Strand

Episode 14: Lou

Episode 15: Tomorrow is in your hands

There is, of course, a prologue that introduces you to the game mechanics and world that prefaces Episode 1: Bridget. Episode 15 is also technically an epilogue of sorts (despite being set weeks before the ending of the game) where you’re free to wrap up side quests and leftover deliveries. It might be useful to know this – the game lets you wrap up remaining activities after you beat the game. Given how long Death Stranding is, it’s recommended that you don’t dilly-dally with the story – just push through it with some complimentary side quests along the way.

Crucially, DON’T try to five star every prepper before you move on to the next area… leave that to the endgame. You can complete the game just fine with the items awarded to Sam over the course of the story. 

The extra items you get from the side preppers are useful and interesting and let you explore and tinker with more of the world, but they’re inessential. It depends on the way you play, but if you want to beat Death Stranding any time soon, focus on the story missions – the important deliveries given to you by colleagues like Amelie and Deadman. You’ll still see it all as Kojima intended. 

It’s also worth noting that there are no alternate endings or narrative choices that cause consequences in Death Stranding’s narrative. Don’t walk on eggshells, crush them in your Bridges-issue boots! Delivering to certain preppers doesn’t reward you with any new questlines – the only real thing you should look out for are the pizza delivery missions that actually lead to some story content that you can miss if you’re not careful. Beyond that, you can go your own way. 

Death Stranding: How long does it take to beat Death Stranding?

Death Stranding is an incredibly long game, about the size of your typical modern RPG, somewhere in between Fallout 4 and The Witcher 3 in terms of scope. The gigantic landmass of dystopian America is yours to explore, and given that you’re crossing the coasts, it’s expected that the journey won’t be a brisk walk through the countryside. You’ll stop at certain hubs along the way and open up new parts of the map over the course of the story. If you thought the first region was big, you’re going to be in for quite the shock when you arrive at the second one… 

Players will spend around 40 hours completing Death Stranding, but be warned that this is just counting the main story. There are over 100 hours of content waiting for the player if they wish to make many more deliveries than necessary. There’s also plenty of preppers hiding out in the wilderness and tons of memory cards just scattered about the environment, waiting to be retrieved and decoded. 35-40 is a decent average for the main story, but if the game gets its hooks into you or you have an addictive personality, you’ll easily spend 70 just trying to figure routes out, helping other players cross paths and generally gawping at the luscious landscape.

With that explained you should have a good idea of Death Stranding’s length and how best you should approach it, depending on the type of player you are. If you’re just looking to enjoy the tremendous story, expect 35-40 hours. If you like the look of the mechanics, you might want to book a few days off work… as you’ll be trudging through the mud for 70 plus hours. Regardless, it’s an experience worth having with one of the most unique big-budget games of the past decade, and one that you won’t soon forget.

Getting Started in Borderlands 3

Borderlands 3 doesn’t try to mess too much with the formula of its predecessors. A tweak here and there is enough to keep Pandora’s Vault Hunters fresh and ready to shoot things with absurd guns.

Whether you’re new to the series or looking for a refresher course, here’s how to get started in Borderlands 3

Choose Your Character

The biggest choice you’ll face in Borderlands 3 is also the first, which is choosing your character.

There’s a new cast of four Vault Hunters to choose from: Amara the Siren, FL4K the Beastmaster, Moze the Gunner, and Zane the Operative. Their names provide a few clues, but we recommend reading about them in more detail before you start. After you choose your character, you won’t be able to swap to another in-game—though you will have control over how their skills develop.

A Load of Claptrap

Borderlands 3 has a strong tutorial, delivered by series mascot Claptrap. Follow the instructions of your self-appointed “General” as he walks you through the basics.

One of the first things he’ll introduce you to is the Quick Change Machine. Here you can tweak your character’s cosmetics, but, more importantly, you can also use it to respec. Each character has a fairly in-depth set of skills to choose from, so don’t forget the Quick Change if you feel you’ve made a misstep in your build.

Claptrap will lead you out into the next area. If you lose your bearings, follow the blue diamonds on your HUD and map to mission objectives. Watch out for on-screen control prompts to learn a few basic moves, like the running slide.

Claptrap will guide you to your first weapon. Take note of the alternate fire mode. Many weapons will feature alt-fire, which will double the functionality of your weapon, so keep that in mind when you’re deciding what weapons to choose in Borderlands 3.

Now it’s time to fight for your life! It’s surprisingly easy to see your health melt away here. If you do go down, you’ll hit the Crippled status. Taking down an enemy will get you back to your feet.

Watch out for the health Claptrap drops from above to keep you in the game, and be sure to grab loot from fallen enemies—if you’ve never played Borderlands before, it’s a habit you’ll want to get into. Watch out for any objects with green lights, as this means they’re openable containers.

The next area features a bigger, tougher fight, so apply what you’ve learned again. After that, Claptrap will direct you to collect a shield. Shields will absorb damage up to their capacity, so they’re a game-changer. To reach the shield, you’ll have to learn some mantling (read: parkour).

Knife to a Gun Fight

Through the next set of doors, you’ll fight the first of Borderlands 3’s colourful bosses. This guy won’t pose much of a challenge, and you can also use some environmental hazards to get an edge on him.

After the battle, you’ll get your first level up. Go ahead and visit your menus now, taking the time to read the tutorials on your inventory and other tabs. When you hit the skills tab, you’ll see that skills are divided into three categories: action, augments, and passives. Choose your first Action Skill and be sure to equip it.

With that, you’ll have survived the first test. Find and revive Claptrap to continue on and finish the first mission of Borderlands 3.

Disco Elysium Character Creation Guide – Top Tips On The Best Abilities And Skills To Choose From

It’s fair to say that the Disco Elysium character creation function is easily among the most in-depth within the RPG genre, but knowing how to get the most from it can be quite a feat. As such, we’ve put together a handy Disco Elysium character creation guide that outlines some of the key skills you’ll want to arm your character with. Onward!

Disco Elysium Main Character Creation Guide – What Are Abilities And Skills?

Rather than placing an emphasis on cosmetic alterations and creativity, the Disco Elysium character creation process is almost entirely focused on assigning functional abilities and skills to your wannabe detective. 

Split into a quartet of primary abilities, players must decide to place an emphasis on either Physique, Intellect, Motorics, and Psyche, with each of those abilities in turn affecting six unique skills that can be used by your character. Resulting in 24 total skills, choosing which of the four abilities you wish to use during character creation will greatly affect not only your affinity to those skills in the early going but also how far you can develop them too.

Equally, a key part of the Disco Elysium character creation process is designating a Signature Skill. This is important to get right, as whatever skill you assign as Signature Skill will not only receive a +1 bonus but will also increase the maximum learning cap of every skill within that group by 1 too. 

As such, given how much you’ll find yourself needing to use each of those skills, it’s crucial that you nail down just what skills you want to use during Disco Elysium’s character creation process. The thing to remember with this Disco Elysium character creation guide is that balance is absolutely key – put too much into one skill and you’ll suffer negative effects, whereas too little could leave you ineffectual in many situations.

Without further ado, we’ve set aside the most useful skills within each ability class so you can decide on the best ones for your particular playstyle. 

Disco Elysium Character Creation – The Best Physique Skills 

Disco Elysium Physique Skills – Electrochemistry

Arguably one of the most interesting (and potentially perilous) of Disco Elysium’s skills, Electrochemistry determines your character’s affinity to the theory and consumption of narcotics and other substances. Not only does high Electrochemistry mean that you’ll be knowledgeable of all the stuff that you’ll end up chucking into your body, but it’ll also protect you from most of the negative side effects too. More than other skills, the psychological effect of having a high Electrochemistry can also make you quite the party animal; hellbent on checking every box on an addiction bingo sheet. So be warned.

Disco Elysium Physique Skills – Endurance

Endurance is a highly useful skill, not least because it dictates how much health you have. Should health hit rock bottom, your character will experience a heart attack and, quite like real life, if you have too many of these, you can expect to shuffle off your mortal coil in fairly swift fashion. Thankfully, having higher levels of endurance not only makes you more robust in this sense, but it also fortifies you in terms of other physical trauma too such as drug overdoses and so on.

Disco Elysium Physique Skills – Shivers

An absolutely essential skill, having a high Shivers skill provides your character with the ability to tap into something not too dissimilar from Spider-Man’s Spider-Sense. Once leveled up sufficiently, Shivers will not only allow you to sense danger, but it also permits you to pick up on much smaller events that would normally be missed – lending a massive amount of additional discovery to Disco Elysium in the process.

Disco Elysium Character Creation – The Best Intellect Skills 

Disco Elysium Intellect Skills – Drama 

Not exclusively suggesting a penchant for the theatrical, having a decent Drama skill means that you’ll not only be able to tell when folks are telling porkies, but also that you’ll be able to do the same yourself, using your silver tongue to get you past all sorts of sticky situations. The drawback? Well, too much drama can turn you into something of a drama queen prone to all sorts of unstable behaviour.

Disco Elysium Intellect Skills – Logic

As straightforward as skills come, Logic dictates your character’s gift at being able to analyse the world in a very common-sense fashion. An essential skill for any budding detective, having too much Logic however can result in you becoming susceptible to those who might seek to pad out an otherwise starved ego.

Disco Elysium Intellect Skills – Rhetoric

It’s not much of a stretch to say that there is a whole lot of conversation in Disco Elysium, and so it definitely pays to throw some points into the Rhetoric skill, which will make you a skilled orator capable of verbally overwhelming just about anyone you come across. The downside? Put too many points in Rhetoric and you can become something of an unbearably arrogant know-it-all, reducing the number of folks who will want to converse with you as a result.

Disco Elysium Character Creation – The Best Motorics Skills 

Disco Elysium Motorics Skills – Hand/Eye Coordination

Very much a bread and butter skill, Hand/Eye Coordination is worth putting points into as it dictates your chance of success to actually hit stuff that you want to hit – a handy thing should you find yourself in anything resembling a violent scrape. Beyond such combative uses, Hand/Eye Coordination has social applications too. For example, a decent Hand/Eye Coordination skills score will let you catch a pint sliding across a counter, potentially impressing those around you and opening new opportunities. Like everything though, you can have too much of a good thing and an overabundance of the Hand/Eye Coordination skill will make you twitchy and potentially violently volatile. 

Disco Elysium Motorics Skills – Interfacing

The world of Disco Elysium is vast, and the Interfacing skill makes it yet broader still. By having a decent Interface skill score you can interact with computer terminals in order to glean additional information, take down force fields, access previously unreachable areas and much more besides. As with everything though, a high Interfacing skill comes at a price, as you’ll find yourself increasingly more comfortable with machines rather than people, which as a detective, is hardly ideal.

Disco Elysium Motorics Skills – Perception

A must-have skill for any sleuth worth their salt, Perception lets you notice both the large and small details of everything and everyone in the environment. Essential for any detective that doesn’t want to miss a trick, there’s a bad side to having too much Perception also. Indeed, if too highly leveled, Perception can work against you – overloading your brain with detailed information and eventually causing a breakdown. 

Disco Elysium Character Creation – The Best Psyche Skills 

Disco Elysium Psyche Skills – Empathy

Being able to understand and empathise with victims and suspects alike is pretty much a top drawer skill for any sleuth looking to make their way through the dense and dingy sprawl of Revachol, and so the Empathy skill becomes unavoidably essential. Though being able to experience the traumas and emotions that others have in order to further a lead is eminently useful, having too much Empathy can cause you to heap everyone’s problems on your own shoulders – likely precipitating a nervous breakdown in the process. 

Disco Elysium Psyche Skills – Inland Empire

Imagine sleep shredding paranoia and wild, boundless imagination all blended together into a single skill – that’s Inland Empire. Highly useful in just about any situation, Inland Empire allows you to pinpoint certain hidden details in a situation or detect concealed danger where others would not expect or sense. A crucial skill that helps to peel back the layers of Disco Elysium’s fantastically created reality, too much Inland Empire goodness can make your character go mad. Quite literally mad. Fun!

Disco Elysium Psyche Skills – Volition

The skill that tells you (and everyone else) if you’re a good guy or a complete weapons-grade bumbucket, Volition is that good voice in your head which pipes up in all those situations where you find yourself wavering on the path. At a high level, Volition is extremely useful as it will keep you level-headed and allow you to sail through a great many situations with ease. Too much volition, however, will also make you duller than an episode of Last of the Summer Wine.

Total War: Three Kingdoms – Best Factions Guide

Total War: Three Kingdoms brings Creative Assembly’s award-winning blend of turn-based empire-building and real-time tactical combat to ancient China. Set during the tumultuous Three Kingdoms period, this game offers a rich mix of diplomacy, strategy, and warfare – and it all begins with choosing your warlord.

With twelve legendary leaders (plus DLC and unlockable options), each with unique strengths, philosophies, and playstyles, it can be overwhelming to pick your path. Do you want to manipulate from the shadows, rally people with virtue, or crush your enemies with brute force? Here’s a breakdown of Total War: Three Kingdoms’ best factions, helping you decide which suits your style.

Words Before War – The Diplomatic Powerhouses

Deciding on the “best” faction is always subjective, but some are certainly more beginner-friendly than others. If you prefer diplomacy over destruction, these warlords specialize in politics, trade, and subtle influence.

Cao Cao – The Master of Manipulation

Often hailed as the most accessible faction for newcomers, Cao Cao excels in diplomatic trickery. He can sow discord between rivals and even incite wars from behind the curtain. His ability to manipulate alliances makes him a powerful presence without always needing to fight.

While not a frontline fighter, Cao Cao inspires troops and benefits from a strong cavalry-based starting army. His -10% unit upkeep bonus also helps you maintain a larger force earlier on.

Kong Rong – The Scholarly Pacifist

Kong Rong isn’t interested in brute strength—he’s a trade and diplomacy expert who leverages economic superiority and philosophical ideals. Perfect for players who enjoy a pacifist approach and value logic over warfare.

His campaign can be challenging due to his weak military prowess, and you’ll need to keep him out of direct combat. But for those who prefer building a peaceful, prosperous empire, Kong Rong is a satisfying pick.

Liu Bei – The Virtuous Leader

Another excellent choice for newcomers, Liu Bei stands out for his benevolence and tight-knit bonds with starting characters like Guan Yu and Zhang Fei. His leadership style relies on public support and moral authority rather than fear or manipulation.

Although he starts without territory and must fight early skirmishes to carve a foothold, his bonuses to inspiration and a 50% reduction in militia infantry upkeep give him strong momentum. Liu Bei is ideal for players who prefer leading with a heart rather than an iron fist.


War Over Words – The Martial Powerhouses

If diplomacy feels like a delay, these warlords let their swords do the talking. With military-focused bonuses and aggressive playstyles, they’re all about expanding territory through battle.

Sun Jian – The Tiger of Jiangdong

Sun Jian thrives under pressure. His guerilla warfare bonuses and ability to perform best when behind enemy lines make him a dynamic choice for risk-takers. Known for rapid expansion and strong starting units, Sun Jian is surprisingly beginner-friendly despite his bold tactics.

For players who enjoy momentum and thrill-seeking gameplay, Sun Jian offers high rewards for high-risk moves.

Gongsun Zan – The Ironfist General

Gongsun Zan is a battlefield veteran who channels military discipline into governance. His campaign removes administrative micromanagement in favor of army-focused leadership. He excels in defense and cavalry use, and receives strong reinforcement bonuses during combat.

Ideal for tacticians who prefer structured armies and solid positioning over political mind games.

Dong Zhuo – The Tyrant Ruler

Dong Zhuo is the definition of ruling through fear. Though not playable from the start, you can unlock him by defeating his army in battle or becoming emperor in any campaign.

His leadership style depends on maintaining high intimidation levels. Let it drop, and internal collapse could follow. His campaign is challenging but rewarding for those who want a darker, more authoritarian experience.


The Outlaw Approach – Infamy and Rebellion

Zheng Jiang – The Bandit Queen

The only base-game female warlord, Zheng Jiang thrives on infamy. She doesn’t seek popularity—her strength lies in raiding, pillaging, and striking fear. Keeping her infamy high is essential, which means staying aggressive.

Zheng Jiang’s campaign is considered among the hardest in the game, especially for new players. With few allies and constant pressure to attack, her style is best suited to experienced players looking for a unique challenge.


DLC & Other Notables

Beyond the core factions, Three Kingdoms includes several DLC warlords and Yellow Turban leaders like He Yi, Gong Du, and Huang Shao. These factions introduce unique mechanics such as fervour and peasant support, offering new ways to conquer China.


No matter which faction you choose in Total War: Three Kingdoms, you’re in for a rewarding experience—whether you’re forging alliances, dominating battles, or spreading fear across the land. The game’s diversity in playstyles means you’ll find a faction that matches your strategy, whether you’re a diplomat, a warrior, or something in between.

Monster Hunter World: Iceborne Monsters

The latest chance to carve up lots of (sort of) innocent dragons, lizard-dogs, and cute bats is here, that’s right, there’s more Monster Hunter. That’s right, with a new expansion comes new things to hunt, and that’s why you need a list of all the Monster Hunter World: Iceborne Monsters.

While some of these are returning from older games, others are variations on current Monster Hunter: World monsters and others are entirely new. The one thing that each of them has in common is that they’re all looking to eat you. Well, some of them are actually just minding their own business and then you bust in and stab them in the head, but others are legitimately destroying the world around them; it’s a mixed bag. Anyway, here is your MHW Iceborne monster list. 

Monster Hunter World: Iceborne Monsters List 1

This first part of the list of Iceborne monsters has everything up to and including the face of the Iceborne expansion: Velkhana.

Beotodus is a big old ice fish. It swims through the snow and earth and coats itself in an icy armour. It’s the first monster you fight and serves as a warm-up to some of the arctic battles you’ll be taking part in.

Banbaro has the head of a moose and the body of a tyrannosaurus rex. It’s an odd combination, but it basically means that you’ll be running away from it a lot as it tries to swing trees and boulders at you. It can surprise you by flinging these huge objects at you as well, so be on your guard.

Viper Tobi-Kadachi can inflict both poison and paralysis. It’s incredibly fast and can close any distance you put between you in an instant. Make sure you’re prepared to fight it by being immune to those two status effects though and it’ll be much easier.

Nightshade Paolumu this variant monster inflicts sleep by blowing out billowing clouds of sleeping gas. If you can avoid that then the fight isn’t much of an issue, though it does stay airborne a lot, so make sure to use your new clutch claw to keep things even. Or just bring an Insect Glaive.

Coral Pukei-Pukei is a water-spewing chameleon/bird that is, honestly, kind of disgusting. It drains water from the world and spits it out of both its mouth and its tail to cause damage across a huge area. It can do this while drinking too, so head for cover if it dunks its head in a flower.

Barioth is fast, strong, and looks like a sabertooth tiger with wings. On top of this, it can create damaging ice cyclones and leap vast distances. It’s probably the first fight on this list of Monster Hunter World: Iceborne monsters that will really test you.

Nargacuga is a panther bird and is almost entirely black. It’s another fast monster and combines its speed with the ability to fire sharp feathers from its tail to deal damage at range. It’s a tough monster too, with plenty of health to whittle down as you fight it.

Glavenus is a t-rex with a sword for a tail. Also, it can breathe fire. That seems like a lot, doesn’t it? Well, it is. Glavenus is one of the MHW Iceborne monsters that have no issue killing you in one hit if you’ve got the wrong armour on. Keep on the move and try and cut its tail off to make the fight a bit easier.

Tigrex is a tiger-striped beast with incredible power. It fights mostly using its brute force, but can also fling rubble at you if you get too far away. It’s also relentless, many of its attacks simply has it charging at you multiple times before performing a spin attack.

Brachydios is a boxing dinosaur that secretes an explosive substance. It coats its fists and head with this too cause highly-damaging blasts that can take you out in a single blow. It’s fast and it moves around unpredictably too.

Shrieking Legiana is an ice-coated version of the Legiana. It flies at incredible speed and can leave trails of razor-sharp ice behind it or even fling them forwards. It uses its tail to fling hunters flying and deal damage.

Fulgur Anjanath is a lightning variant of the normal Anjanath. It spits electrified mucus at those who are far away and kicks or bites those who are close. It also spends a lot of time being angry, which can make it tough to deal with.

Acidic Glavenus is like the normal Glavenus but with no fire, instead, it coats itself in a type of acid that reduces the defence of those affected by it. It also tends to attack slightly faster and with more jabs than sweeps.

Ebony Odogaron is an angry dog than has claws, speed, and the ability to spit out dragon-damage inflicting blasts. It’s a tough one to fight if you’re not prepared to deal with bleeding or you’re weak to dragon attacks, but it’s also weak to every other element, so you should be okay. 

Velkhana is the face of the new monsters, and for good reason. This elder dragon freezes the air around it to form armour, can change the landscape with its breath, and can even cause chunks of ice to form above you. 

Monster Hunter World: Iceborne Monsters List 2

These are all the beasts you’ll be fighting after Velkhana, including some of the ones you can only fight once you’ve seen the credits.

Seething Bazelgeuse is an angrier version of the bombardier dragon we all hate from the OG MHW. Its explosive scales have a larger range and can even swell up to devastate huge areas of the map. Also, it breathes fire.

Blackveil Vall Hazak is a more noxious version of the elder dragon Vall Hazak. It’s coated in toxic spores that it uses to drain the life from anything around it. It’s probably the most obvious ecological threat on this list of Monster Hunter World: Iceborne monsters.

Namielle is a fish-dragon and can summon torrents of water. Not only that, but it takes advantage of the soaked terrain to electrically charge its wings and shock entire areas with ease. It’s also visually stunning and makes for some cool armour.

Savage Deviljho is a lot like the normal Deviljho but really angry. Like, so angry. It breathes damaging smoke and can pick up other monsters to use as a weapon. You’ve not experienced Monster Hunter until you’ve had a Savage Deviljho through an Ebony Odogaron at you.

Ruiner Nergigante is a spikier version of the already very spiky dragon. It’s angrier, fires off spines when it attacks, and does even more damage. It’s also on the hunt for other elder dragons, so expect it to turn up when it’s not helpful.

Shara Ishvalda is the final boss of the Iceborne expansion and is a mysterious dragon that can move through the earth. It makes for an excellent finale and we won’t say anymore because it would be spoiling things.

Zinogre is an electrically-charged doggo that can send out balls of lightning to deal damage to you.

Yian Garuga is a beaked wyvern that is covered in hard black scales. It’s also got a very short temper and a lot of power. Be careful when facing off against this terrifying foe.

Brute Tigrex, is Tigrex, but even hencher. It’s also got a much darker colour scheme and only appears if you’re an exceptional hunter.

Silver Rathalos. Simple enough really, a Rathalos but silver, another rare beast.

Gold Rathian. As above but for Rathians and gold. Exceptionally poisonous, so bring antidotes.

Rajang is a very angry monkey-type beast. It flings around you, other stuff, and whatever it can get its hands on. It also goes Super Saiyan.

Now you’re ready to take on the new challenges of Monster Hunter: World Iceborne. Looking for some fellow hunters to take on the challenge? Drop by the Green Man Gaming Community Site and find out what other gamers are up to.

Guide to Stealth Kills in Hitman 2

Welcome to our guide, 47.

Your target is to stop blundering your way through kills in Hitman 2 and instead become a true silent assassin. For that, you’ll need to learn some stealth techniques, including the best approach to killing in Hitman 2.

We will leave you to prepare. By reading this guide, that is.

The Clothes Make the Man

For the most part, sneaking in Hitman 2 is identical to its 2016 predecessor. There are a few additions, including the ability to hide in tall grass and in crowds à la classic Assassin’s Creed.

The most iconic feature of Hitman’s stealth, though, is its disguises. The typical way to progress through a mission is to swap Agent 47 into the clothes that make the man and sidle your way into out-of-bounds areas.

You’ll usually start out looking for low-level disguises, like blue-collar workers, progressing from there to specialised roles (e.g. a chef) before arriving at high-ups like personal bodyguards or unique NPCs.

When wearing a disguise, 47 can wander around without needing to sneak. You’ll only need to watch out for Enforcers, the NPCs with white dots above their heads. Enforcers can see through your current disguise if they get a good look at you. Plan your route around them or use Blend In actions to throw off suspicion.

Best Weapons for Stealth in Hitman 2

Hitman 2 includes a few exciting additions to the stealth arsenal. One is a tranquillizer pistol worthy of Solid Snake. In a pinch, you can use it to subdue a target before killing them, but it’s more useful for clearing the way to your target by taking out non-targets without losing your Silent Assassin status by killing them.

One of the best weapons for stealth in Hitman 2 is still 47’s trusty fiber wire. With this, you can sneak up behind the target and kill them silently. Unlike most weapons, fiber wire is innocuous in situations like frisking and 47 can carry it openly in his hands, though it can take an agonising few seconds to subdue a target.

Less perfect are silenced weapons. These can get the job done, but they’re messy and liable to attract attention if 47 is seen carrying them. Still, they can save you in a pinch.

Silent Assassin

With all this talk of stealth, you may be left wondering: what is the best approach to killing in Hitman 2?

Hitman’s trademark is the range of options it presents. The best approach to killing by stealth is whichever works while leaving you undetected.

Pursuing Opportunities is by far the easiest way to set up a stealthy kill. These are individual “stories” you can follow, each one presenting an obvious way to accomplish a kill, usually by staging an elaborate accident.

If you don’t want to rely on Opportunities, then finding ways to get your target alone before deploying your fiber wire is a quick way to get the job done. Poison is another popular option.

Half the fun of Hitman 2 is improvising your way into danger and back out again, so seize chances as they come. If you keep the above advice in mind, you’ll be ready to take these chances without blowing your cover.

So what’s your favourite kill from Hitman 2? Comment below and Check out the Green Man Gaming Community site to find out how other gamers make their silent assassinations happen.

How Dragon Ball Z: Kakarot Looks Set To Be The Most Ambitious RPG In The Series To Date

For a less than subtle franchise that has long been synonymous with wild swathes of colour and brick-fisted fury, it’s perhaps a little surprising to discover that the latest video game adaptation in the series, Dragon Ball Z: Kakarot, is the most sophisticated entry to date. A much more thoughtful and adventurous take on Akira Toriyama’s seminal manga, Dragon Ball Z: Kakarot leverages a number of RPG style systems which all combine to make it the deepest and most sophisticated game the series has seen in a long while.

The Great Dragon Ball Z Bake-Off

Unlike previous Dragon Ball Z games, there is much more to Dragon Ball Z: Kakarot than just putting fists (or feet) to the ugly mugs of your enemies. For a start, food and the subsequent munching of it plays a key role in cementing Goku’s success in Kakarot’s story campaign mode, not least because chowing down on various foodstuffs found around the world can provide some much needed temporary stat boosts to our spiky-haired hero.

More than that, Goku can elect to combine ingredients (rather than just eating them immediately) by asking chefs, such as his wife Chi-Chi, to fashion bountiful meals from them. In doing so, these banquets not only provide the aforementioned temporary stat boosts, but can also result in the permanent increase of the potency of selected abilities too, not to mention providing Goku with a hefty amount of experience points into the bargain.

Fishing With A Power Rating Of Greater Than 9000

Intertwined with Kakarot’s culinary pursuits are the fishing shenanigans that it permits players to indulge in. Discover a body of water stuffed with fish and Goku (or Vegeta), can reattach his Saiyan monkey tail, dip it into the water, and await a bite from the amphibians lurking beneath the surface.

This being a Dragon Ball Z game however, the act of fishing plays out very differently from a normal interpretation of the popular pastime. When you catch a bite, our heroes pull the fish out of the water with all their might and then strike a blow to the side of its head, knocking it out in the process. A key ingredient, caught fish can either be eaten on its own, or used to create a much larger, more nourishing meal from which the experience points and stat rewards are substantial to say the least.

Skill Trees For Days

Of course, Dragon Ball Z: Kakarot wouldn’t be much of an RPG if it didn’t have the requisite skills and abilities begging to be unlocked. Split into passive and active skills, players can unlock and learn new skills by spending special Z-Orbs which are rewarded for defeating enemies and also for exploring Kakarot’s sprawling overworld.

Ranging greatly in power and function, there are half a dozen different Z-Orb variations, with specific skills and abilities requiring a certain number of each in order to be unlocked. In short, the creative latitude that Dragon Ball Z: Kakarot affords players to fashion progression after their own playstyle, is quite substantial to say the least and should leave build tinkerers very happy indeed.

The Family And Friends That Fight Together, Win Together 

Rather than encouraging our hero to go it alone, Dragon Ball Z: Kararot rewards knowledge of the manga and television show by dishing out special bonuses if certain characters are teamed up with one another.

Known as the Link Bonus system, players can create special teams from which our hero can gain unique stat boosts. For example, teaming Goku with his son Gohan provides a series of ability and stat increases that you wouldn’t get by linking Goku up with anybody else, and the same is true of other combinations too.

A Massive Open World Stuffed With Quests

Of course, Dragon Ball Z: Kakarot couldn’t make a boast about its RPG credentials if it didn’t have a massive world rammed full of quests for players to discover, and well, thankfully, it most certainly has one of those. Oh yes.

Acting as a framework of sorts for the three main acts of the Dragon Ball Z anime story, Kakarot presents players with a huge, gated world from within which a veritable bounty of numerous side-quests and secret areas pour forth. Whether you’re chatting to NPCs, taking in new quests, mining minerals, fishing, cooking or flying around the world at mach speed, Dragon Ball Z: Kakarot offers the player much, much more to do than its smash-mouth legacy might otherwise imply.

The Evolution of Sonic the Hedgehog

Unlike its titular blue hedgehog, you could get breathless sprinting through the history of the Sonic franchise. The blue blur has lived up to his rep as an energetic go-getter and his franchise includes some of gaming’s wackiest stories.

Sonic’s post-2000 identity crisis hasn’t eroded the popularity of the character, and he remains one of gaming’s biggest icons. Yet in the last couple of decades, his fortunes have undulated more than the zones he calls home.

With a live-action Sonic the Hedgehog movie on the horizon, now is the perfect time to skid to a stop and take a look at Sonic’s past.

Sonic’s Genesis

Sonic sped into our lives in 1991, with the release of Sonic the Hedgehog on the Sega Mega Drive (Genesis, to US-ians). The blue blur brought something new to platforming: a need for speed.

While platform games at that time were semi-sedate affairs (aside from the occasional flutter of the heart during a difficult sequence), Sonic infused the genre with a sense of urgency. Whole levels blazed by in seconds.

Yet it wasn’t all about speed. The secret to Sonic’s success was to combine momentum and adrenaline with intricate level design. Its Zones were like puzzle boxes, presenting different rewards based on a player’s level of skill.

Sonic the Hedgehog was an instant hit, but Sonic Team truly honed the game’s core philosophy in the next couple of titles, producing Sonic 2 and Sonic 3. These two games are held up as the gold standard of Sonic games to this day.

Sonic’s sequels also extended the series’ pop-cultural reach. His soundtracks, his image, and his Bill Clinton-inspired attitude (yes, really) became icons. Meanwhile, Sonic borrowed back from pop culture, giving us the Super Sonic transformation courtesy of Dragonball Z and the Death Egg, a not-at-all subtle play on Star Wars’ Death Star.

As Sonic’s pop culture cache grew, so did the franchise. Sonic exploded out of video games and into other media with multiple cartoons and comics to his name. While the Archie Comics incarnation of Sonic is quite well known, the bush pig charted a unique path in the UK. Sonic the Comic ran from 1993 to 2002 and featured an elaborate, evolving storyline, alongside other comics based on SEGA properties, like Decap Attack and Ecco the Dolphin.

Releasing in ‘93 and ‘94, Sonic CD and Sonic & Knuckles both opened intriguing new worlds for Sonic. Sonic CD was a critically acclaimed success, using the newfound power of compact discs. Sonic & Knuckles experimented in a different way. Its Lock-On cartridge made it backward compatible with Sonic 2 and Sonic 3, bringing Knuckles into those games. 

High-Speed Crash

Sonic’s sophomore blues came with the arrival of the 3D era. 

To make matters worse, fellow critter Crash Bandicoot released on the Playstation to huge success and did it mostly by being the successful marriage of 3D and platforming that Sonic was not. Likewise, Sonic’s old foe and Nintendo mascot Mario only found a new level of success on the N64. Meanwhile, the Sega Saturn struggled to compete in the new era.

Unlike contemporaries Mario and Link, Sonic couldn’t seem to make the 3D leap. Sonic 3D Blast in 1996 and Sonic R in 1997 both tried new things, but nothing seemed to stick.

Sonic Adventure, released in 1999, managed to turn things around. It reimagined Sonic, his gameplay, and his supporting cast, preparing him for the new millennium. Sadly, the death of the Dreamcast cut this resurgence short. Sega’s exit from the console market had an inevitable impact on their mascot. Sonic Adventure 2 proved the last hurrah for Sonic on his home series of consoles.

Attitude Adjustment

As the Sonic series moved into the 2000s, it was at risk of falling behind and even its titular mascot floundered. Sonic was 90s ‘tude through and through, but felt like a relic in the 2000s, particularly with Sega’s star waning. 2005’s Shadow the Hedgehog attempted to revise the tone of the franchise, to mixed results.

Sonic’s fifteenth anniversary in 2006 saw the launch of several new games, including a reboot simply titled Sonic the Hedgehog. But fans hoping for a love letter to Sonic’s history were left disappointed, as each game struggled to make a positive impact. Instead, Sonic was fast becoming a breathless grab-bag of weird spin-offs and failed attempts to capture past glory.

One of the strangest tales to emerge from this era was Sonic Unleashed. Despite launching to mixed reviews in 2008, this game continues to appear in discussions about the top Sonic games among the fanbase, becoming the definitive dark horse (or werehog) of the franchise.

Five Gold Rings

The blue blur may have been knocked back, but he had a few rings left.

2010 and 2011 saw the release of two back-to-basics adventures: Sonic the Hedgehog 4 and Sonic Generations, respectively.

Sonic Generations was a fan service extravaganza, a celebration of the entire series to date. As both a game and a piece of fan service, it worked. It fused old-school 2D platforming with 3D energy, finally creating a version of Sonic that felt true to its roots while embracing the third dimension.

Sonic 4 was less popular, despite its similar throwback inspiration. Once again, Sonic’s momentum dropped off just as he picked up speed. Sonic’s next reinvention was the Sonic Boom sub-franchise. While the titular TV show received strong reviews, the reaction to the games, and Sonic’s redesign, were a different story. The derision directed at a bandana-wearing Sonic has echoes of 2019’s furore over his live-action incarnation.

It would take 2017’s Sonic Mania for the series to get back in fan’s good graces, but it did it with style. Sonic Mania is one of the most complete entries in the entire franchise and routinely tops best-of lists.

Silver Sonic

2017 seems like a long time ago now, so fans have been left wondering when they’ll next see Sonic in action.

The Sonic Team has indicated that 2021, Sonic’s 30th anniversary, will be a big year for the hedgehog. Details are scant for now, so fan attention is on another medium altogether: the big screen.

It’s fair to describe the initial reaction to the trailer for the upcoming live-action movie Sonic the Hedgehog as abject horror. Legions of fans turned out on social media to express their disgust at Sonic’s design, enough to force the studio back to the drawing board. They returned with a Sonic much closer to his iconic look, featuring only a few small tweaks.

The reception to Sonic’s redesign has been positive. While the movie isn’t out yet, fans seem ready to embrace Sonic’s live-action adventure fresh off the redesign, and there’s some hope that it can achieve at least the success of 2019’s Detective Pikachu, Sonic’s closest cinematic reference point.

There’s even a chance that Sonic the Hedgehog will bring the 90s icon back into the spotlight by riding that nostalgia wave — as so many 90s properties have managed already.

An Extra Life?

Whatever happens, Sonic’s 30-year anniversary is on the way. Sonic Team has promised big things, but it’s too soon to call whether the future’s bright and blue. Here’s hoping Sonic can keep his momentum this time.

Choosing the Right Formation in FIFA 20

Players have had a few months to get to grips with FIFA 20, but there’s a lot to unpack. If you’re sick of getting dabbed on by other players, it’s time to get serious about your formations and tactics.

Here’s our guide to choosing the right formation in FIFA 20.

Form Up

There are over 30 formations available in FIFA 20, plus ways to tweak them with tactics and instructions. That can be overwhelming for a new manager, but the thing to remember is this: it’s all about you.

There are no overpowering or easy-win formations. The formation you choose should be the sum of your preferred playstyle, your players, and the tactics you expect to use. In other words, deciding your formation upfront based on your playstyle can help you choose the players you need to run it.

To match your formation to your playstyle, think about your habits. Perhaps you attack from the wings more often than not, or you’re a reactive player that lets the opponent make the first move. The personality of your playstyle should align with your formation.

A Few Favourites

Here’s a small selection of our favourite formations and how they work in practice. This will show you how a formation dovetails with your style of play.

4-4-2: The English classic is viable in FIFA 20, but it remains fairly conservative, like its real-world counterpart. This one is all about team composition. You’ll need a strong core of mid-fielders to elevate this jack-of-all-trades above a master of none, but if your midfielders know what they’re doing and you have an excellent striker, it can turn into one of the best scoring formations in FIFA 20.

4-2-3-1: If you’re not a confident player, this is an excellent safety net of a formation. It’s reliable in an all-round way, much like 4-4-2. Its weaknesses come out in competitive play, as it needs a confident player to manage its vulnerabilities.

4-2-2-2: This is a balanced formation with great utility, which can adapt to almost any playstyle. It’s another excellent choice for the player still learning their style.

4-3-3 (2): Wing play has made a serious comeback in FIFA 20 and this formation offers a defensive edge over 4-3-3, placing more focus on the wingers.

Tactics and Instructions

While formations set the basic strategic overview for your game, setting the right tactics can bring out the best in a formation. Likewise, instructions can fine-tune the performance of each player, so you can milk each formation for all its worth.

Using a 4-4-2, for instance, you can tell your team to Drop Back to maintain cohesion and hold a defensive line, turning it into one of the best defending formations in FIFA 20. Or you can set Pressure on Heavy Touch and have your strikers Get In Behind to put the pressure on your opponents.

The three-part combo of formations, tactics, and instructions creates a huge variety of gameplay options. If in doubt, experiment. You’ll never know what works best for your playstyle if you don’t take some risks.

Put your football insight to the test with Fifa 20 today, then check out the Green Man Gaming Community site to see what formations other gamers are using.

All the Finishing Moves in Mortal Kombat 11

Mortal Kombat and fatalities: name a more iconic duo. Apart from in that weird crossover with DC comics, gory, over-the-top finishing moves have always been a staple of the brutal franchise.

Fatalities in Mortal Kombat 11 are more brutal and beautiful than ever before, so we’re sure you’re dying to perform them.

Here’s how to execute Mortal Kombat 11’s finishing moves.

Performing a Fatality

To perform a fatality, you need to first beat your opponent. At the end of the final round, your opponent will enter a wavering state and the announcer will utter the immortal words: FINISH HIM.

Now, you need to input the button sequence for the specific fatality you want. You’ll also need to be at the correct distance from your foe. The three distances are Close (touching), Mid (about half a screen) and Far (a full screen). You’ll never guess where you can perform Anywhere fatalities from.

Once you’ve satisfied these two conditions, you’ll execute one of the two fatalities available to your character. For second fatalities, you’ll need to have unlocked them first.

The button combos given here are platform-free. There are four direction buttons involved in fatalities (Forward, Back, Down, Up), and four actions. The button for each action will depend on your platform.

The actions are:

FP: Front Punch

BP: Back Punch

FK: Front Kick

BK: Back Kick

Baraka

Food for Thought (Close): B, D, B, BP

Rock, Paper, Baraka (Close): B, F, B, FK

Cassie Cage

I <3 U (Mid): D, D, F, BK

#GirlPower (Mid): B, D, D, B, BP

Cetrion

Maintaining Balance (Mid): B, D, F, D, BK

Good and Evil (Mid): B, D, B, FK

D’vorah

New Species (Close): B, F, B, FK

Can’t Die (Mid): B, D, D, BK

Erron Black

Melted (Mid): D, D, D, FP

Death Trap (Mid): D, F, D, BP

Frost

Ice Sculpture (Close): F, B, D, FP

The Cyber Initiative (Mid): B, F, D, F, BK

Geras

Phasing Through Time (Anywhere): B, D, D, FK

Peeling Back (Close): D, F, B, FP

Jacqui Briggs

Spider Mines (Mid): F, B, F, FK

Nothin’ But Neck (Mid): B, F, B, BK

Jade

Bow Before Me (Anywhere): D, D, F, D, BK

Pole Dance (Close): B, F, D, F, FP

Jax Briggs

Coming In Hot (Close): F, D, F, FK

Still Got It (Close): B, F, B, D, FP

Johnny Cage

Mr Cage’s Neighborhood (Close): F, B, D, D, BK

Who Hired This Guy (Close): F, D, F, FP

Kabal

Road Rash (Mid): B, F, D, F, FK

Hooked (Close): D, D, D, BK

Kano

Last Dance (Close): F, D, D, FP

Face Like a Dropped Pie (Close): B, D, F, BP

Kitana

Gore Nado (Mid): D, D, D, D, BP

Royal Execution (Mid): D, B, F, FP

Kollector

For the Kollection (Close): D, D, D, D, BK

Head Lantern (Close): D, F, B, FP

Kotal Kahn

Totem Sacrifice (Close): B, D, B, FK

Kat Food (Close): B, F, B, F, FP

Kung Lao

Headed Nowhere (Close): D, F, B, D, BP

Meat Slicer (Close): D, F, D, FK

Liu Kang

Burn Out (Close): D, B, D, F, FP

Belly of the Beast (Mid): B, D, B, F, BP

Noob Saibot

Double Trouble (Mid): B, F, B, F, BK

Split Decision (Close): D, D, D, FP

Raiden

Alternating Current (Mid): B, D, B, FP

Direct Current (Close): D, F, B, FK

Scorpion

You’re Next (Far): B, D, D, FP

Chain Reaction (Far): D, F, B, BP

Shao Kahn

Back Blown Out (Close): B, F, D, D, BP

Kahn-Sequences (Close): B, F, B, FP

Skarlet

Bloody Mess (Mid): F, B, D, FK

Heart Condition (Mid): D, D, F, BK

Sonya Blade

To the Choppa (Mid): D, F, B, BP

Supply Drop (Close): B, F, D, FK

Sub Zero

Ice-Cutioner (Mid): B, F, B, BP

Frozen in Time (Mid): F, D, F, BK

Kombat Pack 1

Nightwolf

War Ritual (Close): F, B, F, B, BP

Komo-tose (Close): D, D, D, D, BK

Shang Tsung

Condemned the Damned (Mid): B, F, D, D, FP

Shokan Reborn (Mid): B, F, B, BK

Sindel

Scream Queen (Close): D, D, F, BK

Hair Today, Gone Tomorrow (Mid): B, F, B, FP

Mortal Kombat 11 is available now on Green Man Gaming. Not sure if it’s for you? Head over to the community site and find out what other gamers have to say about it.