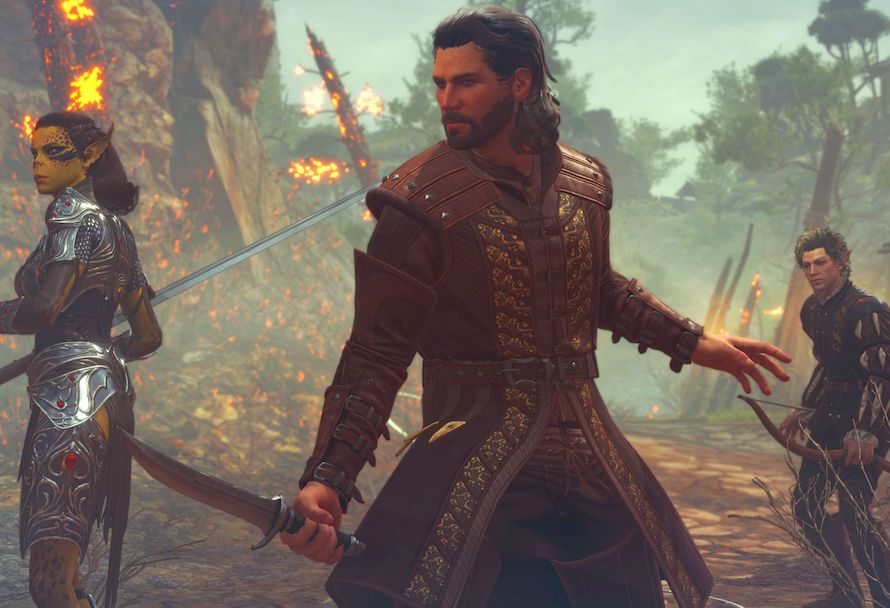
During Baldur’s Gate 3’s gameplay reveal at PAX East – whether it was intended or not – Larian Studios revealed most of the in-game races that players can expect to play as in Baldur’s Gate 3. Now, of course, these are subject to change – more races may have been added since, and Larian will no doubt bring more races to the game beyond its early access launch.
In the meantime, we thought it’d be best to run through each of Baldur’s Gate 3’s races so you can plan out your role playing ahead of launch. Baldur’s Gate 3 will land on Stadia and PC on September 30 in Early Access.
Every Race confirmed in Baldur’s Gate 3
According to Larian, the races revealed in the PAX East gameplay showcase will be coming to the game in early access, with more to arrive in the future.
Baldur’s Gate 3’s RPG skills and systems draw from the Dungeons and Dragons 5E tabletop system, so if you’re familiar with DnD, you can most likely infer what buffs and boons these features may provide in-game based off your own experience. Failing that, Google is your friend!
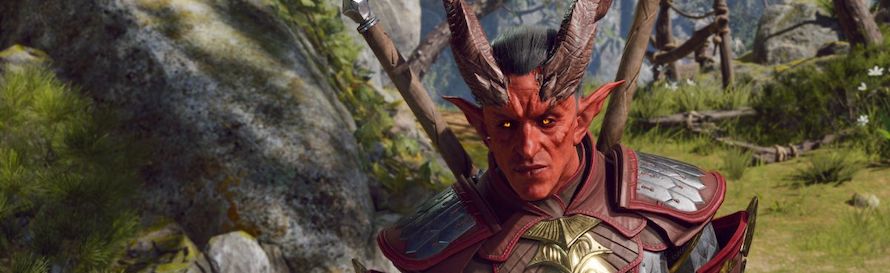
Tiefling
Sub race: Asmodeus Tiefling
Features
Intelligence +1
Charisma +2
Hellish Resistance
Drow
Features
Charisma +1
Cantrips
Darkvision
Drow Weapon Training
Human
Features
Strength +1
Dexterity +1
Constitution +1
Intelligence +1
Wisdom +1
Charisma +1
Githyanki
Features
Intelligence +1
Strength +2
Decadent Mastery
Martial Prodigy
Dwarf
Sub race: Hill Dwarf
Features
Wisdom +1
Dwarves Weapon Training
Dwarves Resilience
Dwarves Toughness
Elf
Sub race: High Elf
Features
Cantrips
Dexterity +2
Intelligence +1
Keen Senses
Fey Ancestry
Elven Weapon Training
Darkvision
Half-Elf
Features
Charisma +2
Ability Improvements (0/2) – you can improve two of your base stats (STR/DEX/CON/INT/WIS/CHA)
Fey Ancestry
Darkvision
Half Drow
Features
Ability Improvements (0/2) – you can improve two of your base stats (STR/DEX/CON/INT/WIS/CHA)
Cantrips
Darkvision
Halfling
Sub race: Lightfoot Halfling
Features
Charisma +1
Lucky
Brave
Mercurial Step
Naturally Stealthy
Baldur’s Gate 3 Classes and Custom Characters
If you’ve played one of Larian’s earlier games such as Divinity: Original Sin 2, you’ll be quite familiar with many of the systems in place in this game, if the gameplay showcase is anything to go off of. The combat will be turn-based, with each character having an initiative roll that determines their place in the combat cycle.
There will also be six classes to choose from, Fighter, Wizard, Rogue, Ranger, Cleric and Warlock. With subclasses tied to each role that allow players to specialise throughout their playthrough. You’ll also be able to create your own custom character much like the Divinity series, if you’re not tempted by Baldur’s Gate 3’s set cast of characters, who will boast pre-determined backstories and character arcs, which can be tinkered with and explored throughout the course of the game.
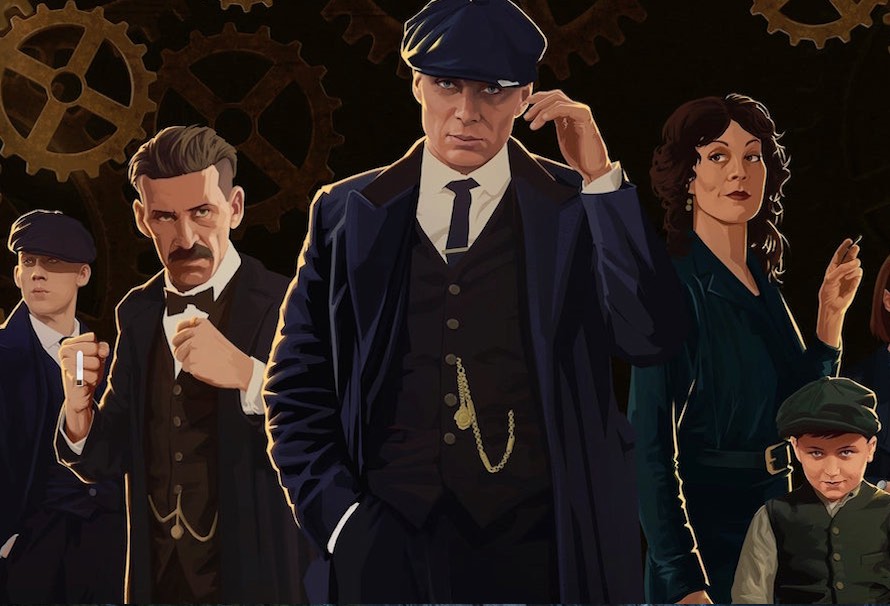
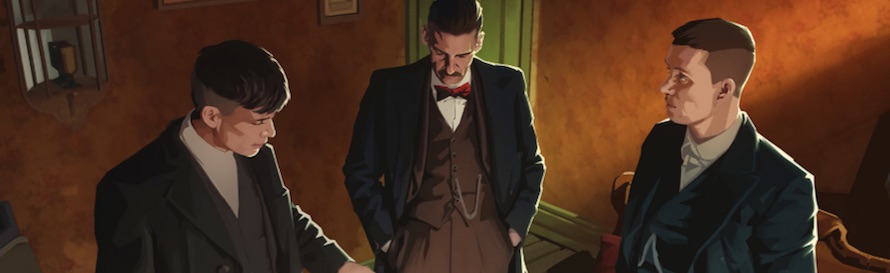
One of the most surprising gaming announcements of the year, Peaky Blinders: Mastermind from Velocity developer Futurlab marks a sizable departure for the rugged British coding outfit.
While on a functional level the puzzle solving gameplay is miles away from anything else that the studio has done to date, Peaky Blinders: Mastermind also represents a very different challenge, as Futurlab must properly and accurately honor an extremely high profile BBC television show that has a deep throughline into British pop culture. Here’s how Peaky Blinders: Mastermind does right by its award winning, small screen counterpart.
The Whole Gang’s Here – Present And Accounted For
Arguably the main reason for the success of Peaky Blinders both domestically and across the world, is its compelling and tragic cast of characters whose fate the audience often finds themselves greatly invested in.
In Peaky Blinders: Mastermind, Futurlab are obviously keenly aware of this fact and have done a bang up job of replicating not just the likenesses of the characters from the television show, but also the way that they speak and act too.
Whether it’s the acerbic tongue and blistering comebacks of Polly Gray, or the somewhat unhinged and furious ravings of Arthur Shelby, when you read the conversational text in Peaky Blinders: Mastermind, you’ll do so in the voice of the actors and actresses which play them in the television show.
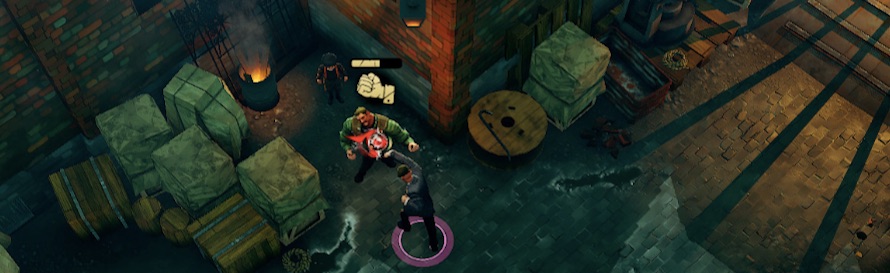
Leans Deeply Into The Strengths Of Its Characters
Much more than just a sum of their appearance and spoken words, the Peaky Blinders as an entity function extremely well because they have an array of strengths that complement each other in dynamic and interesting ways. Whether that’s Ada Thorne using her charismatic qualities to distract guards or Arthur Shelby pounding someone into submission and then using his titular flat caps to finish them off, each mission in Peaky Blinders: Mastermind requires the player to exploit the strengths of each character in order to be successful.
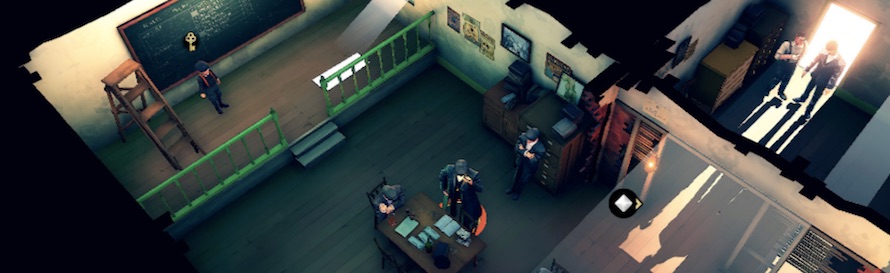
Of course at the head of it is Tommy Shelby himself. The newly installed patriarch of the Shelby family after returning home from The Great War, Tommy’s greatest strength lay in his ability to visualise detailed far-thinking plans and schemes in which all of the Peaky Blinders gang are inextricably intertwined.
In Peaky Blinders: Mastermind then, developer Futurlab has zeroed and expanded upon this notion explicitly, allowing players to control multiple characters in a simultaneous timeline through which Tommy Shelby can direct multiple members of the Peaky Blinders to act at once.
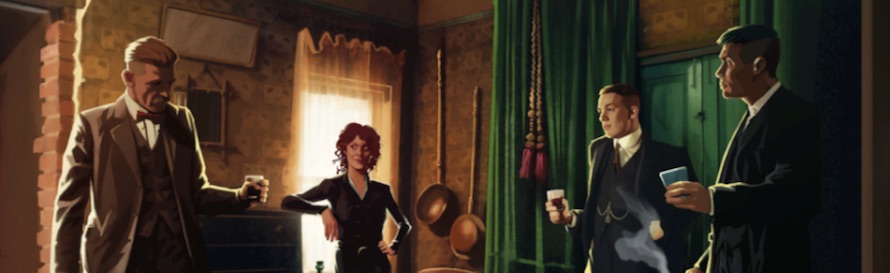
A Prequel To The First Season Of The Television Series
Instead of existing purely in a vacuum, Peaky Blinders: Mastermind actually ties directly into the events of the television show. Taking place before the first season of the Peaky Blinders TV show, Peaky Blinders: Mastermind puts players in the well-shined shoes of Tommy Shelby just after he returns from the Great War.
With Finn still very much a young lad at this point and other characters from the show still kicking around, Peaky Blinders: Mastermind focuses on Tommy’s rise to the top in the Birmingham crime scene as he clashes with other gangs and evades the eye of British intelligence.
The Audiovisual Presentation Evokes The Television Show With Aplomb
Don’t let the elevated isometric perspective of Peaky Blinders: Mastermind fool you – Futurlab have done a tremendous job of replicating the visual and audio hallmarks of the Peaky Blinders television show.
As well as including the foot-tappingly brilliant blues rock soundtrack that is synonymous with the show, Peaky Blinders: Mastermind also deftly replicates key locations from the small screen drama too, such as the Shelby Parlour, the Garrison Tavern and Charlie Strong’s Yard.
In short, Futurlab have done themselves proud as every pixel of Peaky Blinders: Mastermind bleeds a loving and slavish adherence to the hit television show that has been a staple of late night television drama for the last half-decade.
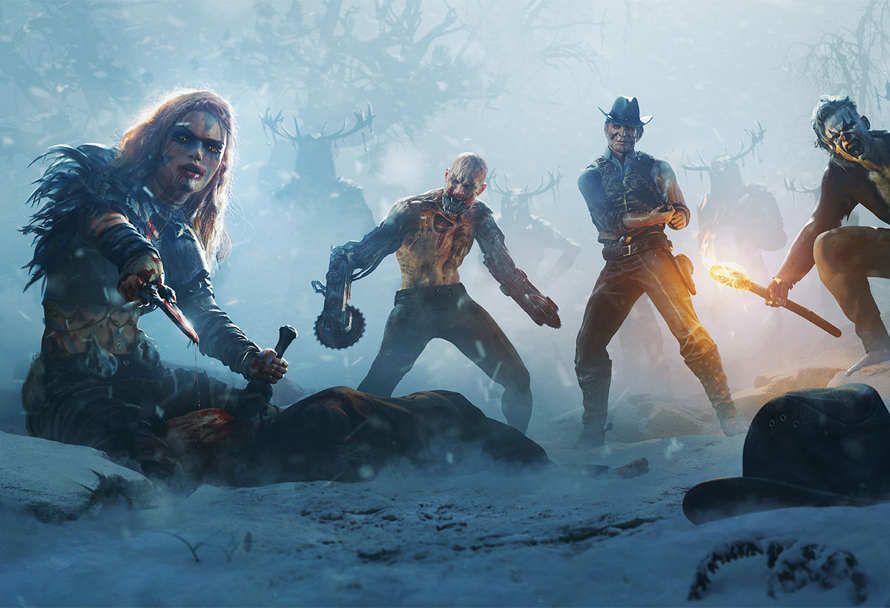
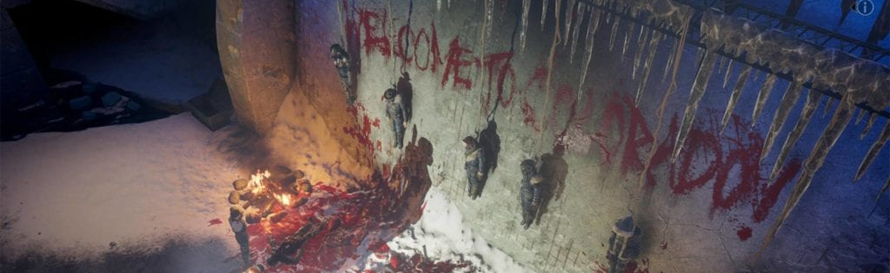
Wasteland 3 is the followup to 2014’s stellar post-apocalyptic roleplaying game. Featuring more depth, more quests, more difficult decisions, and more story than ever before, Wasteland 3 will be a huge meal for RPG fans. That’s why developers inXile are letting you share your apocalyptic dinner with a friend in their brand new co-op mode.
That’s right, no longer will you have to face the raiders, cultists, and mutants of the future alone. You can bring a friend along to share the road as you fight for what’s right, or simply to survive in an unforgiving wasteland.
Not many RPGs have co-op modes so you may have a few questions – that’s why we’ve got the lowdown on everything you need to know about Wasteland 3’s co-op mode ahead of its launch date on the 28th of August.
The Basics
Firstly you’ll be glad to know the full game will be playable in co-op, there’s no splitting the game up or the co-op mode being tacked on. We’re talking fully integrated, full game co-op for two players. Wasteland 3’s co-op is also online so you can be in separate locations when playing, a must in these more isolated times.
Both players will need to own a copy of the game in order to play together and you’ll need to know the person you’re playing with. There’s no matchmaking in Wasteland 3, and there’s also no crossplay available between different platforms, though those who bought it on different stores with different DRM methods on PC will be able to play together.
In-Game
When you’re playing Wasteland 3 in co-op mode both you and your teammate will receive a copy of the save game on each of your systems. This means if you want to play solo with your character you can load up the game and carry on alone. This also means you can explore different choices to your co-op partner or dive into a different narrative branch. If you want to play with a friend again you simply choose which save game to load, and you’re off again sharing the journey.
In both single player and co-op modes you’ll control six rangers in your squad. In co-op mode you’ll decide how you want to split these up, evenly, or divide them into however you see fit.
Inventory management has also received particular attention from developers inXile. Both players, when playing together, will have a shared inventory. No deciding who gets what, it’s just one big pool that you share together. The hope is that this reduces the chance for griefing or stealing loot, as there’s division between players when playing together.
Now you should be ready to dive into Wasteland 3’s co-op mode and get adventuring through its huge story and expansive world. Are you a Wasteland fan since the 80s, or have you converted more recently? Let us know if you’re looking forward to this latest instalment over on our community forum.
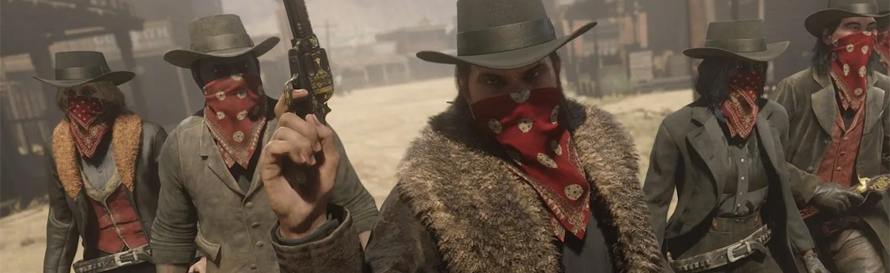
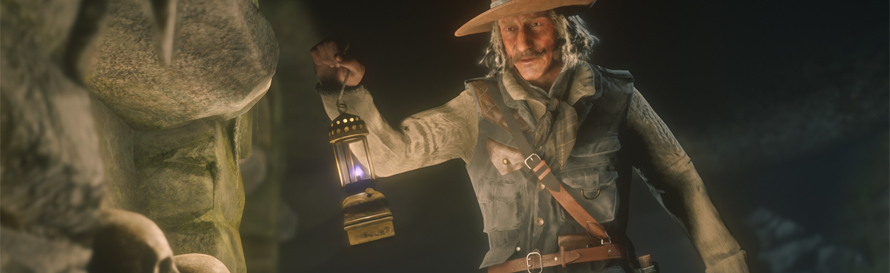
Whether you’re tackling the intimidating lawlessness of the Old West by yourself or teaming up with a posse, money is absolutely essential to surviving in Red Dead Redemption 2’s online mode. With a vast array of activities at your disposal, it can be difficult to know where to focus your efforts to earn cash quickly. Luckily, we’ve got you covered, partner.
Looting
Looting still remains one of the quickest and easiest ways to make money in Red Dead Online, especially if you’re looking to make some extra cash without putting in too much effort. While the cash you get from looting enemies might be modest, you’ll often come across valuable items such as pocket watches, platinum bands, necklaces, and antique jewellery that can be sold to Fences for a nice payout. After taking down a few enemies, a trip to a fence is always recommended to sell off your haul and top up your reserves.
Looting remains highly effective, especially in missions, Free Roam events, and camp raids, where enemies can drop valuable collectables that boost your earnings. Though the general loot payout from enemies hasn’t changed much, the opportunity to loot rare items has increased, especially with updates introducing more collectable items across the world.
Story Missions
One of the most reliable ways to make money in Red Dead Online is by completing Story Missions. These missions are scattered around the map, typically indicated by a yellow icon or fog cloud on the map. Completing these missions can yield substantial rewards, often scaling into the hundreds of dollars, and occasionally even more depending on your performance.
Story missions are still one of the best ways to earn cash quickly, and in addition to the payout, you’ll often get a chunk of gold and a pile of corpses to loot for extra cash. As the game has progressed, more multi-part story missions have been added, increasing the potential for larger rewards. Plus, these missions are an excellent way to earn experience points (XP), boosting your progression and unlocking additional content.
Become A Collector
Becoming a Collector in Red Dead Online is still one of the most lucrative ways to make money, though it requires patience and dedication. You’ll need to reach level 5 in the Collector role to unlock the Metal Detector upgrade, which is essential for finding valuable buried items.
Additionally, the Diamond Bag upgrade remains key to maximizing your earnings. Once you’ve unlocked it, you’ll be able to store more rare collectables, allowing you to find higher-value items during your hunts. The Collector role has evolved with the addition of rare seasonal items, giving players even more opportunities to collect and sell high-value artefacts.
The Metal Detector still proves useful for finding valuable items buried underground, and with maps purchased from the Collector Vendor, you can uncover hidden treasures all over the map. This is a particularly passive way to earn money, as you can search for collectables while you travel between other missions or events, making it easy to earn cash while going about your business.
Treasure Hunting
Treasure hunting remains an excellent method for earning significant amounts of cash in Red Dead Online. Treasure maps, awarded to players every five levels starting from level 10, will lead you to hidden caches of money and gold. These maps can also be found in the hideouts of bandit leaders, and players who take part in bounty hunting and raid missions are likely to come across treasure maps as well.
The treasure-hunting system has evolved with additional treasure locations and increased rewards, ensuring that players can still find treasure even after completing the initial map sets. It’s an enjoyable pursuit because you’ll not only find gold and cash but also special resources like health tonics, ammunition, and rare collectables, making treasure hunting a rewarding and fun activity for those looking to make a decent amount of money.
Additional Tips and Activities
Aside from the methods above, there are a few additional ways to make money in Red Dead Online:
Bounty Hunting: As a Bounty Hunter, you can track down targets for significant payouts. Taking on bounties offers a solid stream of income and an exciting, action-packed experience.
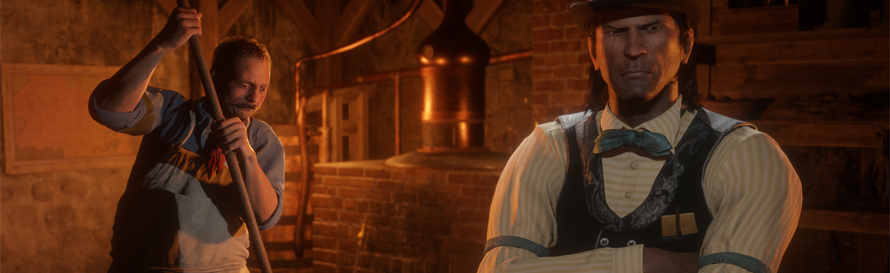
Moonshining: The Moonshiner role remains one of the most profitable, especially if you can keep your distillery running smoothly and upgrade your business. You can sell your moonshine to buyers for substantial sums, especially if you take advantage of special orders.
Trader Role: As a Trader, you can collect resources, craft valuable goods, and sell them for a profit. This role, although more passive, remains a steady source of income over time.
Fishing: With the right bait and patience, fishing can yield a good profit, especially when targeting Legendary Fish, which can be sold for high prices at certain locations.
Final Thoughts
Making money in Red Dead Online can feel like a daunting task with the vast number of activities available to players. However, with a clear strategy, you can maximize your earnings and make your way to riches. Whether you’re looting bodies, hunting treasure, or participating in story missions, there’s no shortage of ways to earn a decent living in the Wild West. Keep your wits about you, partner, and you’ll be rolling in cash before you know it.
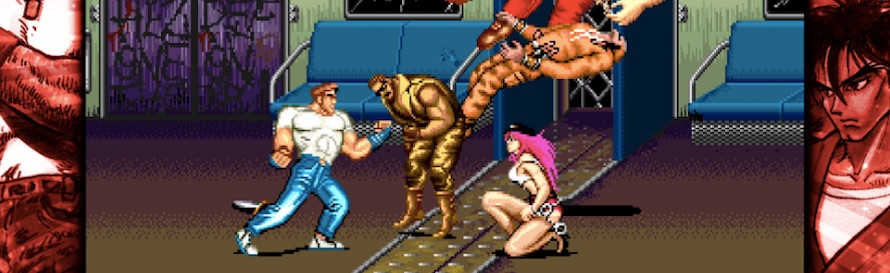
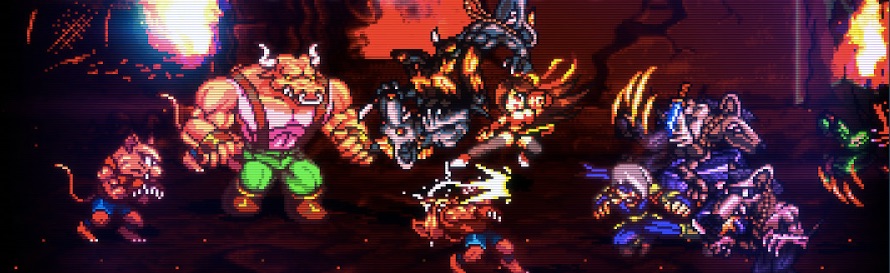
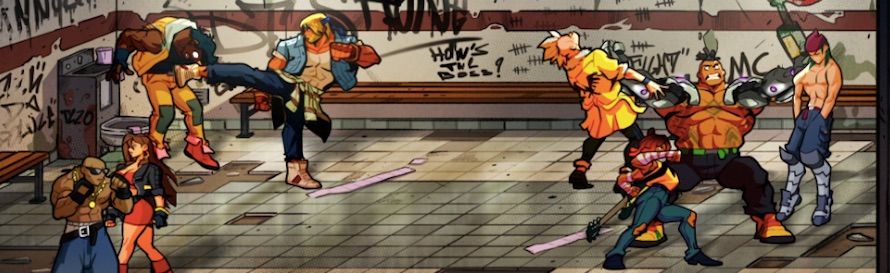
There is perhaps fonder memory of the 1980s arcade scene than the humble side-scrolling brawler. A uniquely empowering and satisfying genre that enables players to lay waste to hundreds of goons with all manner of fists, feet and weapons as they push forever east, we’ve wiped the blood off our face and readjusted our broken nose to put together a list of the best side-scrolling brawlers you can get for PC. Let’s scrap!
Capcom Beat Em’ Up Bundle
Arguably, there’s no better place to kick off this list than with the Capcom Beat Em’ Up Bundle – an eclectic collection of some of the finest side-scrolling brawlers of yesteryear from the kings of the combat arcade.
Encompassing seven side-scrolling brawlers from the genre’s golden era, players will be able to relive memories from all-time genre great Final Fight, as well as lesser known side-scrolling efforts such as Captain Commando, The King of Dragons, Knights of the Round and Warriors of Fate.
Even better still is the fact that in addition to arcade perfect renditions of these games, the Capcom Beat Em’ Up Bundle also includes Battle Circuit and Armored Warriors too; two somewhat rare bralwers that never received a home release until now. As such, if you’re looking to rekindle your love of side scrolling brawlers, the Capcom Beat Em’ Up Bundle is pretty much the best place to start.
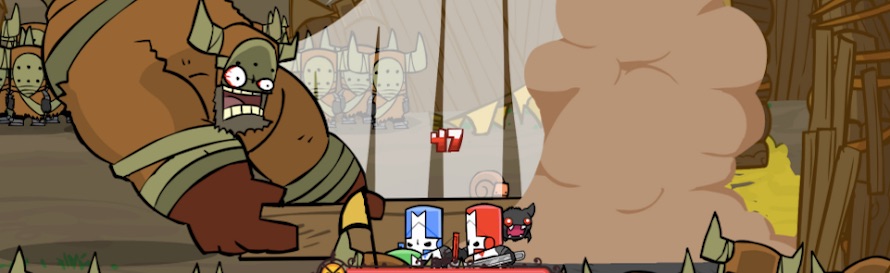
Castle Crashers
The second (and many would argue best) title from indie developer The Behemoth, Castle Crashers lavishes a wacky cartoon art style on top of a side-scrolling brawler that has jolly face-smashing and humor for days.
Castle Crashers offers more than just traditional brawling too, as a neat progression system allows players to customise their chosen warrior to match their playstyle while an array of frankly mad mini games help to keep things varied and fresh.
Speaking of mad, Castle Crashers is pretty much off its rocker throughout. From giant and quite literal catfish to herds of pooping deer and flocks of pooping owls, Castle Crashers is offbeat to say the least and all the better for it.
Fight’N Rage
With its scrappy CRT stained pixel art presentation, Fight’N Rage’s laser targeting of wistful nostalgia might seem cynical, but in truth Fight’N Rage’s audiovisual presentation merely serves as a veneer for the much deeper brawler which lay beneath.
For a start, Fight’N Rage is absolutely stuffed with content – like properly stuffed. In addition to a wide range of non-linear levels, alternate endings and more than 20(!) characters to unlock and play as, Fight’N Rage has arguably more punch for your buck than just about any other game on this list.
As well as being such a generously content stuffed offering, Fight’N Rage also roundly nails the fundamentals too, boasting a simple to pick up but difficult to master control system that lets rookies hit the ground running and genre stalwarts to nail combos upwards of 100 hits. So yeah, Fight’N Rage is very much the real deal.
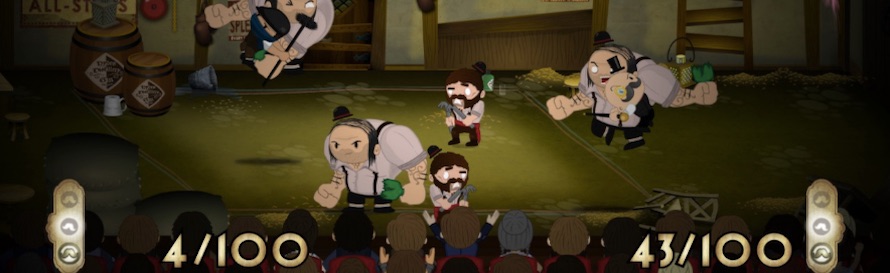
Foul Play
From Mediatonic, the same ultra-talented folk that brought us current online multiplayer sensation Fall Guys: Ultimate Knockout, Foul Play is a side-scrolling brawler that is often deeply unappreciated – so let’s change that eh?
Framing its 22 or so levels as a series of plays that unfurl on a theatre stage while the various heroes and 50 different goons are played by actors, Foul Play’s unusual setting is immediately charming and whisks players away to such fanciful locations as Atlantis and the dusty pyramids of Cairo.
Making the most of its unique environment, Foul Play also has the audience occasionally call on the player to complete certain tasks, all the while bumbling stagehands can be glimpsed in the background moving the stage on while occasionally actors can be glimpsed stepping to their character suits. It’s all super charming stuff.
Another area in which Foul Play meaningfully separates itself from every other game in this list is in the intricacies of its combat. With an emphasis on perfectly timed counterattacks, thunderous juggle combos and special tricks, Foul Play demands your attention like an engrossing stage play about two alcoholic dogs reciting Shakespeare. Or something.
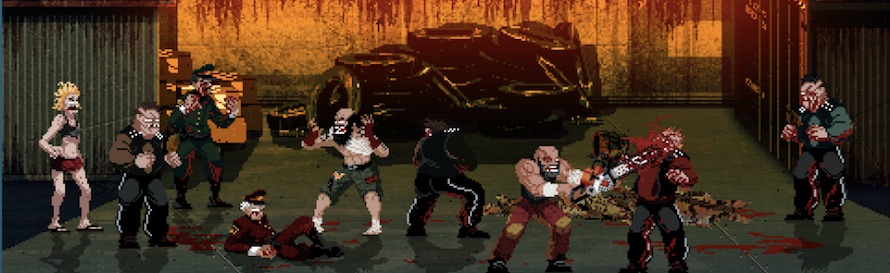
Mother Russia Bleeds
A grimy, discarded needle of a side scrolling brawler, Mother Russia Bleeds is easily the most grisly offering in this list. Set in an alternate timeline USSR, Mother Russia Bleeds casts players as one of a quartet of formerly imprisoned street fighters who must fight against a totalitarian regime hellbent on their destruction.
In keeping with this nihilistic setting, Mother Russia Bleeds allows its cast of miscreant warriors to enhance their face punching capabilities by taking drugs to replenish their health or increase their strength to such an extent that a well-placed strike can turn an enemy into a storm of bloody chunks.
Unrelentingly grim and stuffed with smashed faces and bloody corpses in every scene, Mother Russia Bleeds is arguably the video nasty of the side-scrolling brawler genre that is well worth your time.
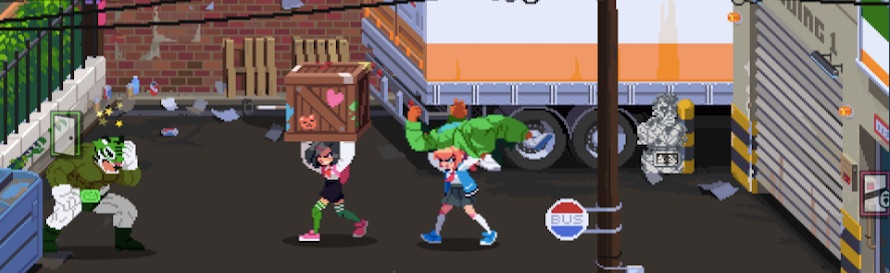
River City Girls
As the titular hard-hitting River City Girls who must rescue their kidnapped boyfriends, WayForward brings us not only easily the finest entry in the legendary Kunio-Kun series, but also a title that pushes the whole side-scrolling brawler genre forward as a result.
With effervescent and beautifully animated sprites that have more character in a single pixel than many 3D games have in their entire models, non-linear levels, multiple progression paths and a veritable treasure trove of secrets to find, River City Girls is quite simply required gaming for everyone.
Oh, and River City Girls also has pretty much the most catchy introductory song ever. Ever.
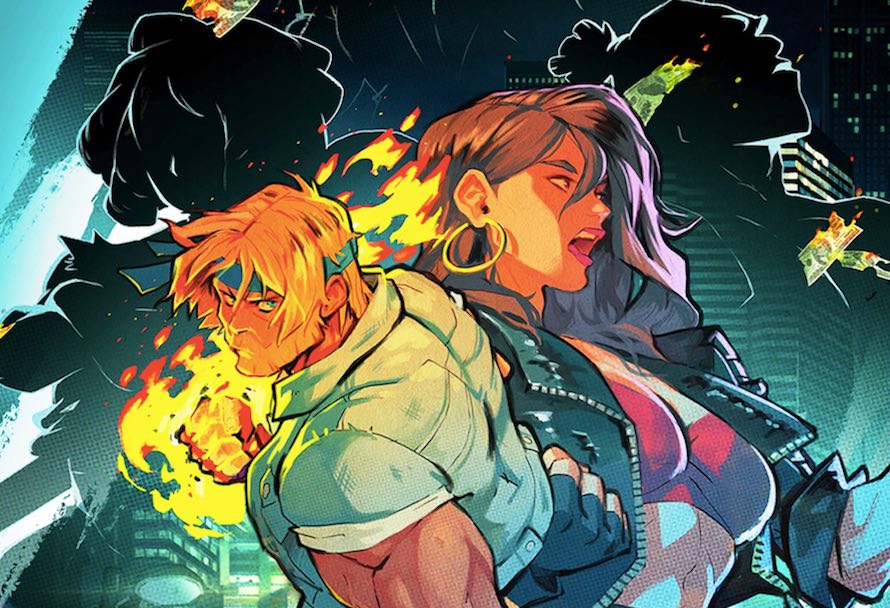
Streets of Rage 4
Somehow defying expectations to become one of the very best side-scrolling brawlers ever made, Streets of Rage 4 managed the unthinkable – it not only continued the Streets of Rage series with aplomb and honored its lineage, but it also managed to be the best game in the whole franchise. Imagine that.
Showcasing gorgeous, eye-popping hand drawn visuals that re-imagine the series classic character designs with verve and which compliment the return of franchise music maestro Yuzō Koshiro, Streets of Rage 4 looks and sounds the part certainly, but the bounty of its towering calibre lay deeper than that. Streets of Rage 4 doesn’t just play like Streets of Rage used to, it plays better. Streets of Rage 4 fortifies such a boastful claim by not only augmenting its timeless brawling gameplay with a deeply satisfying juggling system, but also in providing the most varied cast of enemies the series has seen to date. Axel’s flurry and dragon uppercut combo has never looked better.
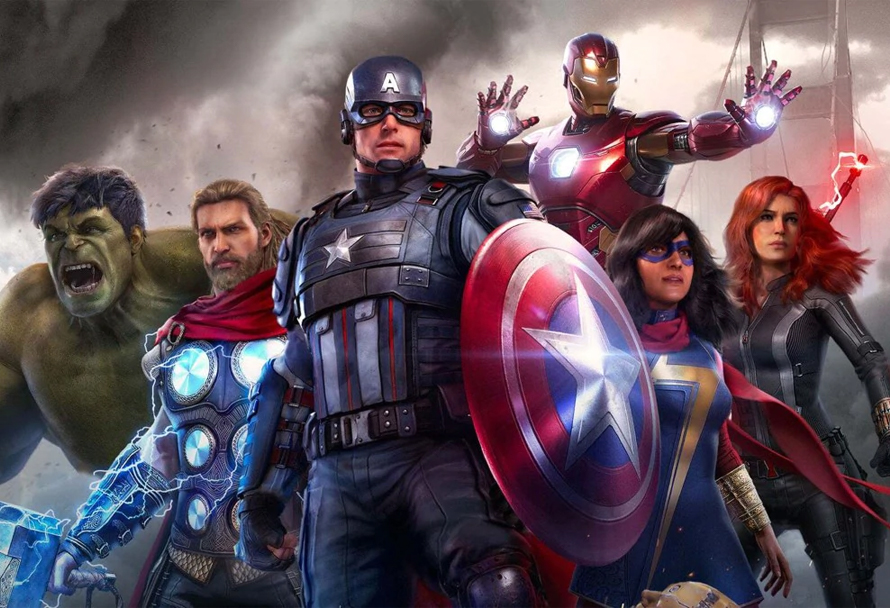
Marvel’s Avengers from Square-Enix brings together Earth’s Mightiest Heroes in the sort of tremendously epic ensemble that one might think you’re staring at in the latest MCU blockbuster movie. That said, Marvel Comics has literal universes of characters to pull on, so what Marvel’s Avengers game characters made the cut and which didn’t? We let you know right here in this handy guide.
Iron Man
Able to fly around the battlefield, hover around foes while delivering a small country’s worth of devastating ordnance and engage in deadly close combat with his repulsor strikes, Iron Man is a high-damage dealing, agile character whose sarcastic comebacks cut almost as deeply as his laser attacks do.
In Marvel’s Avengers, Tony Stark’s Iron Man bankrolls the Avengers global conflicts while his flashy New York-based Avengers Tower provides a cutting-edge base of operation for the heroic group.
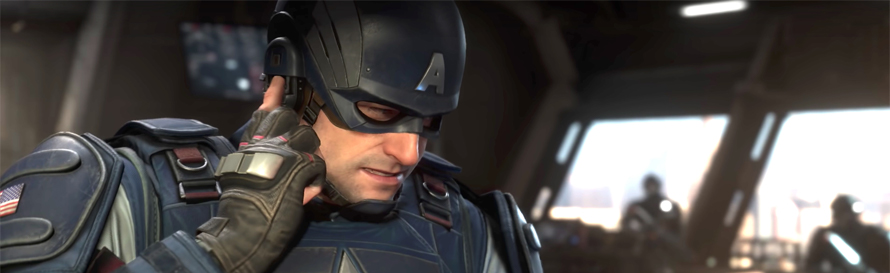
Captain America
The soldier that time forgot makes a compelling case for himself as an effective hybrid damage-dealing tank in Marvel’s Avengers. Between his impressive martial arts expertise, thudding takedown moves, precision counter-attacks and a whacking great shield made of pure vibranium that can be thrown at multiple enemies and recalled just as quickly, Captain America is an essential component of the Avengers heroic line-up.
With a resolute moral compass and a deeply held instinct to defend those who cannot defend themselves, Marvel’s Avengers sees Captain America tangling with the forces of the vicious Taskmaster as he attempts to prevent the destruction of San Francisco and the surrounding areas.
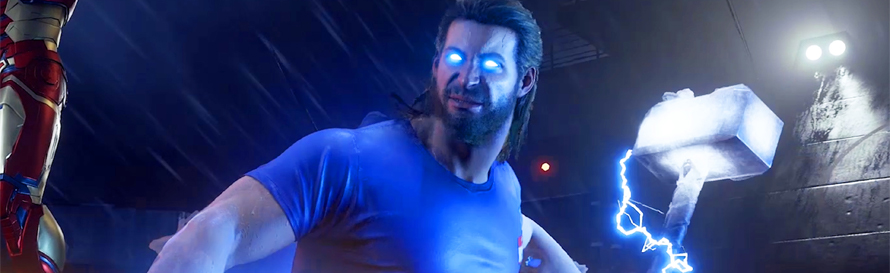
Thor
Arrogant, brash and abrasive, Thor’s burly exterior conceals a sensitive… nah, who am I kidding? An almost unstoppable force on the battlefield, Marvel’s resident thunder god is capable of dealing out tremendous amounts of damage in both melee and at range, leveraging the power of his Mjolnir hammer and his innate ability to channel lightning into the faces of his enemies.
Simultaneously amused by and invested in the fates of mortal men and women, Thor’s presence in the Avengers provides the group with insights into the Nine Realms and the threats that lay beyond.
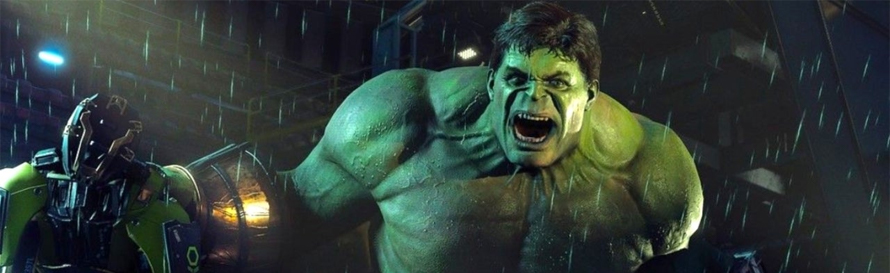
The Incredible Hulk
A gargantuan and relentlessly charging wall of green flesh and muscle, Bruce Banner’s alter ego is the Avengers primary tank. With his rage-infused attacks, high-speed sprints and long-distance leaps, the Hulk isn’t just capable of damaging enemies greatly but he can command the attention of all enemies on the battlefield too. In practice, this means that the not-so-jolly green giant is efficient in not only distracting enemies from attacking the less hardy members of the group, but he can also use his aggro-gaining tanking traits to pull all of the enemies together in a single place for maximum damage.
Always in conflict with Bruce Banner and vice-versa for ultimate dominion over the other, the Hulk is always at the vanguard of just about every mission that the Avengers embark on. Nonetheless, the constant state of volatility that Banner finds himself in as he attempts to repress the Hulk marks him as much a threat to the world as it does an erstwhile ally to the Avengers.
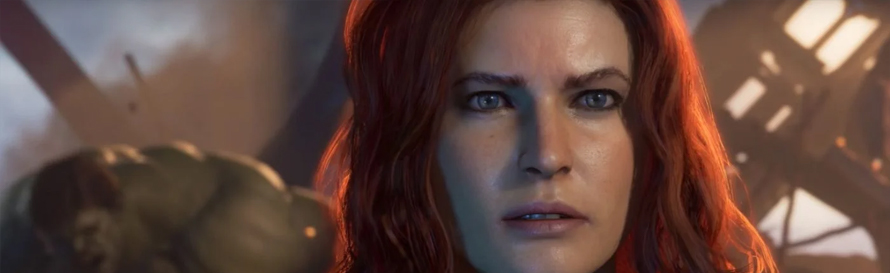
Black Widow
A Russian-trained superspy with a conscience, Natasha Romanoff is the Black Widow; an extraordinarily deadly damage dealer who excels in melee combat and has a set of uncanny abilities that allow her to confuse her foes and buff her friends in battle. A technical savant when it comes to martial arts, Black Widow supplements her arsenal of bone-breaking moves with a variety of gadgets that hurt, stun and distract her foes in equal measure.
Always trying to outrun her murderous past, Black Widow follows the Avengers across the globe in a bid to scrub out the red from her ledger in an attempt to redeem herself.
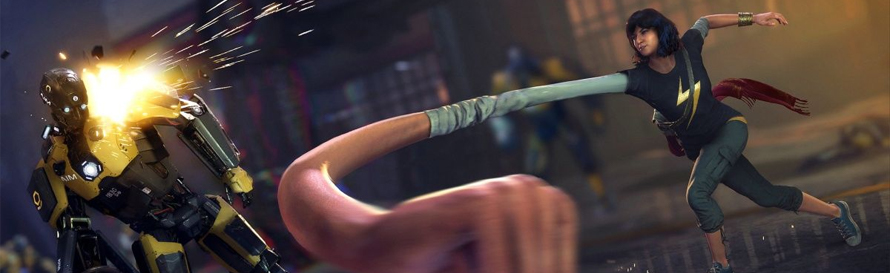
Ms. Marvel
An Inhuman warrior created by a catastrophic leak of Terrigan gas, Ms. Marvel is a force of nature at any range on the battlefield. Able to stretch her limbs to spectacular proportions and able to grow to a terrifying size, Ms. Marvel is one of the most versatile combatants on the Avengers roster.
Wide-eyed and continually nerding out over the fact she gets to go on missions with the Avengers that for so long she has held up as icons, Kamala Khan’s innocence belies a burning desire to prove herself and not be dictated by those around her.
Hawkeye
Announced as the first DLC character for Marvel’s Avengers, the slick Hawkeye is very much a focused damage dealer like Black Widow – the primary difference being that Hawkeye prefers to dish out his punishment at a comfortable range, instead of making it all up close and personal.
A family man with strong ties to Black Widow which predates the Avengers, Hawkeye is a precision combatant who rounds out the Earth’s Mightiest Heroes in significant ways that many might well underestimate.
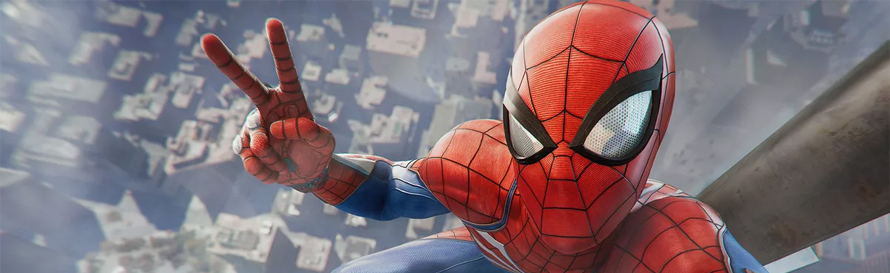
Spider-Man
Currently an exclusive character to the PlayStation 4 and PlayStation 5 versions of Marvel’s Avengers, your friendly neighbourhood Spider-Man swings into action sometime in 2021. While we have no real details on how Spider-Man fits into Marvel’s Avengers from a functional standpoint, acrobatic melee combat, all-surface traversal and web-based crowd control all seem like sure bets.
Hank Pym/Ant-Man
First revealed in a 2019 trailer for Marvel’s Avengers, Hank Pym is a well-meaning scientist who buys into the A.I.M’s kool-aid that they can create a better world for everyone. Of course, A.I.M being A.I.M, things don’t quite work out that way and Hank Pym finds himself adrift before aligning with the Avengers. Whilst not a playable character, Hank Pym’s Ant-Man alter ego would be a tremendous addition to the Avengers ranks.
Taskmaster
A devious and highly skilled villain, Taskmaster is a vicious combatant who can mimic the attack patterns of whomever it is that he happens to be fighting. Brutal and without mercy, Taskmaster remains a constant and deadly thorn in the Avengers side.
Abomination
Former KGB spy Emil Blonksy got more than he bargained for when he subjected himself to the same gamma radiation that allowed Bruce Banner to unleash the Incredible Hulk. For Emil though, things didn’t work out quite so well. Despite being even stronger and more powerful than the Hulk, Blonksy cannot return to his human form and must instead remain as the Abomination; a nihilistic force hellbent on destruction and cruelty.
MODOK
The end result of a cataclysmic experiment to create a bio-engineered living computer, MODOK was supposed to be a special A.I.M project that would allow the company to understand the depths of the cosmos. What transpired however was the creation of a vile super-genius whose lust for murder cannot be satiated – something that MODOK proved when he murdered everyone at A.I.M and took over as Scientist Supreme.
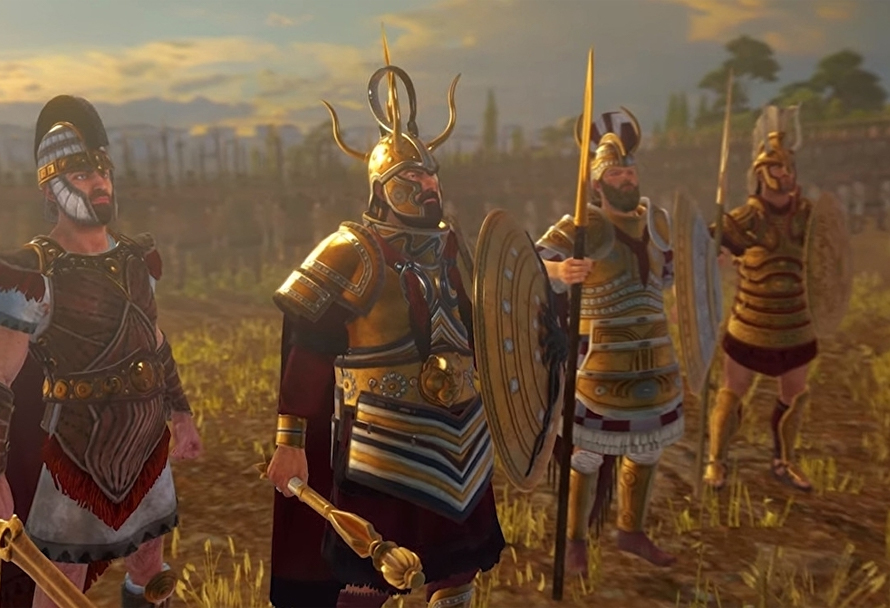
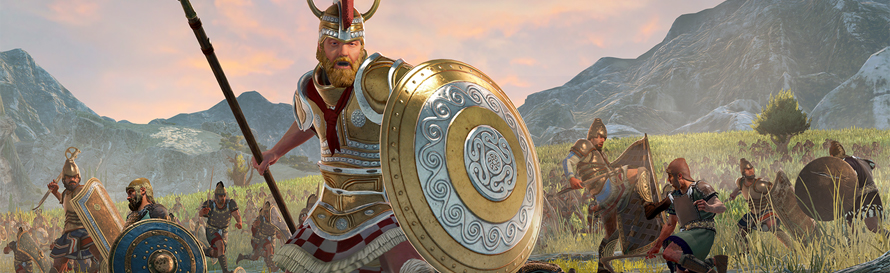
When we think of military campaigns, there’s arguably none more famous than the Siege of Troy. After countless Total War games spanning medieval, Roman, Napoleonic, and Sengoku eras, it’s time to go back – way back. Back to the age of myth, bronze, and heroes. Welcome to ancient Troy.
Total War Saga: Troy dives into one of the most legendary conflicts in history, and while it’s part of the more bite-sized Saga series, don’t let that fool you – there’s still a huge amount of strategic meat on the bone. Veterans of the franchise will find plenty to enjoy, and newcomers will be drawn into its mythological storytelling, faction variety, and immersive campaign gameplay.
With distinct playable leaders, mythical beasts, divine influence, and a map teeming with opportunity (and betrayal), Troy is a Hellenic commander’s dream. And if you’re wondering who to lead into battle, here’s the full rundown of factions waiting to be commanded.
Playable Factions at Launch
At release, Total War Saga: Troy gave players access to eight unique factions. Each one is based on iconic figures from Greek myth and legend, and they each come with their own playstyle, strengths, and campaign goals:
Dardania – Led by Aeneas, favours divine will and replenishment.
Ithaca – Led by Odysseus, focused on cunning, ambushes, and mobility.
Lycia – Sarpedon’s faction, strong on trade and naval power.
Mycenae – Led by Agamemnon, with strong influence and vassal mechanics.
Phthia – Achilles’ faction, driven by rage and glory-seeking.
Sparta – Led by Menelaus, focused on holding territory and retaliation.
Hector’s Trojans – Defensive and honour-bound.
Paris’ Trojans – A faction favouring diplomacy and romantic ambition (yes, really).
Each of these leaders brings a different lens to the story of Troy and offers unique campaign mechanics that change how you approach war, diplomacy, and divine favour.
Amazon DLC Factions
Shortly after launch, the Amazons DLC added two more factions:
Hippolyta’s Amazons – Emphasise diplomacy, territory expansion, and female unit recruitment.
Penthesilea’s Amazons – A nomadic horde-style faction built around fast-moving raids and mercenaries.
These legendary warrior queens bring fresh, high-mobility tactics to the battlefield and provide a great contrast to the more grounded Greek factions.
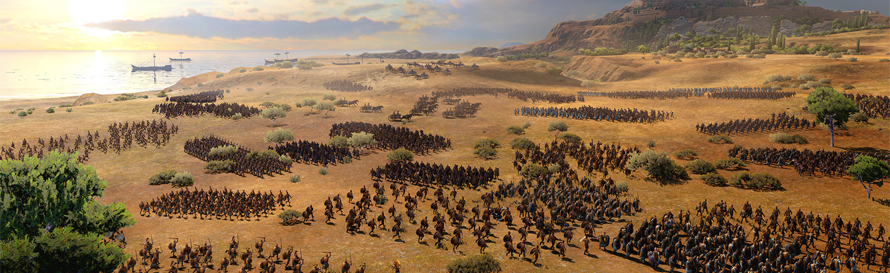
Non-Playable Factions
Even if you’re limited to the ten playable factions (with DLC), the campaign map is far from quiet. You’ll interact with a variety of other non-playable groups that represent regions and powers from across the Bronze Age Aegean world. These include:
Phrygians
Thracians
Thessalians
Ionian city-states
Rhodes
…and more.
Some factions, like the Amazons, may appear as NPCs if you don’t own the relevant DLC. They all have their own agendas, allies, and resources—so expect diplomacy to be just as dangerous as open warfare.
Total War Saga: Troy launched on August 13th, 2020, and later arrived on Steam on September 2nd, 2021, bringing even more players into the fold. Whether you’re a Homeric scholar, a Virgil fan, or just someone who loves watching phalanxes clash in glorious real-time battles, Troy has something for you.
So, who will you lead? Will you stand with the proud sons of Troy, or bring glory to the Achaeans with your thousand ships? Either way, the fate of the ancient world is in your hands.
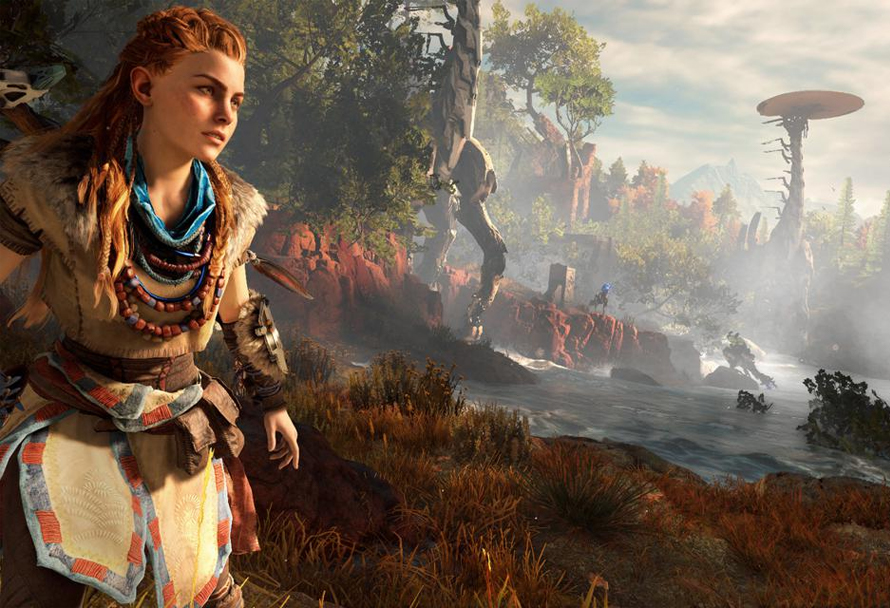
It’s certainly fair to say that Aloy has more than a few weapons at her disposal to deal with the machine menace that is plaguing the land in Horizon Zero Dawn. So with that in mind, we’ve leaped into the wilderness to discover the best weapons for our flame-haired heroine to get the job done.
Tearblaster
Early on in the game, you’ll get a taste of what the Tearblaster can do when you start being able to fire Tearblaster arrows from your trusty bow. Simply put, being able to strip off the armour of your foes at long range is desirable, to say the least.
The Tearblaster however takes things one step further. A hulking weapon that can blast out pockets of hyper-compressed air at Aloy’s enemies, the Tearblaster speeds up the armour-stripping process exponentially, allowing Aloy to remove the armour of even the most aggressive Thunderjaws and Ravagers extremely quickly. Make no mistake, the Tearblaster is a weapon you’ll want to use often.
You can collect the Tearblaster by completing the Hunting Grounds category of side quests.
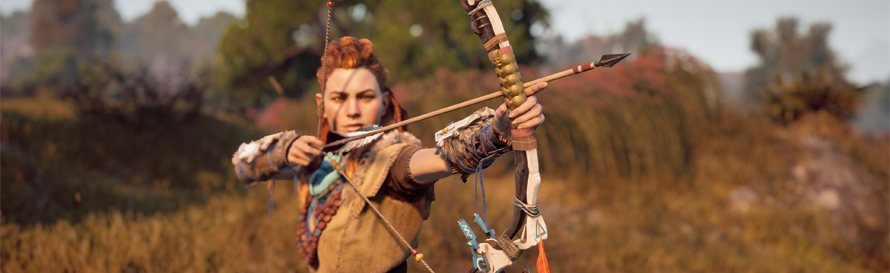
Shadow Hunter Bow
The best version of the bow that Aloy begins with, the Shadow Hunter Bow is utterly essential, to say the least. With a trio of mod slots and a high degree of agility, the Shadow Hunter Bow is an insanely adaptable weapon that is formidable in just about any combat situation.
Further afield, the usefulness of the Shadow Hunter Bow when tackling larger machines also comes to the fore as well. This is thanks in no small part to the additional teardown damage that the Shadow Hunter Bow afflicts on those larger mechanical brutes.
The Shadow Hunter Bow can be bought from the hunter merchant in Meridian.
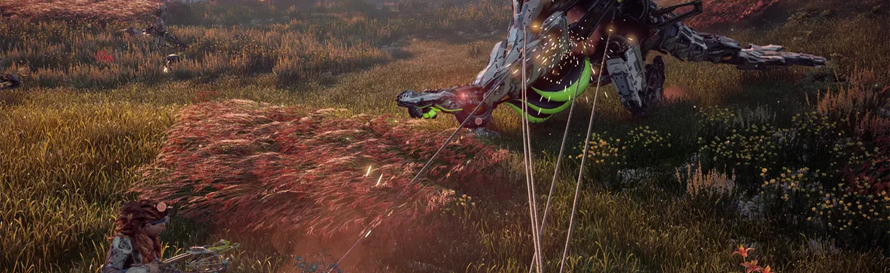
Lodge Ropecaster
Easily the best Ropecaster in Horizon Zero Dawn, the Lodge Ropecaster earns its place largely on account of how efficient it is with ammunition consumption. In addition to requiring fewer materials, the Lodge Ropecaster boasts 70 agility and like the upgraded Shadow Hunter Bow before it also has three slots for the player to fill with additional elemental effects.
Ultimately, such qualities make the Lodge Ropecaster a superb weapon to use against the largest of Horizon Zero Dawn’s machine enemies, not least because you can keep them at range effectively for longer all the while dealing significant damage.
The Lodge Ropecaster is earned by completing the Weapons of the Lodge quest and requires players to earn at least a Full Sun mark in all of the Hunting Grounds Trials of the base game.
Improved Stormslinger
Perhaps the most versatile and overall most powerful weapon in Horizon Zero Dawn, the Improved Stormslinger is a must-have. Capable of firing out tremendously damaging bolts of electricity, the Improved Stormslinger doubles down on its electrical damage by also triggering additional shock damage.
With very little cost and ammo that is readily available, the sum total is a weapon that can destroy with ease and can be deployed against all machines, great and small, with impressive results.
Only available as part of the Horizon Zero Dawn: Frozen Wilds DLC expansion, Aloy must first obtain the standard Stormslinger from Ourea who offers our heroine the weapon from inside the Retreat. Once collected, Aloy can upgrade it to the improved version by completing the Geared Up: Stormslinger quest from Varga in Longnotch.
Othercideis a dynamic turn-based tactical RPG set to allure players into the veins of its ominous and minacious world with invigorating combat and an entrancingly dark and foreboding aesthetic. Developed by ‘Lightbulb Crew’ and published by ‘Focus Home Interactive’, Othercide intertwines rouge-like elements with an enticing and cryptic narrative while at the same time injecting diverse gameplay mechanics and features into every aspect of the game.
Story — are you afraid of the unknown?
The premise of Othercide is one of enrapturing mystery sure to rally lore-hungry players into an overwhelming frenzy as they rush to unearth the underlying story. You will take on the role of ‘The Daughters’; past remnants of the “greatest warrior who ever lived” and stand together as humanity’s last hope against a preternatural force known as the Suffering. Manifestations brought into the inhospitable world from another dimension; derived from crimes which humanity committed against themselves. They now are amalgamations of undeniable horror that prey on the weak and strong alike.
Needless to say, it certainly has captured my intrigue to find out more about the mythos of the world which we will be playing within. The creatures are petrifyingly horrific, all we can do is watch the monochromatic masses move ever-closer towards us as they curdle our flowing blood from the first glance.
Gameplay — Spectacularly Unique
Othercide radically re-imagines the classic traits of the tactical RPG genre and offers players a strikingly bold new experience. Features such as the “dynamic timeline system” shown in the image above forces players to plan their next strategy ahead of time. The combat provides us with a sense of trepidation which grows ever-stronger as we watch the timeline with perturbed eyes as a creature of the Suffering’s action phase is close to commencing. However, certain character moves can push back enemy phases such as a “sealed slam”, likewise, character buffs can even push forward your own units place on the timeline. These mechanics work together tremendously with a unit’s place on the timeline being determined by their initiative stat.
The combat itself is unforgiving and merciless with an adrenaline-inducing difficulty. Failure is a vital part of the cycle as with any failure, knowledge and evolution follow. “Lost” powers will come to fruition when you fail which will allow you to return with newfound strength. Over the course of your time playing Othercide you will be leading your plethora of playable ‘Daughters’ into the bloodthirsty fray around you as the Suffering wreaks havoc on the land. Every Daughter has their own tantalising playstyle both with advantages and disadvantages; working together is a sure-fire way of success. Construct moves which will unleash a devastating chain of abilities against the Suffering. Different abilities and Daughters will keep the experience fresh and exhilarating in every battle. Alas, Othercide throws a new chip on the table because in order to heal one of your Daughters…you will have to sacrifice one of your own. If your favourite character is about to die in agony from the Suffering, you will need to make that burdensome choice.
After every battle, you will earn both “memories” and a form of currency. The currency you earn can be used to ‘birth’ a new daughter but memories, on the other hand, can be used to boost various stats and abilities. Once you have mastered how to deal with the Suffering’s army; boss battles will keep you on your toes as Othercide offers you bosses which are meaningful, frightening, and above all — look to be very enjoyable. The bosses are brutally demanding and your intellect will be put to the test as you work out how best to eliminate them from the field of battle.
Conclusion
Othercideis set to release on the 28th of July for PlayStation 4, PC, and Xbox One. This is certainly a game which you should watch out for this month, with exquisite character design, engaging combat, and a mesmerising art style.
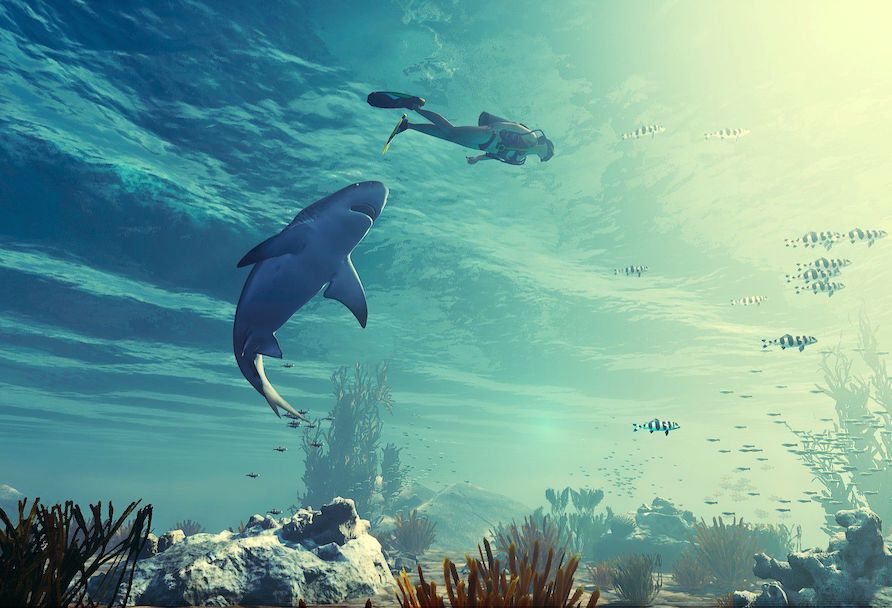
If you were ever obsessed with sharks as a kid, you’ve most likely wanted to see what it’s like to trawl the briny deep in search of prey. Luckily, now you’re an adult, you can play Maneater, Tripwire Interactive’s in-depth shark simulator which is as aloof as it is exciting.
The game is out now and you can pick it up on PC, PlayStation 4, Xbox One or Nintendo Switch and live out your underwater fantasies. Throughout the game, you’ll evolve from a tiny shark into well, a Maneater!
In this guide, we’re going to show you how that works, and what each evolution entails. Here’s every evolution in Maneater, and how to unlock them.
How To Evolve Your Shark In Maneater
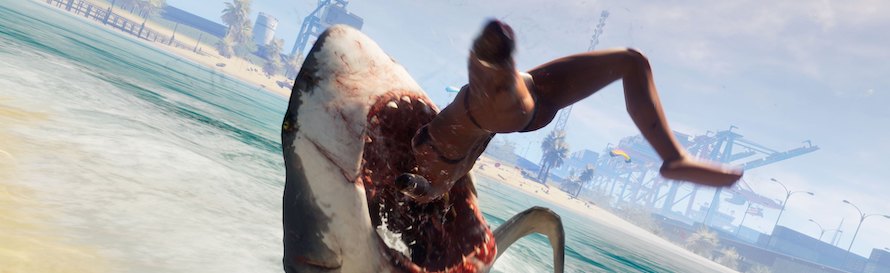
You’ll start Maneater as a baby shark, and grow to become an apex predator. This process is one of the most important parts of the game and constitutes your main objective as you play through the narrative.
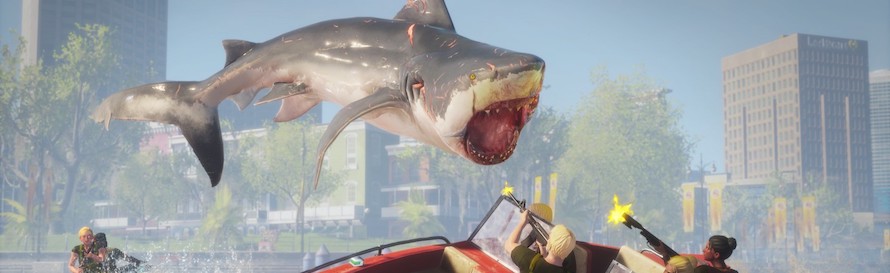
Completing objectives and eating others in Maneater will increase your level, which in turn will increase your size. As you grow in size, you’ll be able to leap out of the water higher and survive more hits before death – you’ll also deal more damage and earn new abilities to help you take down more developed enemies, like mid-air lunges.
You can also evolve different parts of your shark throughout Maneater, including the Jaw, Head, Fins, Tail, Body and Organs – think of these evolutions like the special gear you equip in shared-world shooters. You unlock them by luring and killing the apex predators in specific areas, finding secrets and completing objectives. The gear will give you buffs to your damage and armour, among other statistical elements. Some equipment will increase the nutrients you receive from killing and eating prey – make sure these are equipped if you want to level up quickly and increase in size with greater efficiency.
Every Shark Evolution In Maneater
Pup Shark – You start the game as a pup, so don’t worry too much about this one. Keep progressing through the first three levels to get past this introductory section.
Teen Shark – At level 4, you’ll become a teenager and earn a new double jump ability as well as achieving greater lung capacity (sounds about right!)
Adult Shark – At level 10, you’ll evolve into an adult shark, so head back to The Grotto (your shark home, which you should be familiar with by now!) to undergo some important changes and level up.
Elder Shark – At Level 20, you’ll evolve into an elderly shark and receive a number of buffs – you’ll also be able to break down new gates in the environment. Turns out you can teach an old shark new tricks…
Mega Shark – At Level 30, you’ll become a Mega Shark and hit the endgame. This is the level cap in Maneater, but feel free to keep chomping away, customising your equipment and building your very own custom apex predator as you see fit.
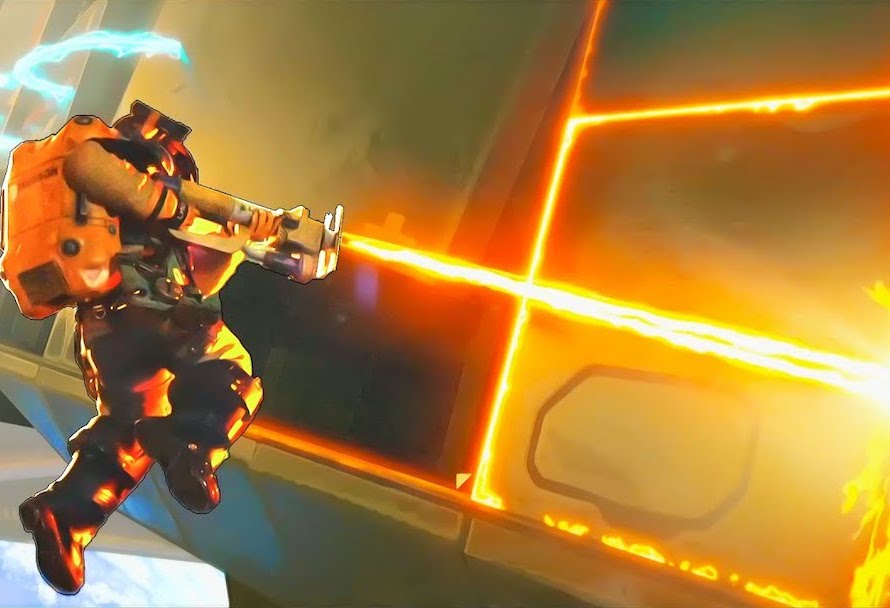
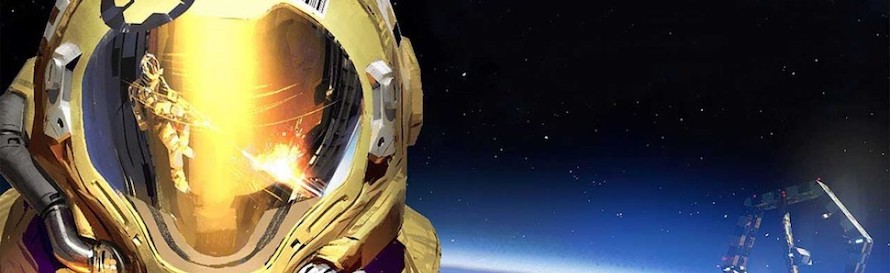
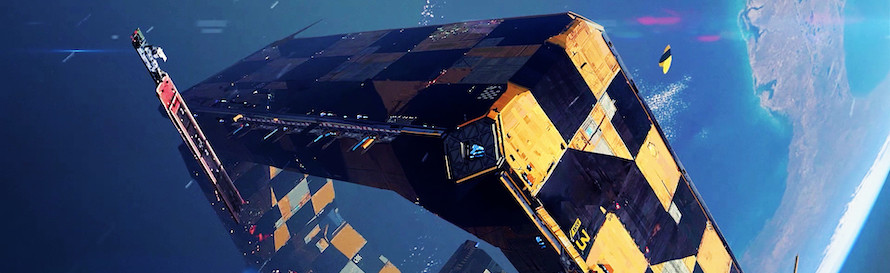
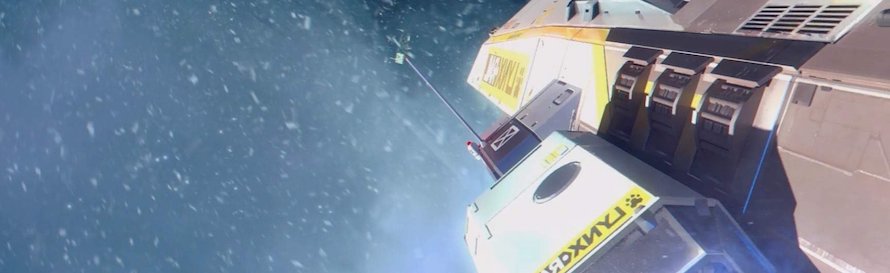
You’ve decided to embark on a career of ship salvaging by joining the galaxies-leading salvage corporation. But you don’t know your spanners from your sprocket wrench. In Hardspace: Shipbreaker you’re going to need to learn how to manoeuvre through zero g environments, maintain, upgrade and repair tools. As well as, understanding the risks involved in dismantling ships full of potentially hazardous items all whilst navigating a zero g environment with next generation physics simulation. Don’t worry, we’ve got you covered with some tips on getting your career started.
What is Hardspace: Shipbreaker?
Released in early access in mid June, Hardspace: Shipbreaker is a game all about dismantling spaceships floating around in the endless void of space. You’ll be purchasing salvaging rights to be able to get into the belly of these ships, take them apart and sell anything worth a dime. Equipped with the best LYNX tech, slice and dice all the valuable items from within the ships. You’re going to have to work pretty hard to pay off your debts to LYNX corp as right from the off your debt amounts to 999,999,999 Credits… Better get to work.
Plan Your Work
You’re going to need to learn the best methods for how to salvage in Hardscape Shipbreaker. One thing that will help you is planning your work. Don’t just start using your Cutter with reckless abandon otherwise you could end up ruining some precious salvage.
Your high powered Cutter Tool will be your main item for breaking up ships. The Stinger head mount will mainly be used for making precision cuts and is useful for melting structural points. Whilst the Split Sawhead mount is used for making wide sweeping cuts and breaking down large objects into more manageable chunks.
Be careful whilst you work though, as your Cutter Tool could easily ignite hazardous materials within structures and therefore damaging salvageable items. Make sure you know what you’re cutting! You might go through some trial and error whilst you learn, but it won’t be long before you’ve mastered the ways of Hardspace: Shipbreaker and how to salvage.
Zero G Life
Working in Zero G conditions can be a little daunting so it’s good to get acclimated to the tools that will help you get around the ships whilst carrying out your contracts.
You have access to a Grapple Tool, this is the perfect equipment for moving heavy objects out of your way or, should you need, pulling them closer to you. Your gloves are also fitted with magnets. These magnets are perfect for helping you grab onto objects or walls and will help stabilize yourself in this weightless environment. The magnetic gloves are also useful for cushioning your impact with any objects.
Upgrading your tools is something that will prove invaluable to securing higher profits. The Grapple Tool can be upgraded with a Tethering function that allows you to link two objects together and moving multiple things at once. Use them wisely however, as Tethers aren’t free! Objects in Hardspace: Shipbreaker all act with next generation physics and will cause damage to other objects they collide with and can in some cases cause death if you get hit too hard.
Maintaining your Tools
Life as a salvager can take its toll on not only yourself, but also your equipment. WIth all these contracts you’re completing you’ll need to learn in Hardspace: Shipbreakerhow to repair tools.
You can access the shop terminal and here you will be able to purchase repair kits amongst other things. Additionally, whilst working make sure to keep an eye out for useful consumables hiding within the ships. Fuel canisters, oxygen tanks and repair kits can all be found tucked away. Whilst fuel canisters and oxygen tanks are instantly consumed upon pick up, the repair kits will be added to your supply for use when they’re more needed.
Atmosphere and Elements
Space is a harsh and dangerous place and that’s no different in Hardspace: Shipbreaker. Learning how to handle and, in some cases, make use of the elements will be an important part of your career.
The ships you’ll be working on will have a power cell or generator of some kind. Removing these will shut down many of the ship’s systems. Removing the power cell from its protective casing will also cause it to emit electricity. We don’t need to tell you that electricity is dangerous. However, be aware that this electricity could damage other objects on the ship. Handle the power with care.
There will be various pipes you’ll encounter on ships. Some will be fuel pipes, whilst others could be carrying coolant. If you can find a way to remove the fuel from sections of pipe by isolating pipes with the right valves then you can safely flush those pipes and remove them. Fuel can and will leak at times that fuel can easily be ignited either in a controlled way or uncontrolled. Try to avoid the latter.
Coolant pipes have the ability to create flash freezes. Used in the correct way they can help you quickly break through a wall with the risk of starting a fire. But, that also means things can go wrong. Like fuel pipes, coolant pipes can also be flushed out with the use of valves to make them safe for cutting.
Whilst there might be no atmosphere in space, some ships can still contain pressurised areas sealed off from the vacuumless space. Depressurisation events can be devastating to your work. Not only could this result in explosive chain reactions, you could also lose valuable items to the dark emptiness of space. Making use of an atmospheric regulator and warnings on your HUD will help you to avoid disaster.
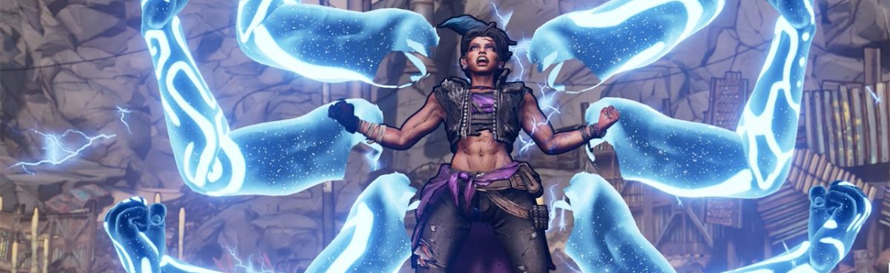
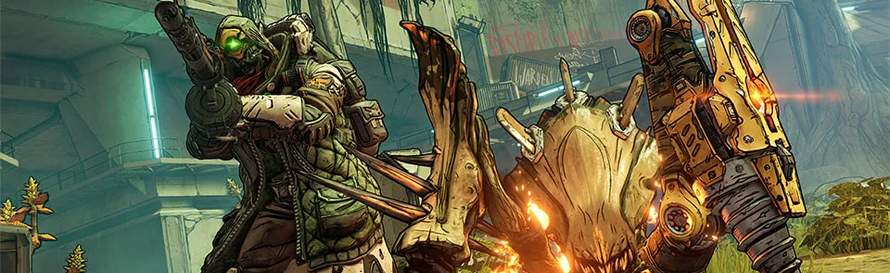
Easily the most powerful items in the game, in Borderlands 3 the legendary gear that you can collect is simply must-have stuff for blasting your way through the opposition. However, there are a great many of them and so to help you keep track of all the Borderlands 3 legendaries we’ve made this handy list, letting you know how to get them. Onward!
Borderlands 3 Legendary List Locations – All Specific Drops And How To Get Them
These Borderlands 3 legendaries can only be found by defeating specific foes or completing specific missions and luckily for you, we’ve got the whole list below.
Borderlands 3 Legendary Assault Rifles
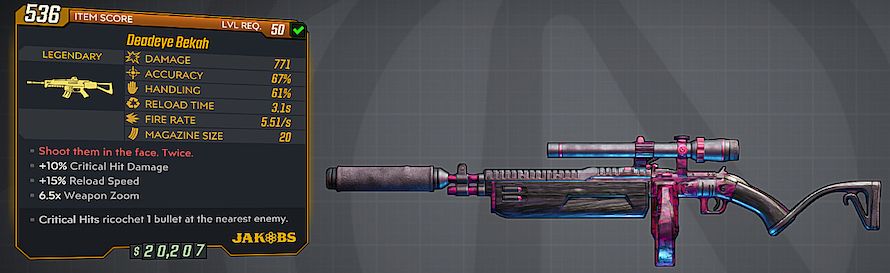
Bekah (Shots split into a trio of projectiles) – Obtained by completing 100% of Hammerlock Challenges
Hand of Glory (Has a melee add-on, has staggered burst-fire) – Obtained by completing the quest The Guns of Reliance
Lead Sprinkler (Body shots cause an explosive round to ricochet. Headshots create three) – Will drop from Billy, the Anointed in Jakob’s Estate (Eden-6).
Borderlands 3 Legendary Heavy Weapons
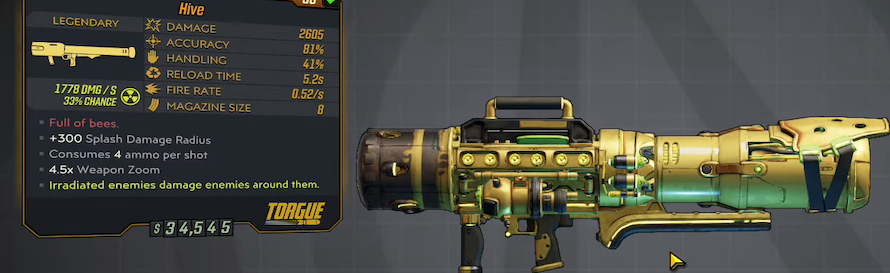
Hive (Shots move slow and then fire small homing rockets) – Will drop from Princess Tarantella II in The Splinterlands on Pandora.
Stuffed Quadomizer (Fires a quartet of rockets that shift between elements) – Will drop from The Rampager in The Forgotten Basilica on Promethea.
Borderlands 3 Legendary Pistols
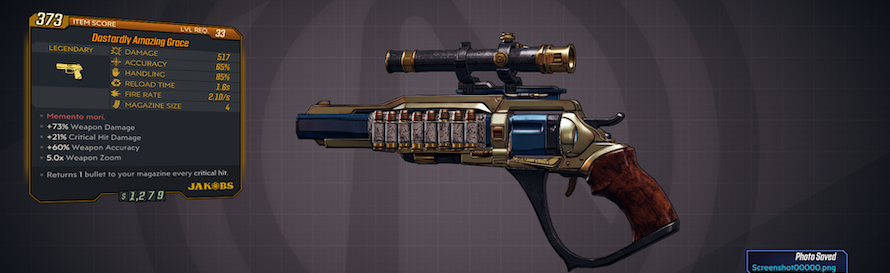
Amazing Grace (Critical hits will return a bullet to mag clip. High damage) – Quest reward for completing Life of the Party.
King’s/Queen’s Call (Critical shots cause three bullet ricochets) – Quest reward for defeating Tyreen the Destroyer and completing the Divine Retribution quest.
Linc (Has extremely fast projectile speed and fire rate) – Will drop from the Anointed Alpha in The Anvil on Eden-6.
Night Flyer (Extremely high damage, will never kill an enemy because damage will cease at 1HP of enemy health) – Will drop from I’m Rakkman in his hidden rakk cave in southwest Carnivora.
Occultist (Fires one round that surrounds itself with many extra incendiary and explosive projectiles) – Increased chance to drop from Troy Calypso in The Great Vault on Pandora.
Pestilence (Has an extremely high rate of fire) – Will drop from Hyde/Heckle in the Jakobs Estate on Eden-6. Atomic in Tazendeer Ruins on Nekrotafeyo also drops Pestilence when defeated.
Psycho Stabber (Provides +125% melee damage boost) – Will drop from Borman Nates in Meridian Outskirts on Promethea.
S3RV-80S-Execute+ (If the gun is thrown and hits enemies, those enemies take increased damage with stacking effect) – Will drop from Captain Traunt on Athenas with Mayhem Mode 4 active.
Sellout (Shoots a laser that orb explodes but which also damages the wielder) – Obtained by completing the quest Sell Out in Ambermire. Players must (you guessed it), kill themselves in order to obtain the weapon as a ‘reward’.
SkekSil (Sometimes shots fire out two extra rockets) – Will drop from Skrakk in Ascension Bluff on Pandora.
Borderlands 3 Legendary Shotguns
Creeping Death (Shots home towards the foe after gun is thrown) – Will drop from Mother of Grogans in The Anvil.
Fearmonger (Fires four shots that stick and explode) – Will drop from Captain Haunt in Heck.
Mind-Killer (Very quick recharge. Scoped shots reduces spread) – Will drop from Mouth Piece in Ascension Bluff on Pandora.
Nimble Jack (One shot before reloading with tight spread) – Drops from handsome Jackie on Skywell-27.
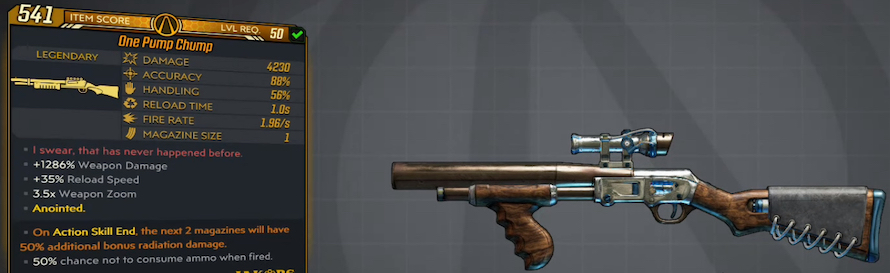
One Pump Chump (Extreme damage. Single clip mag. Chance to not use ammo per shot) – High chance to drop from One Punch in Lectra City on Promethea.
Phebert (Has increased damage, hitscan and uses two ammo per shot) – Drops from Wick and Warty in Lectra City on Promethea.
Redline (Charging gun increases fire rate as does sticky mode) – Drops from Road Dog in The Splinterlands on Pandora.
The Horizon (If thrown, this gun can be shot to create a singularity which results in a massive explosion) – Increased chance to drop from Maxitrillion in Voracious Canopy.
The Garcia (Larger mag size) – Increased chance to drop from Chonk Stomp in Floodmoor Basin on Eden-6.
Vosk’s Deathgrip (Shoots projectiles that create beams of the gun’s element. Alt fire mode shoots a disk that spawns a singularity) – Will drop from either Troy Calypso in The Great Vault on Pandora, or from the Valkyrie Squad and Wotan the Invincible in Midnight’s Calm when Mayhem Mode 4 is being used.
Borderlands 3 Legendary SMGs
9-Volt (Fires a triangle of Shock rounds) – Will drop from Killavolt in Promethea: Lectra City)
Bankrolled Predatory Lending (Uses money instead of ammo at a rate of $1-$3 per shot) – Will drop from Lavender Crawly via Crew Challenge.
Cloud Kill (High fire rate and creates corrosive clouds on impact) – Obtained by completing the quest Beneath the Meridian.
Hellfire (High incendiary damage and fire rate) – Will drop from Jabbermogwai in Voracious Canopy on Eden-6. Will ONLY drop when killed with incendiary damage on True Vault Hunter Mode or Mayhem Mode.
Smart Gun XXL (Weapon throw on reload creates a Gigamind spider turret..) – Will drop from Gigamind in Meridian Metroplex on Promethea.
Tsunami (Fires random mix of Shock and Corrosive shots.Normal rounds will ricochet once). – Has a high chance to drop from Katagawa Ball on Skywell-27.
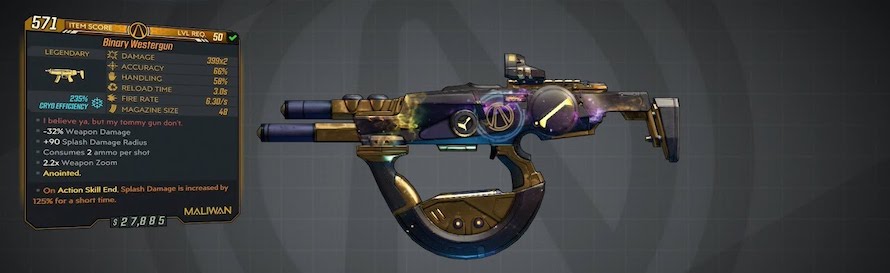
Westergun (No recharge timer, inflicts reduced splash damage over a greater radius) – Has an increased chance to drop from Private Beans at Dido’s Remorse cemetery in Athenas.
Borderlands 3 Legendary Sniper Rifles
Crossbow (Mags contain one shot. Bolts explode) – Will drop from Urist McEnforcer in Lectra City on Promethea.
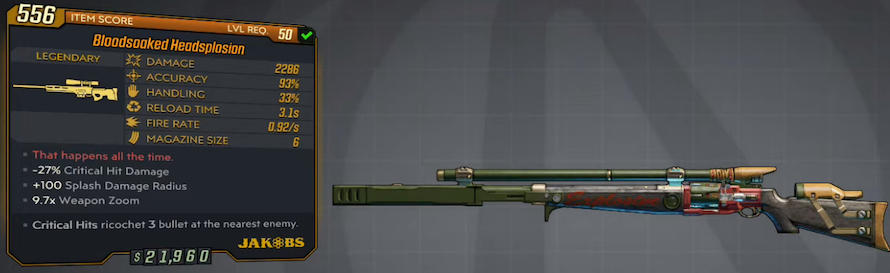
Headsplosion (Shoots explosive ammo. Critical hits cause three rounds to ricochet) – Will drop from Manvark on Pandora via Crew Challenge.
Tankman’s Shield (Each kill increases the damage dealt by the ammo in the next mag clip) – Will drop from Captain Traunt on Athenas, or from the Valkyrie Squad and Wotan the Invincible in Midnight’s Calm when Mayhem Mode 4 is being used.
And we’re done. These are all of the Borderlands 3 legendary weapons that you can get from either killing targeted enemies, or for completing special quests. We hope you’ve found this guide useful in your ongoing quest to seek out the best legendary weapons in Borderlands 3!
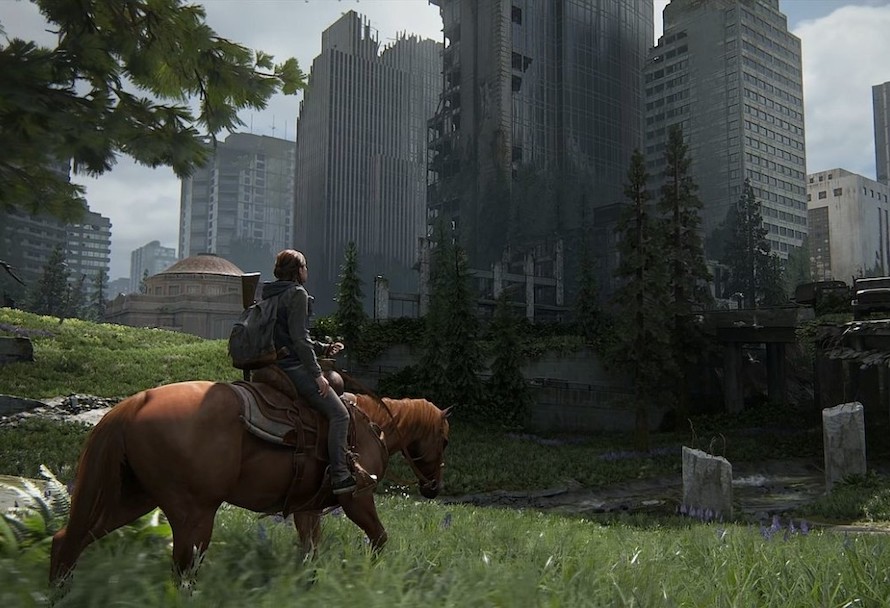
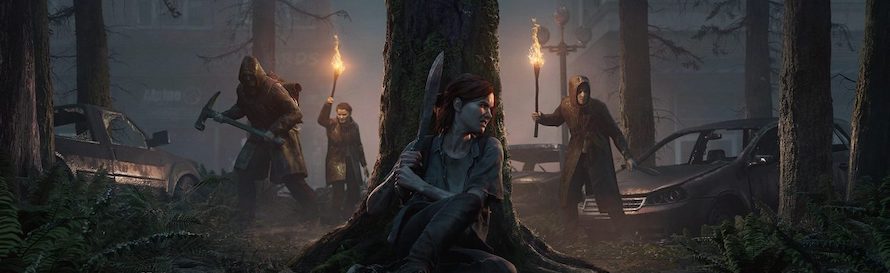
After years of anticipation, The Last of Us Part 2 has finally arrived. Fans of the 2013 original have been eagerly awaiting the next chapter of Ellie’s journey, and now it’s here, offering a meaty chunk of content and a deeply emotional story. But just how long is the game, exactly? Whether you’re about to dive in or still wondering if you’re ready to commit, this article breaks down the game’s length and provides a chapter guide to help you know what to expect.
The Length of The Last of Us Part 2
The Last of Us Part 2 is a substantial game, and it’ll certainly keep you busy for quite a while. The story takes you across post-apocalyptic America, with memorable stops in places like Wyoming and Seattle, among others. For me, it took around 30 hours to finish the game, but I was being thorough, combing through every corner for collectables and secrets.
On average, you can expect the main story to take around 20 to 25 hours, depending on your playstyle. If you’re not concerned about finding all the collectables or reading every note left by survivors, you could finish in that range. However, if you’re aiming for trophies or want to explore everything the game has to offer, expect to spend a bit longer. Scouring the maps for hidden items will reward you with plenty of in-game bonuses, so it’s definitely worth the effort.
How Many Chapters Are In The Last of Us Part 2
With so many twists and turns in the story, you might find yourself wondering just how much longer you have before The Last of Us Part 2 wraps up. The game’s gripping narrative will keep you hooked, but it’s still nice to have an idea of how much is left to go.
Before we dive into the chapter breakdown, a quick spoiler warning: the following list contains chapter names that give away significant plot details. If you’re early in the game and want to avoid spoilers, it’s best to skip this section.
Chapter Breakdown
Jackson
Prologue
Waking Up
The Overlook
Patrol
The Horde
The Chalet
Packing Up
Seattle Day 1
The Gate
Downtown
Eastbrook Elementary
Capitol Hill
Channel 13
The Tunnels
The Theatre
The Birthday Gift
Seattle Day 2
Hillcrest
Finding Strings
The Seraphites
St. Mary’s Hospital
Seattle Day 3
Road to the Aquarium
The Flooded City
Infiltration
The Park
Tracking Lesson
The Stadium
On Foot
The Forward Base
The Aquarium
Hostile Territory
Winter Visit
The Forest
The Coast
Return to the Coast
Santa Barbara
2425 Constance
Pushing Inland
The Resort
The Beach
The Farm
Epilogue
The Last of Us Part 2 offers a deeply immersive experience, with the length of the story making it worth the time investment. Whether you focus purely on the narrative or dive into the game’s hidden secrets, you’ll get a substantial amount of content. The chapter list gives you a general idea of the progression, but remember, there are plenty of twists ahead. So, enjoy the ride – and be prepared for a few surprises along the way.
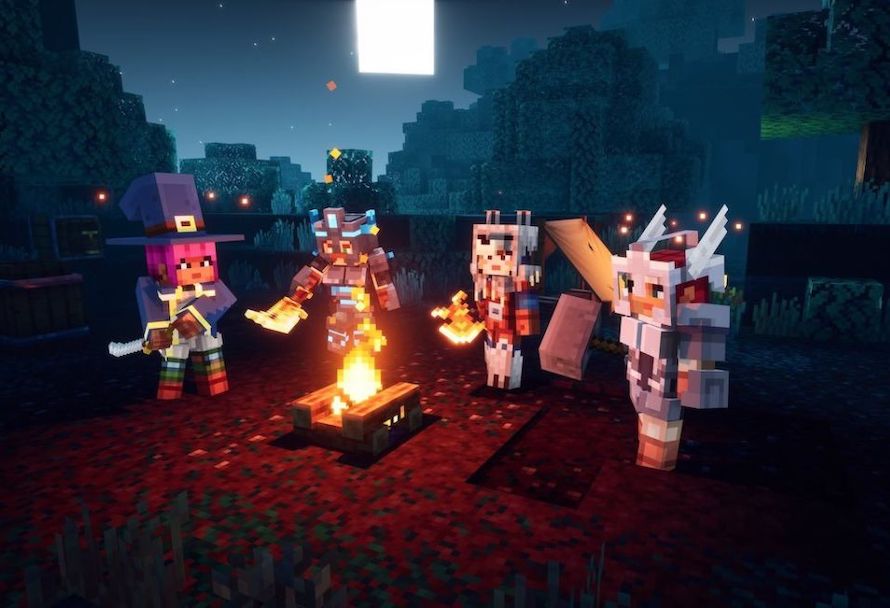
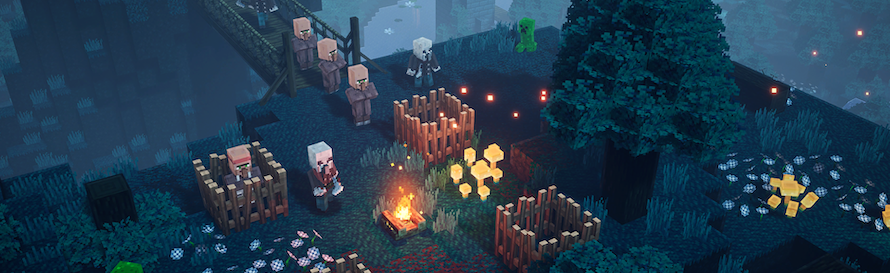
Even though Minecraft Dungeons might seem like a fairly straightforward hack and slash effort on the surface, there are a number of secret levels, nooks and crannies that all help to provide the game with much more depth than one might initially assume. With that in mind then, we’ll be looking at Minecraft Dungeons secret levels and other hidden areas to help you get the most out of Mojang’s monster-bopping Minecraft spin-off.
How To Find The Creepy Crypt
Discovered in the Creeper Woods story mission, the Creepy Crypt is actually pretty easy to find. Once you’ve saved the poor, hapless country bumpkin during the mission, there will be a path which will snake around to the left. Follow this path to its end and at that point you will discover a massive temple structure. Here, simply press the button on the right side of the entrance door (it’s near the ground) in order to open it.
Once inside, don’t forget to make sure that you interact with the shiny on-screen map otherwise the Creepy Crypt secret level will not unlock. It’s also worth noting that all secret levels are added to your main mission map, allowing you to access them at any time after you’ve unlocked them.
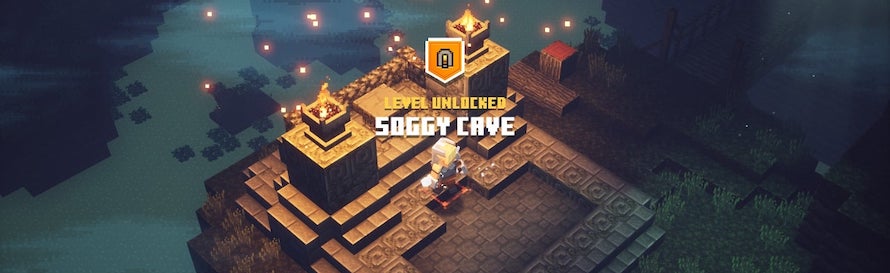
How To Find The Soggy Cave
Soggy Cave is the secret level that is found in the Soggy Swamp, however, it is one of the more frustrating secret levels to find as there is a fair amount of luck involved as to whether or not you can actually access it. This means that you’ll likely have to replay the level a fair few times even after following the instructions below.
Assuming that Lady Luck is smiling upon you, to access the Soggy Cave you need to progress past the supply zone in the Soggy Swamp. If the secret has activated, the main path will branch off and lead to an all-new cave just before the Corrupted Cauldron boss of the Soggy Swamp. To unlock the Soggy Cave secret level, simply waltz in, flick the switch and loot the map.
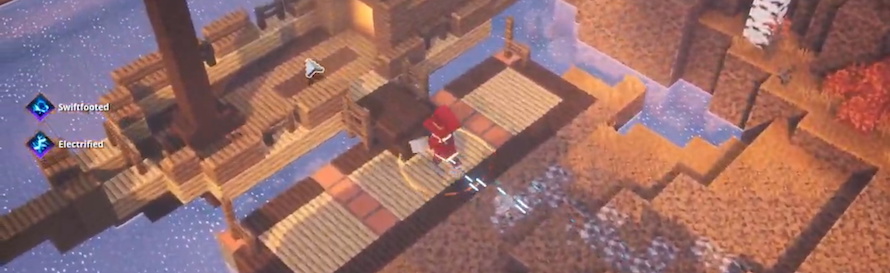
How To Find The Arch Haven
Arguably the most interesting of Minecraft Dungeons Pumpkin Pasture secrets has to be its hidden Arch Haven secret level. However, like both the Soggy Cave and the Lower Temple secret levels, the Arch Haven doesn’t always appear so prepare yourself for multiple playthroughs of Pumpkin Pastures.
The method for finding the Arch Haven secret level (assuming you’re on the right side of the RNG equation), is that you should see a winding path next to the side of a towering fort in the first half of the level. Following this path will lead you to a pirate ship whereupon you must descend to the lower decks and defeat all the monsters there in order to loot the map which will unlock the Arch Haven secret level.
A word of warning though – if you’re struggling mightily to trigger the pirate ship to spawn, don’t be disheartened. Many players have cited the fact that it takes multiple hours for it to happen, so if you’re determined to find it, you might need to set aside a hefty amount of time (and patience) to get the job done.
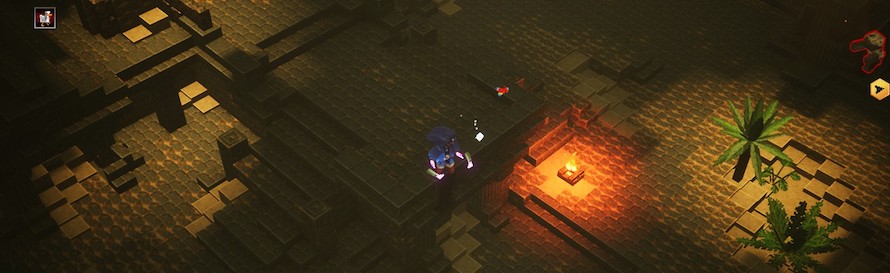
How To Find The Lower Temple
Another one of those annoying random secrets that doesn’t always appear, the Lower Temple secret level can be found in the Desert Temple mission; assuming you’ve been lucky enough to trigger it in the first place.
If you are lucky enough, the method for accessing the Lower Temple secret level is pretty straightforward. Once you’ve found the door which can only be unlocked with the golden key, you then need to cut into the next room where you’ll discover a trio of switches. Simply flick them all and the drawbridge will raise, allowing you to nab the map that will in turn allow you to access the Lower Temple secret level.
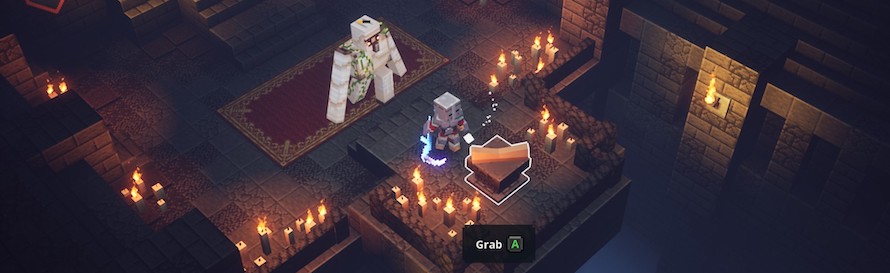
How To Find The Underhalls
No more random secret-level triggers! Located right at the start of the Highblock Halls mission, all you need to do is make your way down the massive staircase until you discover a wall that has a pair of shields mounted upon it. Simply interact with one of the shields and then a secret door will open with the Underhalls map inside.
Once looted, simply interact with the map and access to the Underhalls secret level is all yours.
How To Find The ??? Level
Possibly the trickiest of all the Minecraft Dungeons secret levels in terms of access, to find the ??? level in the game, you need to make sure that you have all nine of the runes from each of the main missions.
Once all nine runes have been collected, you’ll need to return to the Camp Hub World and proceed past the house located in the southeast. If you wandered over there previously, you might have noticed a massive chasm that prevented access to the other side. Now, however, there are numerous springs that allow you safe passage past it.
When you reach the other side, cut between the pair of pillars and then take a left between a patch of trees which should take you down a hidden path. Keep following the path until you come upon a big church which you should immediately enter.
Once inside, proceed to the farthest end of the building and you should see some sort of button with a series of inscriptions above it that match the runes you have. Assuming you do have all the runes, pressing this button will then activate a door which will in turn provide you with the map for the secret ‘???’ level – a charming take on the cow-level secret area that Blizzard’s Diablo titles have long been synonymous with.
After the map has been used, the ??? level will be accessible from your mission selection map in much the same way as the other secret levels are in this guide.
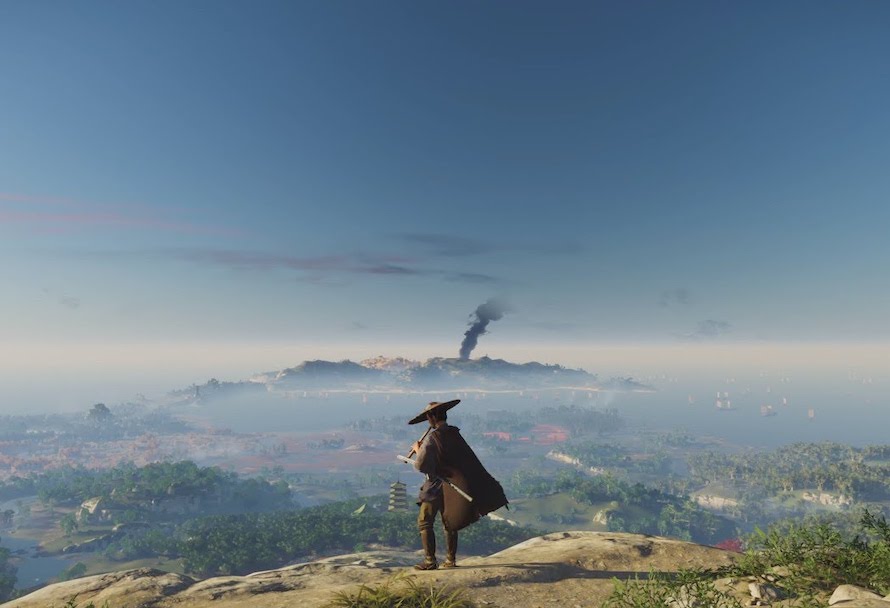
A sprawling open world action adventure that encompasses the entirety of the real world Japanese island of Tsushima, Ghost of Tsushima unfolds across three acts. In total size, Ghost of Tsushima is perhaps more closely comparable to a similar open world effort such as Far Cry 5. More than just a framework for the story, each act essentially unlocks a section of the island for players to romp around in and it’s those smaller sections of the Ghost of Tsushima map that we’re going to focus on in this guide.
Ghost of Tsushima Map – Izuhara
Encompassing the southern portion of Tsushima Island, Izuhara is easily the largest area in the game. Home to the largest number of Mongol fortifications and outposts, Izuhara also provides shelter to the repressed peoples of the island in the towering Golden Temple structure located in the center of the map.
Permeated by lush farmland and an extensive rocky coast surrounded by smaller outcroppings, Izuhara is where our protagonist Jin Sakai begins his long journey of vengeance to unseat the Mongol forces that have murdered his family and brought dishonour to his clan.
The areas that exist in the Izhuara domain are Azamo, Tsutsu, Komatsu, Ariake, Kashine, Komoda and Hiyoshi – the latter of which provides a passage to the north of Tsushima Island.
There are 24 enemy outposts and strongholds in total within Izuhara that can be liberated.
Ghost of Tsushima Map – Toyotama
An expansive but relatively narrow strip of land that includes the joint smuggling ports of Otsuna and Umugi, Toyotama is the second largest map in the game. Home to the massive Kushi Temple and the Mongol occupied fortress in Kubara, Toyotama represents the map that Jin will venture through and explore during the second act of Ghost of Tsushima.
In addition to providing a base for Shimura Castle, Toyotama also gives a refuge to the brave fighters of Yarikawa; a long lineage of proud villagers and farmers who clashed with the leaders of the Shimura clan which previously governed Tsushima island. The areas that can be found within the domain of Toyotama include Akashima, Umugi, Yarikawa, Otsuni, Kuishi and Kubara which provides a gateway to the northern tip of Tsushima Island.
There are 17 enemy outposts and strongholds in total within Toyotama that can be liberated from the Mongol forces.
Ghost of Tsushima Map – Kamigata
The furthermost northern peak of Tsushima Island, the snow-blotted countryside and frigid peaks of Kamigata are called home by not just the strongest fighters in the Mongol army, but also by the Khan himself.
A patchwork of decimated farmsteads and towns reduced to ash, Kamigata is the final area in the game and is the primary focus of Ghost of Tsushima’s third act. By far the smallest map in Ghost of Tsushima, the domain of Kamigata encompasses Kin, Sago, Jogaku and Izumi Bay; the staging area from where the Mongol fleet will attempt to lay siege to the Japanese mainland.
There are 15 enemy outposts and strongholds in total within Kamigata that can be liberated.
When it comes to the Borderlands 3 best character builds we have your back. Though having more weapons than you can count obviously helps, it’s only when you properly optimise the skill trees for your Borderlands 3 character builds that you can properly fill out the roles needed to succeed at Borderlands 3 super tough endgame. To that end we’ve got some of the best Borderlands 3 builds below to get you prepped for the game’s hardest challenges.
Best Borderlands 3 Moze Builds
Boss Destroyer Build
An absolutely outstanding tanking build for both withstanding bosses and also laying waste to them, this Borderlands 3 Moze build is predicated around being able to soak up huge amounts of damage through shielding and health regeneration, while additional damage buffs to her Iron Bear mech allow her to deal out substantial damage too.
This is the Moze build you want for tangling with Borderlands 3 stronger bosses.
To use this build the following augments and action skills are required:
Capacitive Armature (Shield of Retribution tier 3 skill)
Let Off Some Steam (Bottomless Mags tier 2 skill)
Minigun (Bottomless Mags starting skill)
Railgun (Shield of Retribution starting skill)
For this build to function properly, the following skill points are needed from the following skill tree categories:
Bottomless Mags
Dakka Bear (ALL)
Cloud Of Lead (4 points)
Scrappy (ALL)
Rushin’ Offensive (ALL)
Scorching RPM’s (ALL)
Demolition Woman
Deadlines (ALL)
Grizzled (2 points)
Shield of Retribution
Security Bear (ALL)
Armored Infantry (ALL)
Thin Red Line (ALL)
Vladof Ingenuity (ALL)
Experimental Munitions (ALL)
Full Can Of Whoop-Ass (ALL)
Behind The Iron Curtain (ALL)
Desperate Measures (ALL)
Phalanx Doctrine (3 points)
Force Feedback (ALL)
Tenacious Defense (ALL)
Moze Massive Splash Damage Build
A Moze build that has a laser-like focus on doing as much damage as possible to as many enemies as possible, the Moze splash damage build is all about that grenade splash damage and area of effect collateral damage. Like blowing (lots of) stuff up and dealing ungodly amounts of damage in the process? This is absolutely the build for you (trust me – your friends will thank you for it).
To use this build the following augments and action skills are required:
Vanquisher Rocket Pod (Demolition Woman tier 2 skill)
For this build to function properly, the following skill points are needed from the following skill tree categories:
Bottomless Mags
Cloud of Lead (ALL)
Matched Set (1 point)
Stroke the Embers (ALL)
Redistribution (ALL)
Scorching RPM’s (ALL)
The Iron Bank (2 points)
Specialist Bear (ALL)
Demolition Woman
Fire in the Skag Den (ALL)
Torque Cross-Promotion (ALL)
Stainless Steel Bear (2 points)
Pull the Holy Pin (ALL)
Vampyr (ALL)
Why Can’t I Carry All These Grenades? (ALL)
To the Last (ALL)
Explosive Punctuation (ALL)
Short Fuse (ALL)
Best Borderlands 3 Amara Builds
Amara Shockra Build
A beautifully balanced build that focuses on eye-watering elemental damage and debilitating status effects, Amara’s Shockra build is a brutally efficient configuration that cements her as a top damage player in any group against weaker mobs and stronger bosses alike.
To use this build the following augments and action skills are required:
Deliverance (Mystical Assault tier 3 skill)
Shockra (Default Elemental Affinity)
Soul Sap (Mystical Assault tier 2 skill)
For this build to function properly, the following skill points are needed from the following skill tree categories:
Fist of the Elements
Anima (ALL)
Tempest (ALL)
Wildfire (ALL)
Indiscriminate (ALL)
Deep Well (ALL)
Mystical Assault
Do Harm (ALL)
Violent Tapestry (ALL)
Restless (ALL)
Ascendant (ALL)
From Rest (ALL)
Wrath (ALL)
Remnant (ALL)
Awakening (ALL)
Avatar (ALL)
Best Borderlands 3 Zane Builds
Zane Grenadier Clone Build
A fantastic build that makes the most of Zane’s unique talent for being in multiple places at once, the grenadier clone build allows Zane to deal high amounts of damage in multiple places on the battlefield at once. More than that, passive skills like Binary System allow Zane to replace himself with a digi-clone which provides a great deal of flexibility whilst allowing him to escape the throes of battle if it all gets a little too much.
To use this build the following augments and action skills are required:
Binary System (Doubled Agent tier 2 skill)
Bad Dose (Hitman tier 3 skill)
Digi-Clone (Doubled Agent starting skill)
Schadenfreude (Doubled Agent tier 3 skill)
SNTNL (Hitman starting skill)
Static Field (Hitman tier 3 skill)
For this build to function properly, the following skill points are needed from the following skill tree categories:
Doubled Agents
Synchronicity (ALL)
Borrowed Time (ALL)
Duct Tape Mod (ALL)
Fractural Frags (ALL)
Donnybrook (ALL)
Quick Breather (ALL)
Old-U (ALL)
Supersonic Man (ALL)
Trick of the Light (ALL)
Boom. Enhance. (ALL)
Double Barrel (ALL)
Hitman
Violent Speed (ALL)
Violent Momentum (ALL)
Drone Delivery (ALL)
Death Follows Close (ALL)
Best Borderlands 3 FL4K Builds
FL4K Tank & High Damage Pet Build
Allowing FL4K to become an extremely capable tank whilst also maximising the damage of their pet, this build is centered around not only permitting both FL4K and their pet high amounts of damage against all types of enemies, but also in fortifying their health for the long haul. In short, if you want a build for FL4K that gives you the best of worlds in damage and survivability, then this is it.
To use this build the following augments and action skills are required:
Gamma Burst (Master starting skill)
Atomic Aroma (Master tier 2 skill)
Endurance (Master tier 4 skill)
For this build to function properly, the following skill points are needed from the following skill tree categories:
In Red Dead Redemption 2 there is no better way to get around the place than your trusty steed. However, in Red Dead Redemption 2 not all horses are created equally, so we’ve knocked up this handy little guide to make sure that you get the best horse available.
Stats & Horse Ranks
It’s not unreasonable to say that in Red Dead Redemption 2 not every horse is created equally. Luckily, there are four main stats which let you know just how good (or not) your chosen horse happens to be and these are health, stamina, acceleration and speed.
Though such stats are self-explanatory, what is a little less clear is just which horses possess low or high ratings in each regard. To address this, all the horses in Red Dead Redemption 2 fall into one of six fairly broad ranked categories, into which the better ranked horses have superior stats to those of a lesser rank.
The Red Dead Redemption 2 horse ranks are ranked from best to worst thusly:
Superior – Monstrously capable, superior horses possess high stamina, speed, health and acceleration stats and are considered to be the best steeds in Red Dead Redemption 2.
Race – Trained with the thrill of the chase in mind, race horses possess poor stamina and health but predictably excel elsewhere with high acceleration and speed.
Draft – The all-rounder, draft horses possess middle of the road acceleration, health, stamina and speed.
Work – Though the trusty work horse has poor acceleration, it gives a better account for itself in other areas, with middling speed and health and high stamina.
War – Built for the long haul, war horses boast high health and stamina which makes them great for that, burt disappointingly low speed and acceleration which make them a poor choice for chasing others.
Riding – The most common type of horse in Red Dead Redemption 2, these horses are deemed to have poor health, stamina, acceleration and speed stats. A last resort, to put it mildly.
How To Get The Best Horse
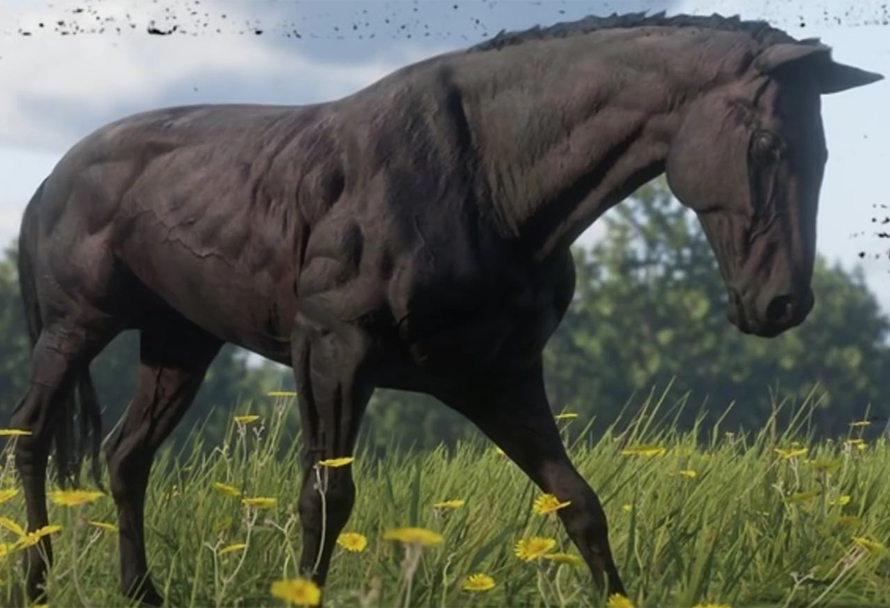
In Red Redemption 2 the best horses are those with superior stats, as we’ve seen. However, there is only one type of steed that possesses those extremely high stats – the Arabian horse.
Available in three different coat colour types, with the very best of the Arabian’s being the rose grey bay coated variant, here are the locations where these top of the line horses can be found:
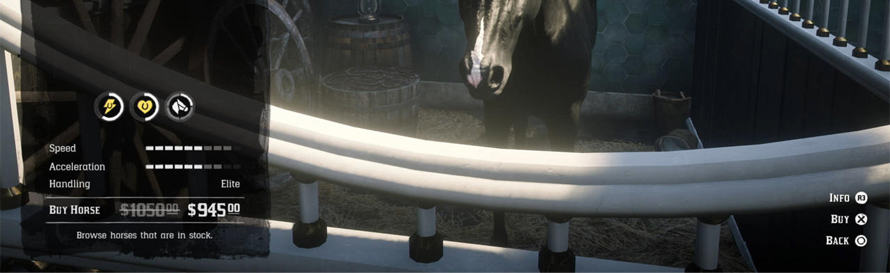
Black Arabian horse location – This grand obsidian beast can be found in the Saint Denis Stable. This horse costs $1,050 to purchase.
White Arabian horse location – Found just a little bit to the west of the ‘A’ on Ambrino as viewed on the map, this horse would normally cost $1,200 to purchase from a seller.
Rose grey bay Arabian horse location – The best horse in the game even among its superior ranked brethren, you can find this stupendous steed minding its own business in the Blackwater stables after the first epilogue. The rose bay grey Arabian horse costs a pocket draining $1,250 to buy.
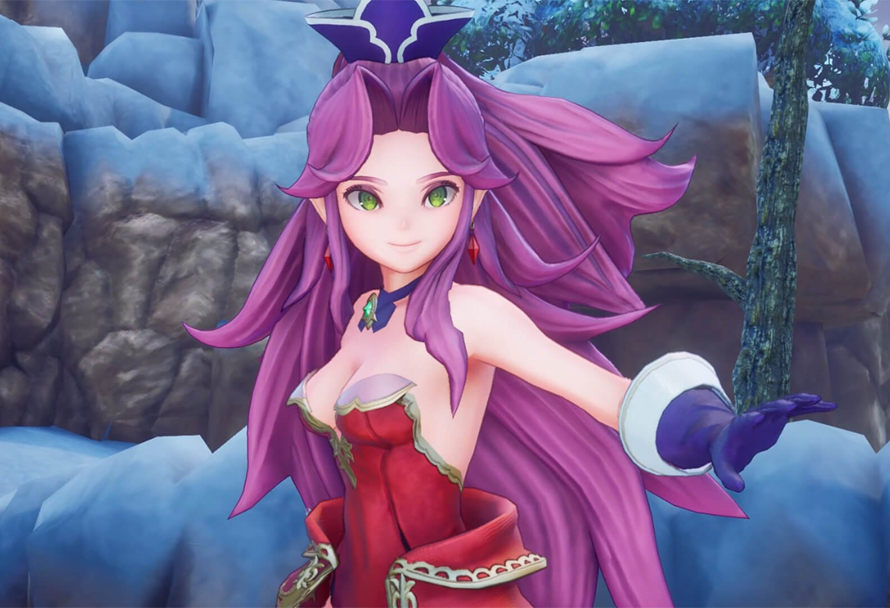
Trials of Mana features a wide range of character and class combinations, giving you nearly limitless party configurations. You’ll choose a main character and two companions for each playthrough, and each of them can evolve into various class paths, with choices at both levels 18 and 38 (plus a final class unlocked in the post-game).
All this variety may leave you wondering: what’s the best party in Trials of Mana? While the game can be completed with any combination of characters, and personal preference or narrative interest might guide your choice, some parties are especially powerful in terms of synergy, stats, and abilities. If you’re looking to dominate your playthrough, here are our top picks for optimal party compositions.
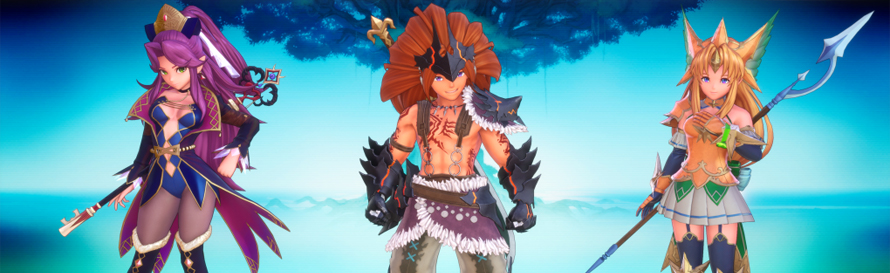
Physical Damage
Duran – Edelfrei
Kevin – Fatal Fist
Riesz – Starlancer
This is a pure powerhouse team focused on raw physical damage. Don’t worry too much about the lack of healing—black market items like Poto Oil can heal your entire party and are quite affordable, making support roles less essential.
Duran brings elemental sword buffs for targeting weaknesses.
Kevin dishes out crit-based debuffs and crushing melee damage.
Riesz provides team-wide buffs for maximum stat synergy.
This setup is arguably the best physical damage party in the game.
Magic Damage
Duran – Paladin
Hawkeye – Ninja Master
Angela – Grand Diviner
For those who prefer magic over muscle, this team brings devastating spell power while still offering some utility.
Paladin Duran tanks damage and provides support buffs and healing.
Ninja Master Hawkeye weakens enemies with debuffs.
Angela annihilates enemies with a full spread of upgraded elemental magic.
Again, healing is limited here, but with smart item use, this won’t be an issue. While Charlotte is the dedicated healer, she doesn’t contribute much offensively, so she’s not ideal for this particular build.
Post-game
After completing the game, you unlock a third-class change (Tier 4), which adds even more power and versatility. Here’s a strong team for tackling the toughest endgame content:
Duran – Divine Hero
Riesz – Meteorite
Charlotte – Chaosbringer
This team balances powerful attacks with survivability:
Divine Hero Duran mixes healing and offense.
Meteorite Riesz provides top-tier buffs and damage.
Chaosbringer Charlotte gains excellent debuffs and some damage potential, becoming far more viable in the post-game than in the main campaign.
With these suggestions, you’ll be well-equipped to steamroll enemies and explore all the game’s content. Whether you want to dominate with brute force, magic, or strategic buffs and debuffs, Trials of Mana gives you the tools—and classes—to build your ideal party.
Your backpack is loaded, you’re trudging over mountainous terrain, you haven’t seen a soul in months. The world of Death Stranding can be one of torturous isolation and devastating beauty, but it doesn’t have to be a lonely one if you know what to look for and how the Death Stranding multiplayer works.
If you’re heading out into the post-apocalyptic expanse for the first time on PC you might need to know some details of how online interactions work, so take a load off and let us tell you all about Death Stranding multiplayer.
Death Stranding Likes
The majority of your interactions with others in Death Stranding’s online multiplayer expresses itself through the Likes system. When you build something you open up yourself to receiving likes, and similarly you can like the structures of others.
This not only makes you feel good – we all like to be liked – it helps build you up a bit. As you receive Likes you’ll rank up through the Chiral Network giving you boosts to your attributes and helping ease some of your interactions with the wasteland’s roaming NPCs.
Building Structures and Making Your Mark
The wilderness can be hostile and unforgiving, so building structures to ease your passage not only helps you – it can help others too. Leave a ladder or a rope behind and someone else may come across it, and if you’re lucky, send you a Like for it.
You don’t have to be the sole constructor either, you can give resources to help speed someone’s large scale creation like a bridge or a watchtower, or receive resources yourself.
Death Stranding Signs
Signs help you personalise the world of Death Stranding, as well as give handy little hints to your fellow porters. Plop one down to encourage, advise, or warn others of what the wasteland has to offer.
Dropped and Lost Cargo
If you find some cargo dropped by another player, why not deliver it? Likes will be your main reward for delivering it or lost cargo in-game, making them a handy way of ranking up when you’re out adventuring.
Resting
If you take a moment to rest and rub your shoulders you’ll leave behind a small cairn for others to find. This will help cut down the time they need to recover, making it a win-win for online interactions.
Strand Contract Bridge Links
As you Like other players’ creations or have yours liked, you may find the same names cropping up again and again. The game builds affinity between you and other players whose stuff you like, eventually you can even enter into a Strand Contract Bridge Link which will let you see each others’ buildings much more often.
Supply Requests
Sending out a supply request alerts others that you need a bit of help, if you’re lucky someone can send you materials and supplies to ease your way in Death Stranding’s world. Additionally, you can help out others via the same supply request system to share the love. Hopefully now you should have an idea of how the online multiplayer works in Death Stranding, so you’ll waste no time building bridges between you and others. Death Stranding launches onto PC on the 14th of July, and you can be prepared by picking it up here.
Smithing in Mount & Blade II: Bannerlord is one of the most valuable and versatile skills you can develop. It lets you craft powerful weapons, earn a steady income, and stockpile useful materials. Whether you’re aiming to master the forge or just make a little extra gold, here’s everything you need to know.
Getting Started: How to Level Up Smithing Quickly
The key to levelling smithing is simple: keep doing it. Every time you craft, smelt, or refine, you earn experience. And yes, smelting down weapons — even cheap ones — gives XP too, making it a fast way to train early on.
A proven strategy:
Fight bandits.
Loot their weapons.
Smelt them for materials and XP.
Repeat.
This cycle builds your smithing skills quickly with minimal effort.
Choose the Right Perks
As your smithing level rises, you’ll unlock perks that improve efficiency, reduce stamina use, and unlock advanced materials. Some essential early perks include:
Practical Smelter – Reduces stamina cost for smelting.
Efficient Charcoal Maker (Level 25) – Converts 1 hardwood into 2 charcoal (instead of 2 hardwood into 1 charcoal).
Steel Maker III – This lets you craft rare Thamaskene steel, required for top-tier weapons.
These perks can make or break your progress, so choose wisely based on your goals.
Watch Your Stamina
Smithing consumes stamina, which gradually depletes with every action at the forge. Once you’re out, you’ll need to rest in a town or do other activities until it recovers.
Tips:
Monitor your stamina bar before long smithing sessions.
Assign companions to Smith when you’re low on stamina (note: they get the XP, not you).
Increase your Endurance attribute to improve stamina and unlock smithing focus points faster.
Essential Materials for Smithing
You’ll need a range of materials to keep crafting and refining. These are the most important:
Hardwood – Refined into charcoal.
Charcoal – Required for smelting and crafting.
Crude Iron, Iron, Steel, Fine Steel, Thamaskene Steel – Used for different weapon tiers.
Iron Ore – Can be refined into usable metal.
A great way to gather materials early on is by smelting down looted weapons — especially wooden ones, which also give you hardwood.
How to Always Have Enough Charcoal
Smelting requires 1 charcoal per item, so running out can bring everything to a halt.
Here’s how to avoid that:
Refine hardwood at the forge to create charcoal.
Loot wooden weapons (like spears and bows) to recover hardwood.
Unlock the Efficient Charcoal Maker perk ASAP to double your output.
This simple loop keeps your operation going without constantly buying supplies.
Why Smelting = Easy Money
Surprisingly, smelting weapons is often more profitable than selling them whole. Many basic weapons, when broken down, yield raw materials worth more than their sale value.
Before selling anything:
Smelt it and check the value of the components.
Sell the parts instead for extra profit.
This method builds up both your coin purse and your resource pool – a win-win.
Always Craft Within Your Means
When crafting weapons, you can adjust properties like length, weight, and blade type. But if the design is too complex for your current skill level, you risk failure — which wastes time and materials.
Tip: Stick to blueprints that match your current abilities. As your skill improves, you’ll unlock more complex parts and better stats with less risk.
Smithing in Mount & Blade II: Bannerlord isn’t just about forging swords – it’s a powerful tool for economic stability, battlefield strength, and character progression. Whether you’re a full-time smith or just using it as a side hustle, learning how to manage resources, stamina, and skill growth pays off quickly.
Forge smart, smelt often, and don’t forget to pick up that Efficient Charcoal Maker perk early on!